# SwitchyOmega

SwitchyOmega is a powerful and reliable proxy manager that works with many popular browsers.&#x20;

{% hint style="warning" %}
**Disclaimer:** Switchy Omega is no longer supported on Google Chrome and Chromium-based browsers as of release of Manifest V3. The following guide covers only the browser extension available for Mozilla Firefox.
{% endhint %}

Follow these steps to integrate Oxylabs [**Dedicated Datacenter Proxies**](https://oxylabs.io/products/datacenter-proxies/dedicated-datacenter-proxies):

**Step 1.** Get the plugin and install it. For Firefox add-on click [**here**](https://addons.mozilla.org/en-US/firefox/addon/switchyomega/).

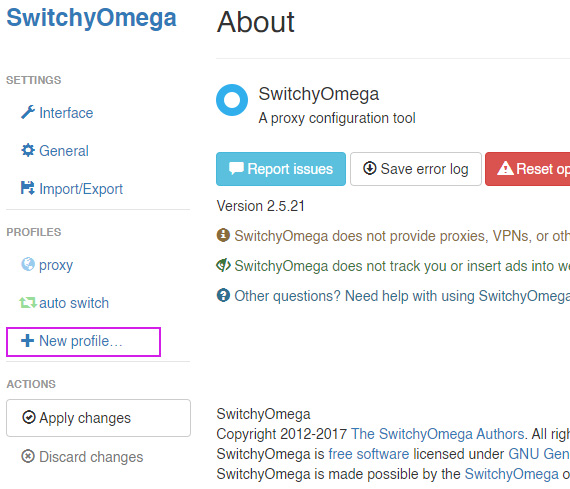
**Step 2.** Open SwitchyOmega **Options**.

<figure><img src="https://63892162-files.gitbook.io/~/files/v0/b/gitbook-x-prod.appspot.com/o/spaces%2FzrXw45naRpCZ0Ku9AjY1%2Fuploads%2FZpj7JgwGLemmj1x9N4Pv%2Fso1.jpg?alt=media&#x26;token=0aa44a2d-6291-41b6-b224-e74d632655c2" alt="SwitchyOmega Options"><figcaption></figcaption></figure>

**Step 3.** Click **+New profile.**

<figure><img src="https://63892162-files.gitbook.io/~/files/v0/b/gitbook-x-prod.appspot.com/o/spaces%2FzrXw45naRpCZ0Ku9AjY1%2Fuploads%2Fv2dkVx5cvcGOGYAjBLj9%2Fso2.jpg?alt=media&#x26;token=d78ec45d-716c-4a7f-9bb8-1fe2c54f58ca" alt="Create New profile"><figcaption></figcaption></figure>

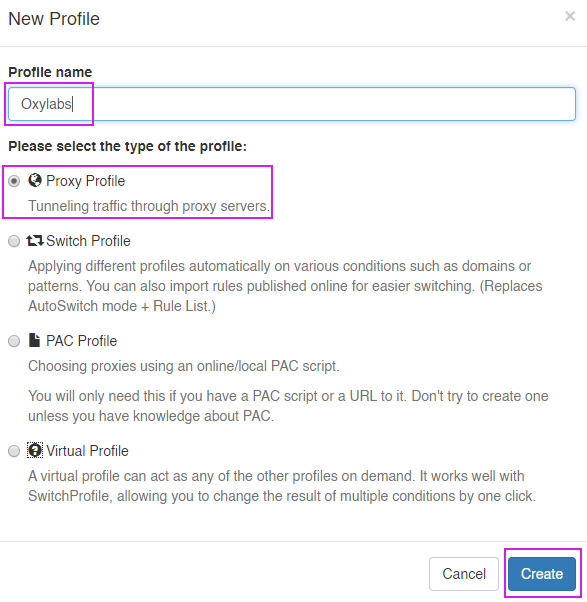
**Step 4.** Give this new profile a name, choose **Proxy Profile** type, and click **Create**.

<figure><img src="https://63892162-files.gitbook.io/~/files/v0/b/gitbook-x-prod.appspot.com/o/spaces%2FzrXw45naRpCZ0Ku9AjY1%2Fuploads%2F8QmHhNSrkUayrW55tiaZ%2Fso3.jpg?alt=media&#x26;token=b3a18ade-21ff-493b-9bcb-dcb4e71b9779" alt="Profile name and proxy profile"><figcaption></figcaption></figure>

**Step 5.** Fill in the details:

**Protocol:** `HTTP`, `HTTPS`, or `SOCKS5`

**Server:** `ddc.oxylabs.io`

**Port:** `8001`

{% hint style="info" %}
You will need to choose a port that's assigned to an IP address from the purchased [**proxy list**](https://developers.oxylabs.io/proxies/dedicated-datacenter-proxies/self-service/proxy-list)**,** that you can find in Oxylabs' dashboard.
{% endhint %}

<figure><img src="https://63892162-files.gitbook.io/~/files/v0/b/gitbook-x-prod.appspot.com/o/spaces%2FzrXw45naRpCZ0Ku9AjY1%2Fuploads%2FdW4LRJsu1tTdkmoD4QNo%2Fddc-switchy.png?alt=media&#x26;token=f353e4c8-5a46-4c78-bf22-f14f2b48b51f" alt=""><figcaption></figcaption></figure>

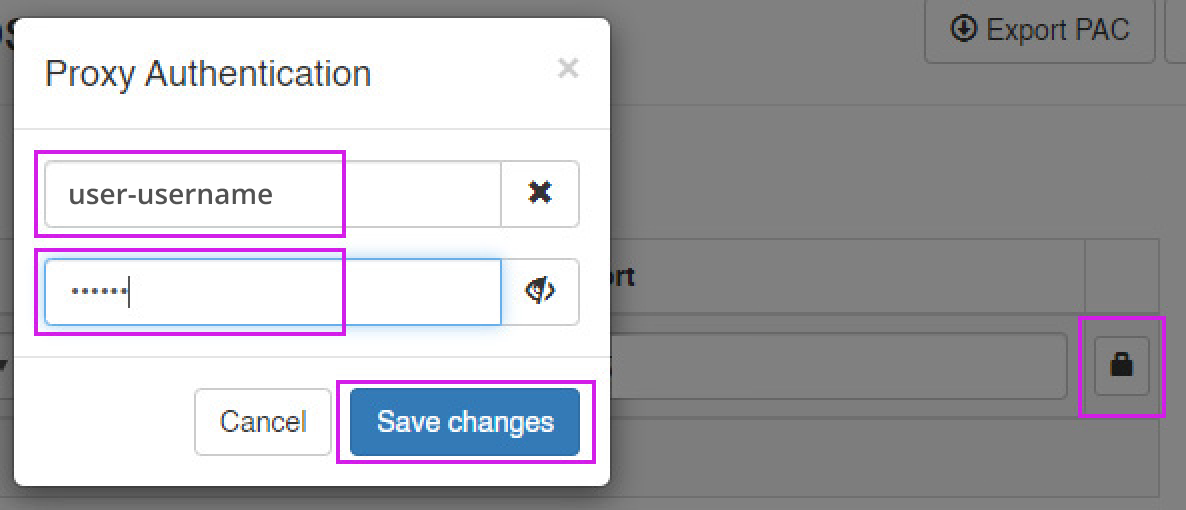
**Step 6.** Click the **lock** icon on the right. Fill in the details for **Proxy Authentication**:

**Proxy user** **username:** `user-username`

**Proxy user password:** `password`

{% hint style="warning" %}
Don't forget to add the `user-` part to your username.
{% endhint %}

Click **Save changes.**

<figure><img src="https://63892162-files.gitbook.io/~/files/v0/b/gitbook-x-prod.appspot.com/o/spaces%2FzrXw45naRpCZ0Ku9AjY1%2Fuploads%2FDjfKctAX4W2uuJXzP0UP%2Fdc-switchyomega-2.png?alt=media&#x26;token=d4a12709-a64d-4e6a-916a-384a5040a9e6" alt=""><figcaption></figcaption></figure>

**Step 7.** Click **Apply changes.**

<figure><img src="https://63892162-files.gitbook.io/~/files/v0/b/gitbook-x-prod.appspot.com/o/spaces%2FzrXw45naRpCZ0Ku9AjY1%2Fuploads%2FgxV4VGyZdbPkpYU3vGNb%2Fso6.jpg?alt=media&#x26;token=02365cb7-b002-4d17-ab45-5c1dfe9a0ce5" alt="Apply changes"><figcaption></figcaption></figure>

**Step 8**. Click on the SwitchyOmega icon and choose your newly configured proxy.&#x20;

<figure><img src="https://63892162-files.gitbook.io/~/files/v0/b/gitbook-x-prod.appspot.com/o/spaces%2FzrXw45naRpCZ0Ku9AjY1%2Fuploads%2FI7PumVAIfAwhtDw02YY2%2Fso7.jpg?alt=media&#x26;token=3ed189d6-4f7f-4733-98d6-fa42d2a328ed" alt="Choose newly configured proxy"><figcaption></figcaption></figure>

That's it! You are now ready to use SwitchyOmega with Dedicated Datacenter Proxies.
