# SEO Neo
[SEO Neo](https://seoneo.io/) is an SEO tool designed to boost website visibility and rankings through automating AI-driven content generation, cloud blogging, backlink creation, and much more.
This guide will show you how to quickly connect Oxylabs [Dedicated Datacenter Proxies](https://oxylabs.io/products/datacenter-proxies/dedicated-datacenter-proxies) with SEO Neo.
{% hint style="warning" %}
**Note:** some screenshots provided in this guide depict the setup process using Residential Proxies for illustrative purposes, refer to the specific guidelines for Dedicated Datacenter Proxies provided in the text.
{% endhint %}
{% stepper %}
{% step %}
### Download SEO Neo
Visit the [SEO Neo website](https://seoneo.io/amember/signup) and log in or create an account. Head to the **Download** page to get the application for your Windows or macOS device.
{% endstep %}
{% step %}
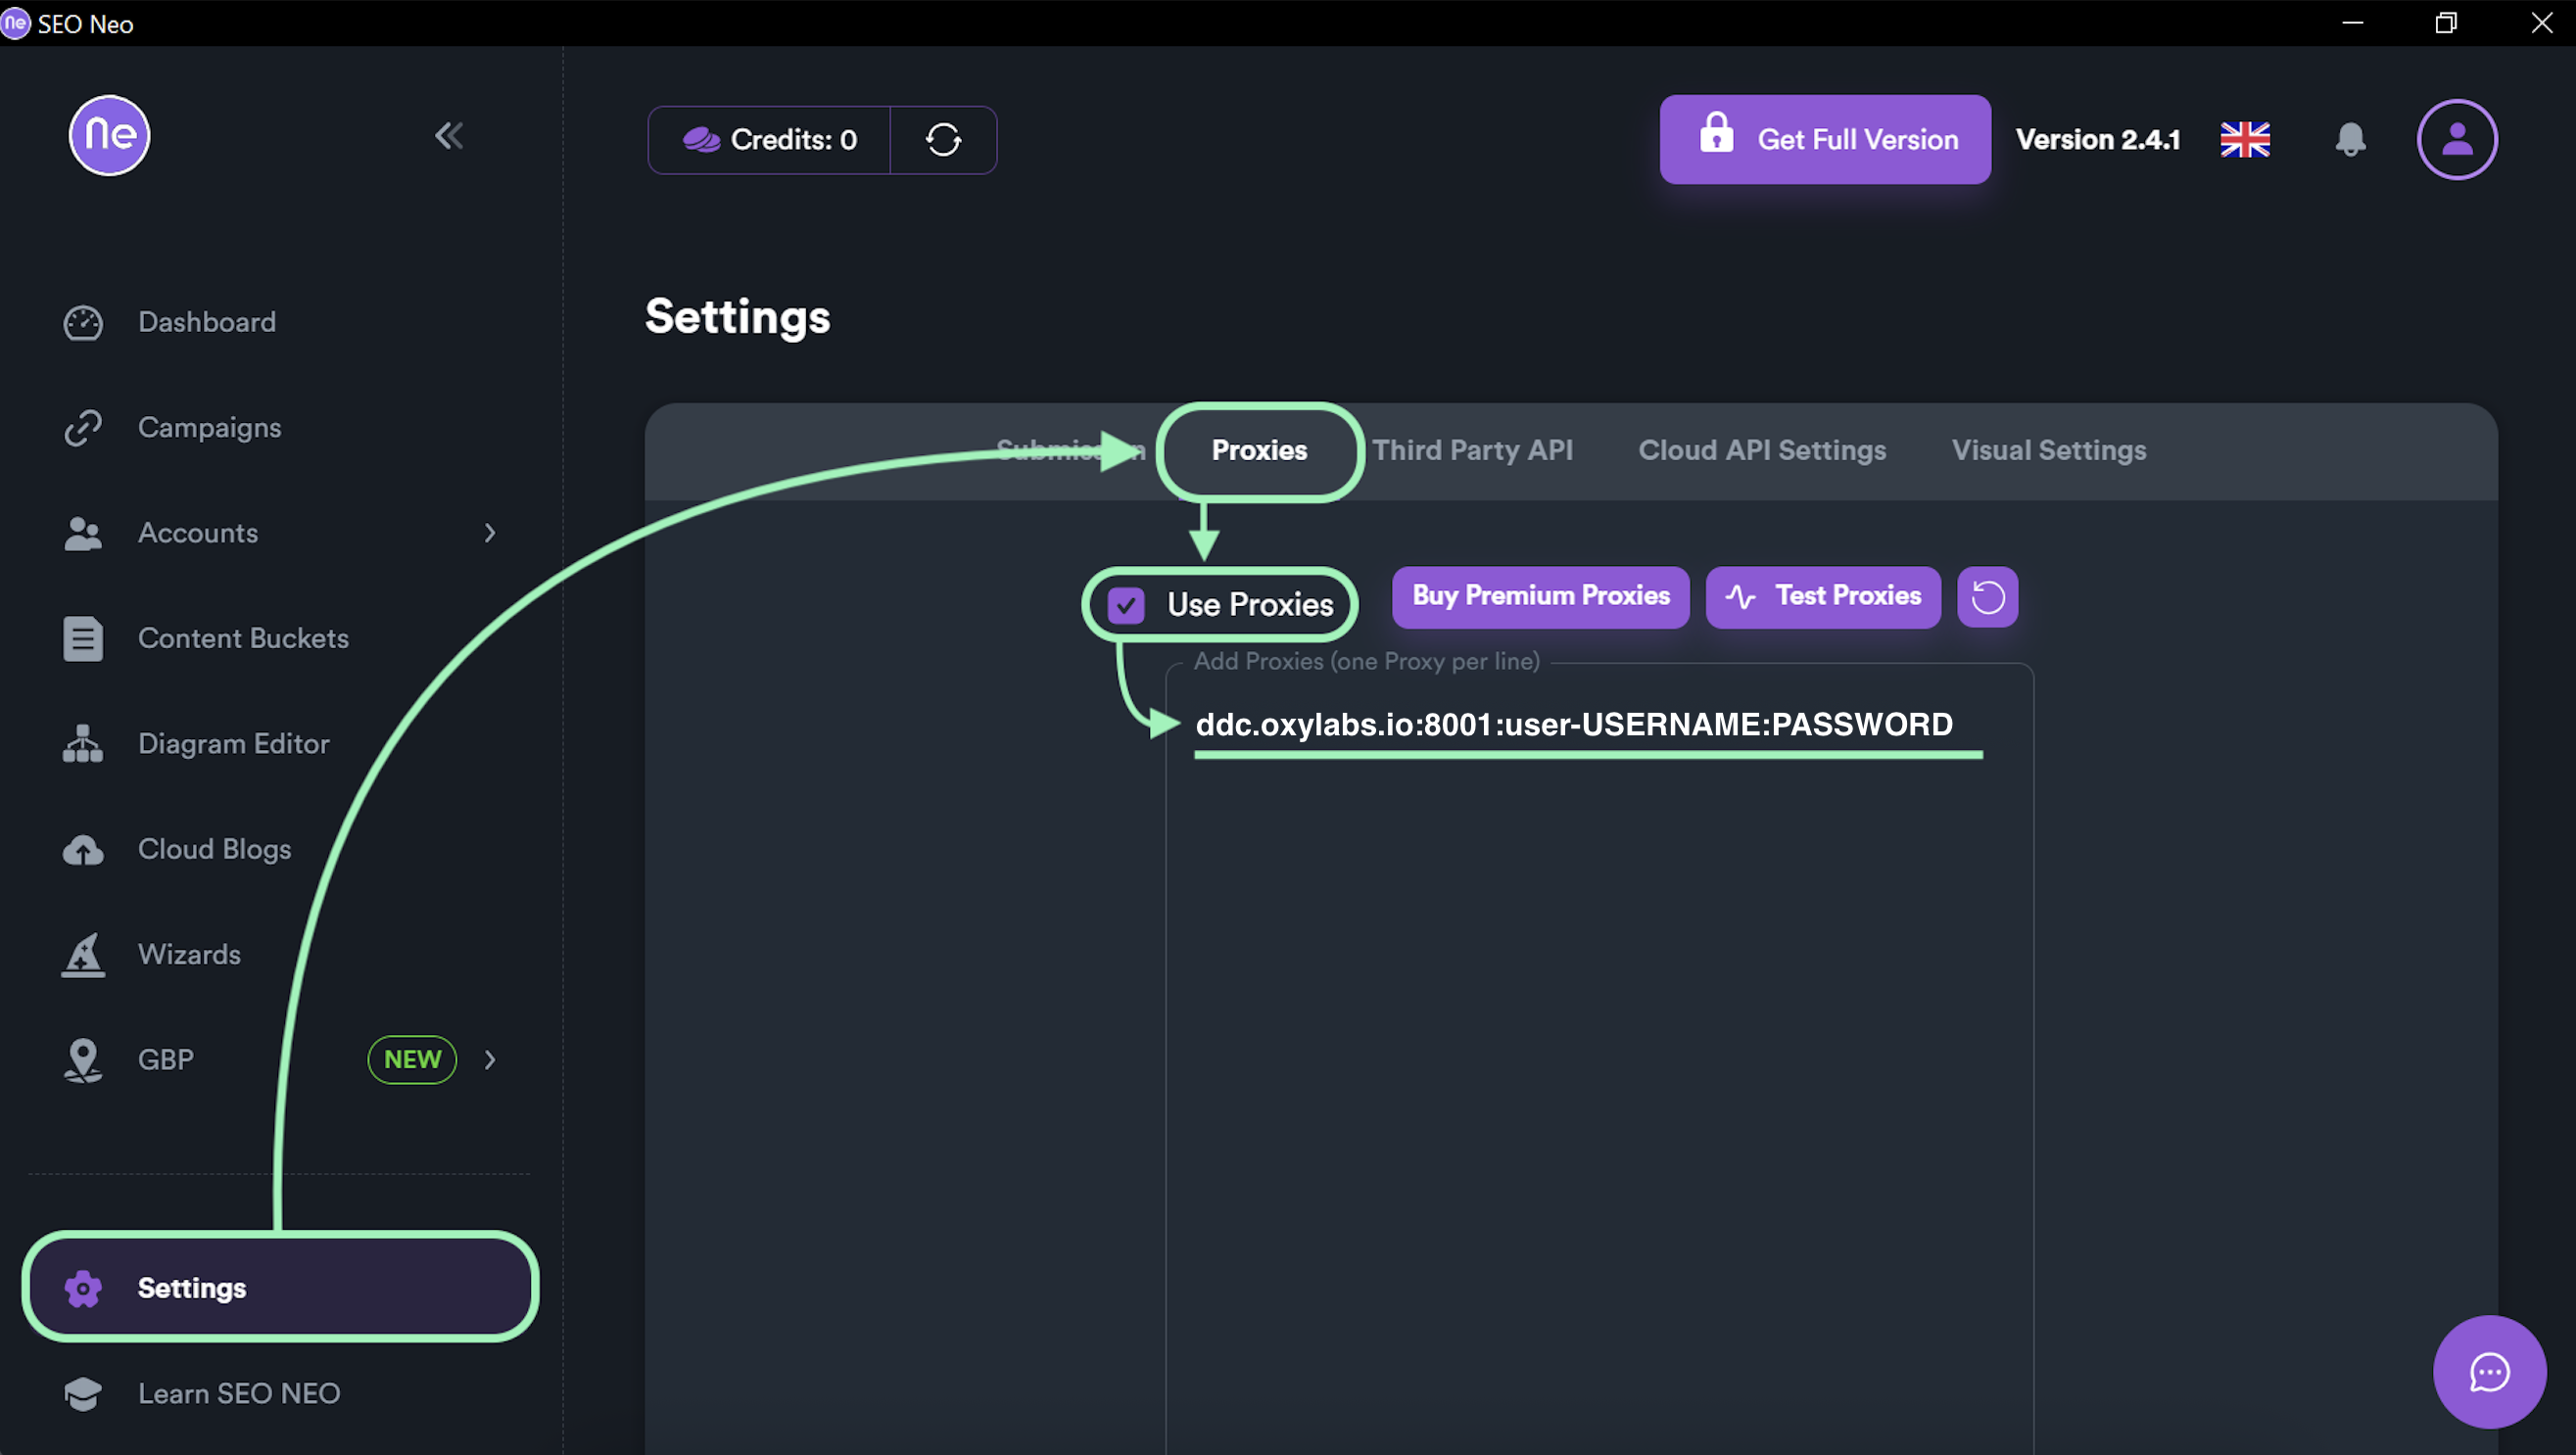
### Enable proxies in Settings **→** Proxies
Once you've installed SEO Neo and logged in to the application, go to **Settings → Proxies** and enable proxies by clicking the **Use Proxies** checkmark.
{% endstep %}
{% step %}
### Add Dedicated Datacenter Proxies
Add your proxy configuration inside the box in your chosen format:
* `host:proxy_port` (if you have whitelisted your IP address)
* `host:proxy_port:username:password`
{% hint style="warning" %}
Make sure to add the `user-` part to your username.
{% endhint %}
You can use the following configuration for a quick start:
**Host:** `ddc.oxylabs.io`
**Proxy port:** `8001`
**Username:** `user-USERNAME`
**Password:** `PASSWORD`
{% hint style="success" %}
The port number indicates which IP address from your acquired list will be used sequentially. Use port `8000` for automatic proxy IP rotation. Visit the [documentation](https://developers.oxylabs.io/proxies/dedicated-datacenter-proxies/self-service) to learn more.
{% endhint %}
{% endstep %}
{% step %}
### Test your connection
Simply click the **Test Proxies** button to check the connection:
If you see the green check mark (✔️) next to the proxy setup and the “Success” message at the top, you’ve successfully configured your proxies with SEO Neo.
{% endstep %}
{% endstepper %}
You may also use other types of proxies with SEO Neo: [Residential Proxies](https://developers.oxylabs.io/proxies/integration-guides/3rd-party-integrations/seo-neo), [ISP Proxies](https://developers.oxylabs.io/proxies/integration-guides/isp-proxies-integrations/seo-neo), [Mobile Proxies](https://developers.oxylabs.io/proxies/integration-guides/3rd-party-integrations-1/seo-neo), [Enterprise Dedicated Datacenter Proxies](https://developers.oxylabs.io/proxies/integration-guides/3rd-party-integrations-1-1/enterprise/seo-neo), and [Datacenter Proxies](https://developers.oxylabs.io/proxies/integration-guides/shared-datacenter-proxies-guides/seo-neo).