Sphere
Learn how to set up and use Linken Sphere browser with Oxylabs proxies step-by-step.
Linken Sphere 2 is an antidetect browser built to simulate real user identities and mask default browser fingerprints.
Follow the instructions below to integrate the following Oxylabs proxies:
Set up Linken Sphere 2
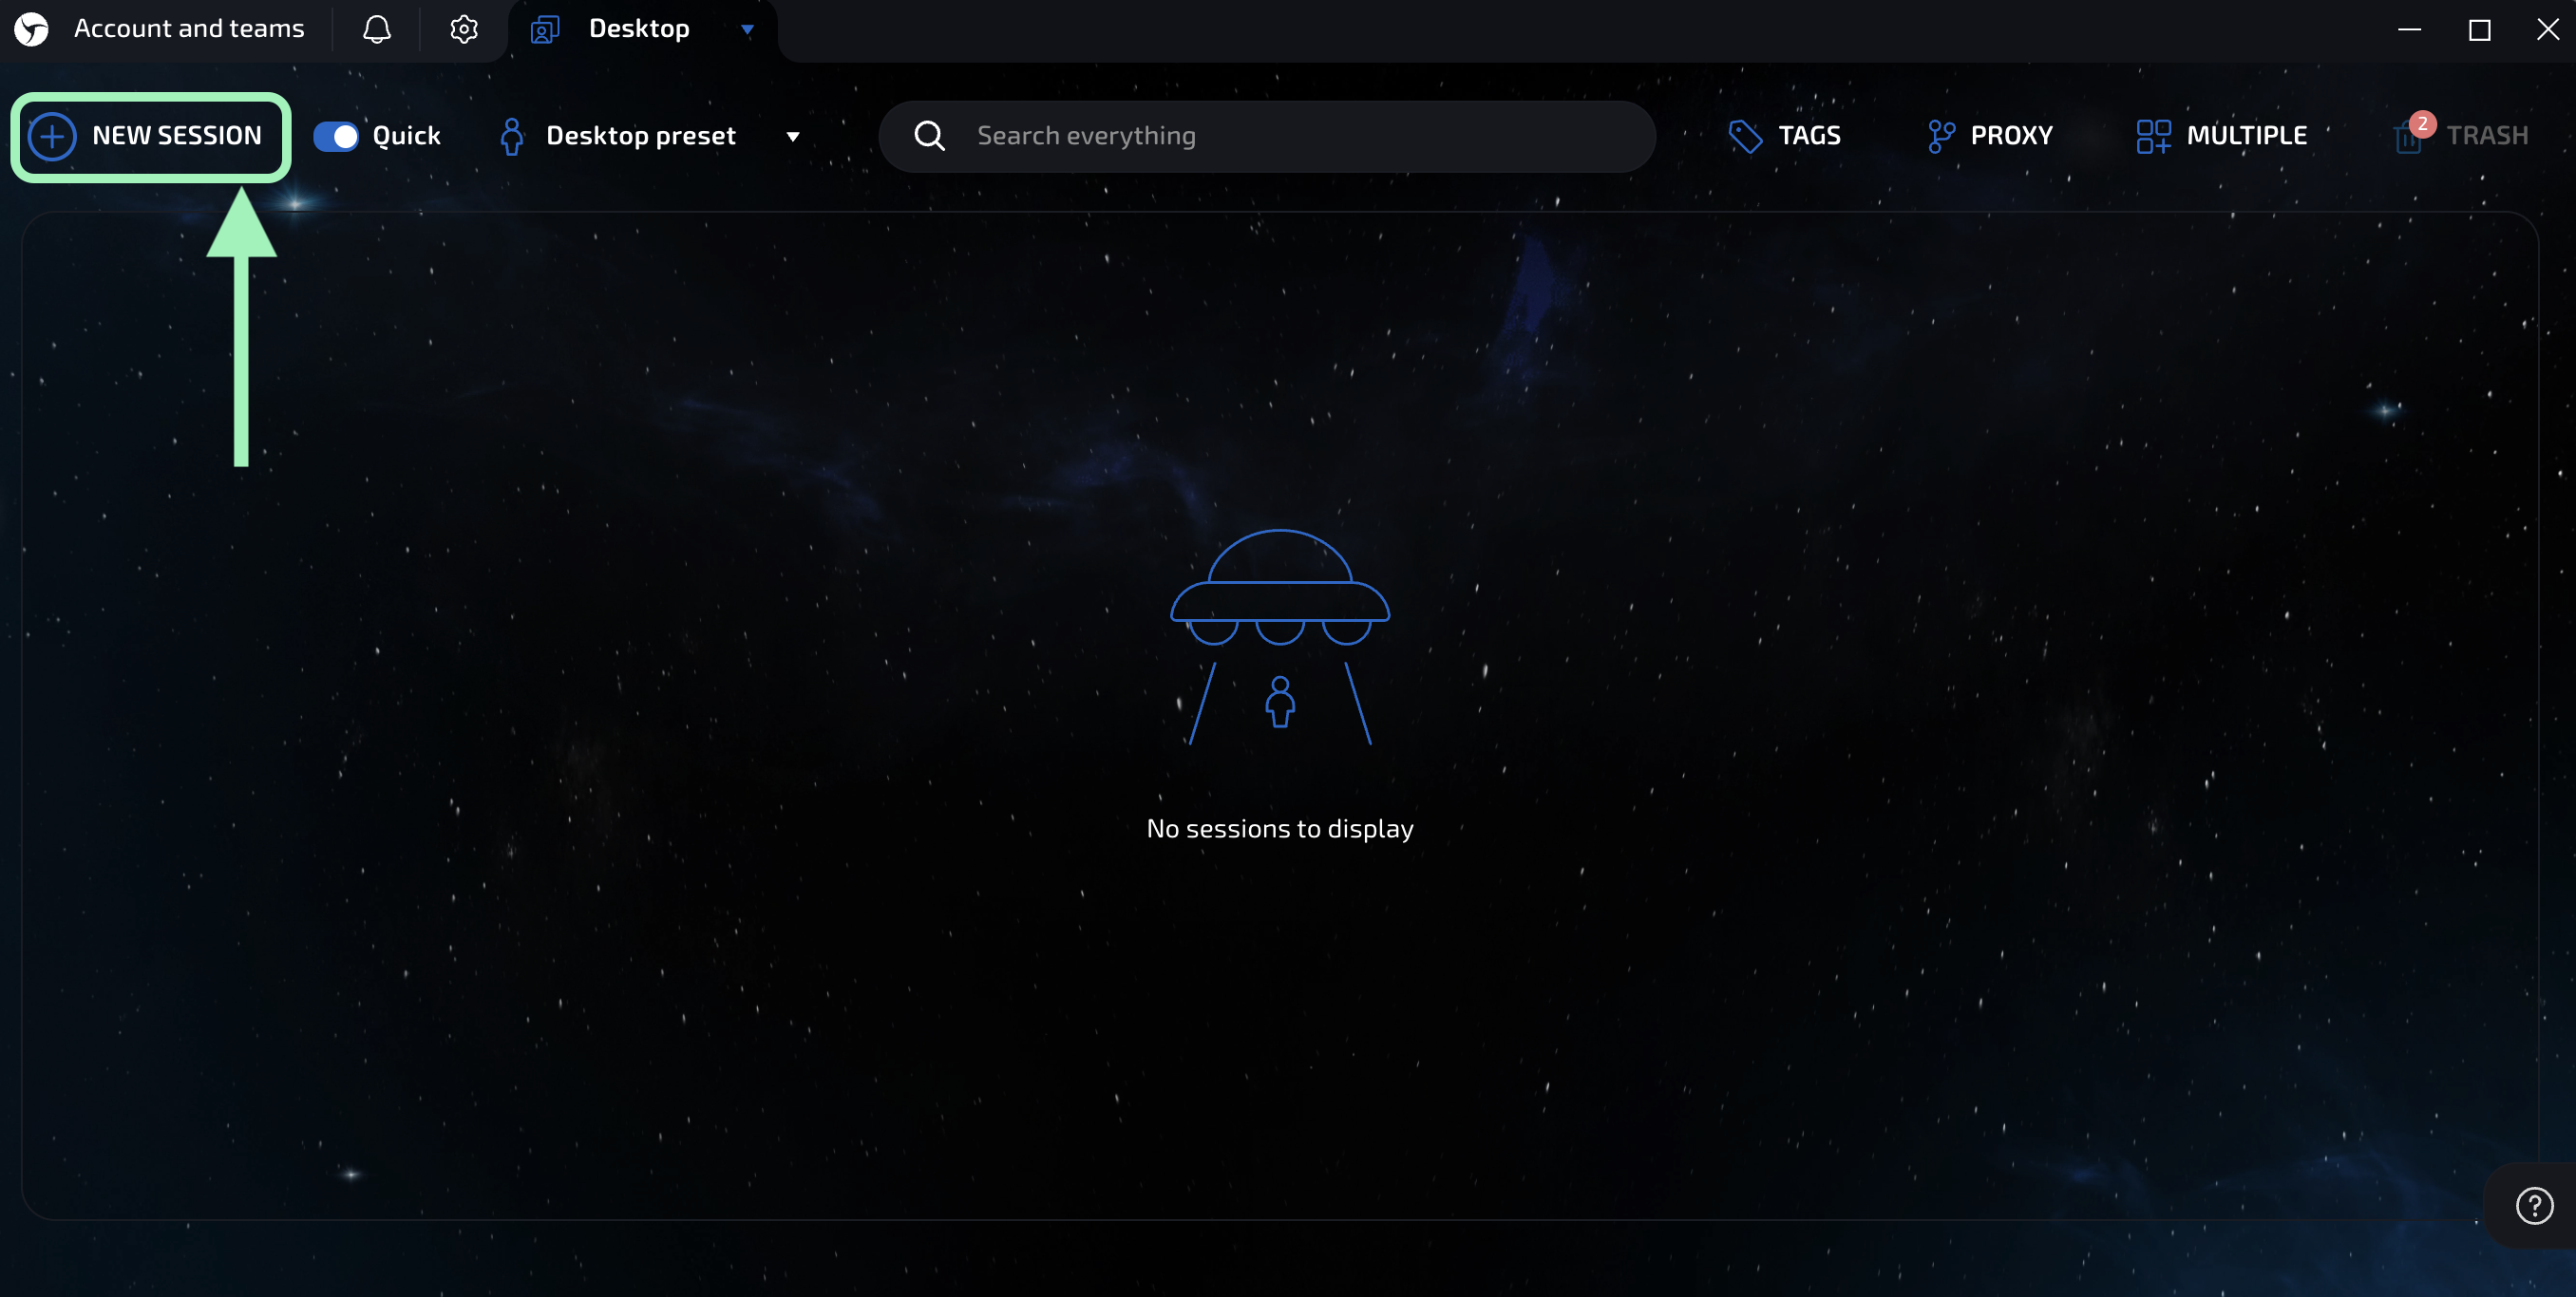
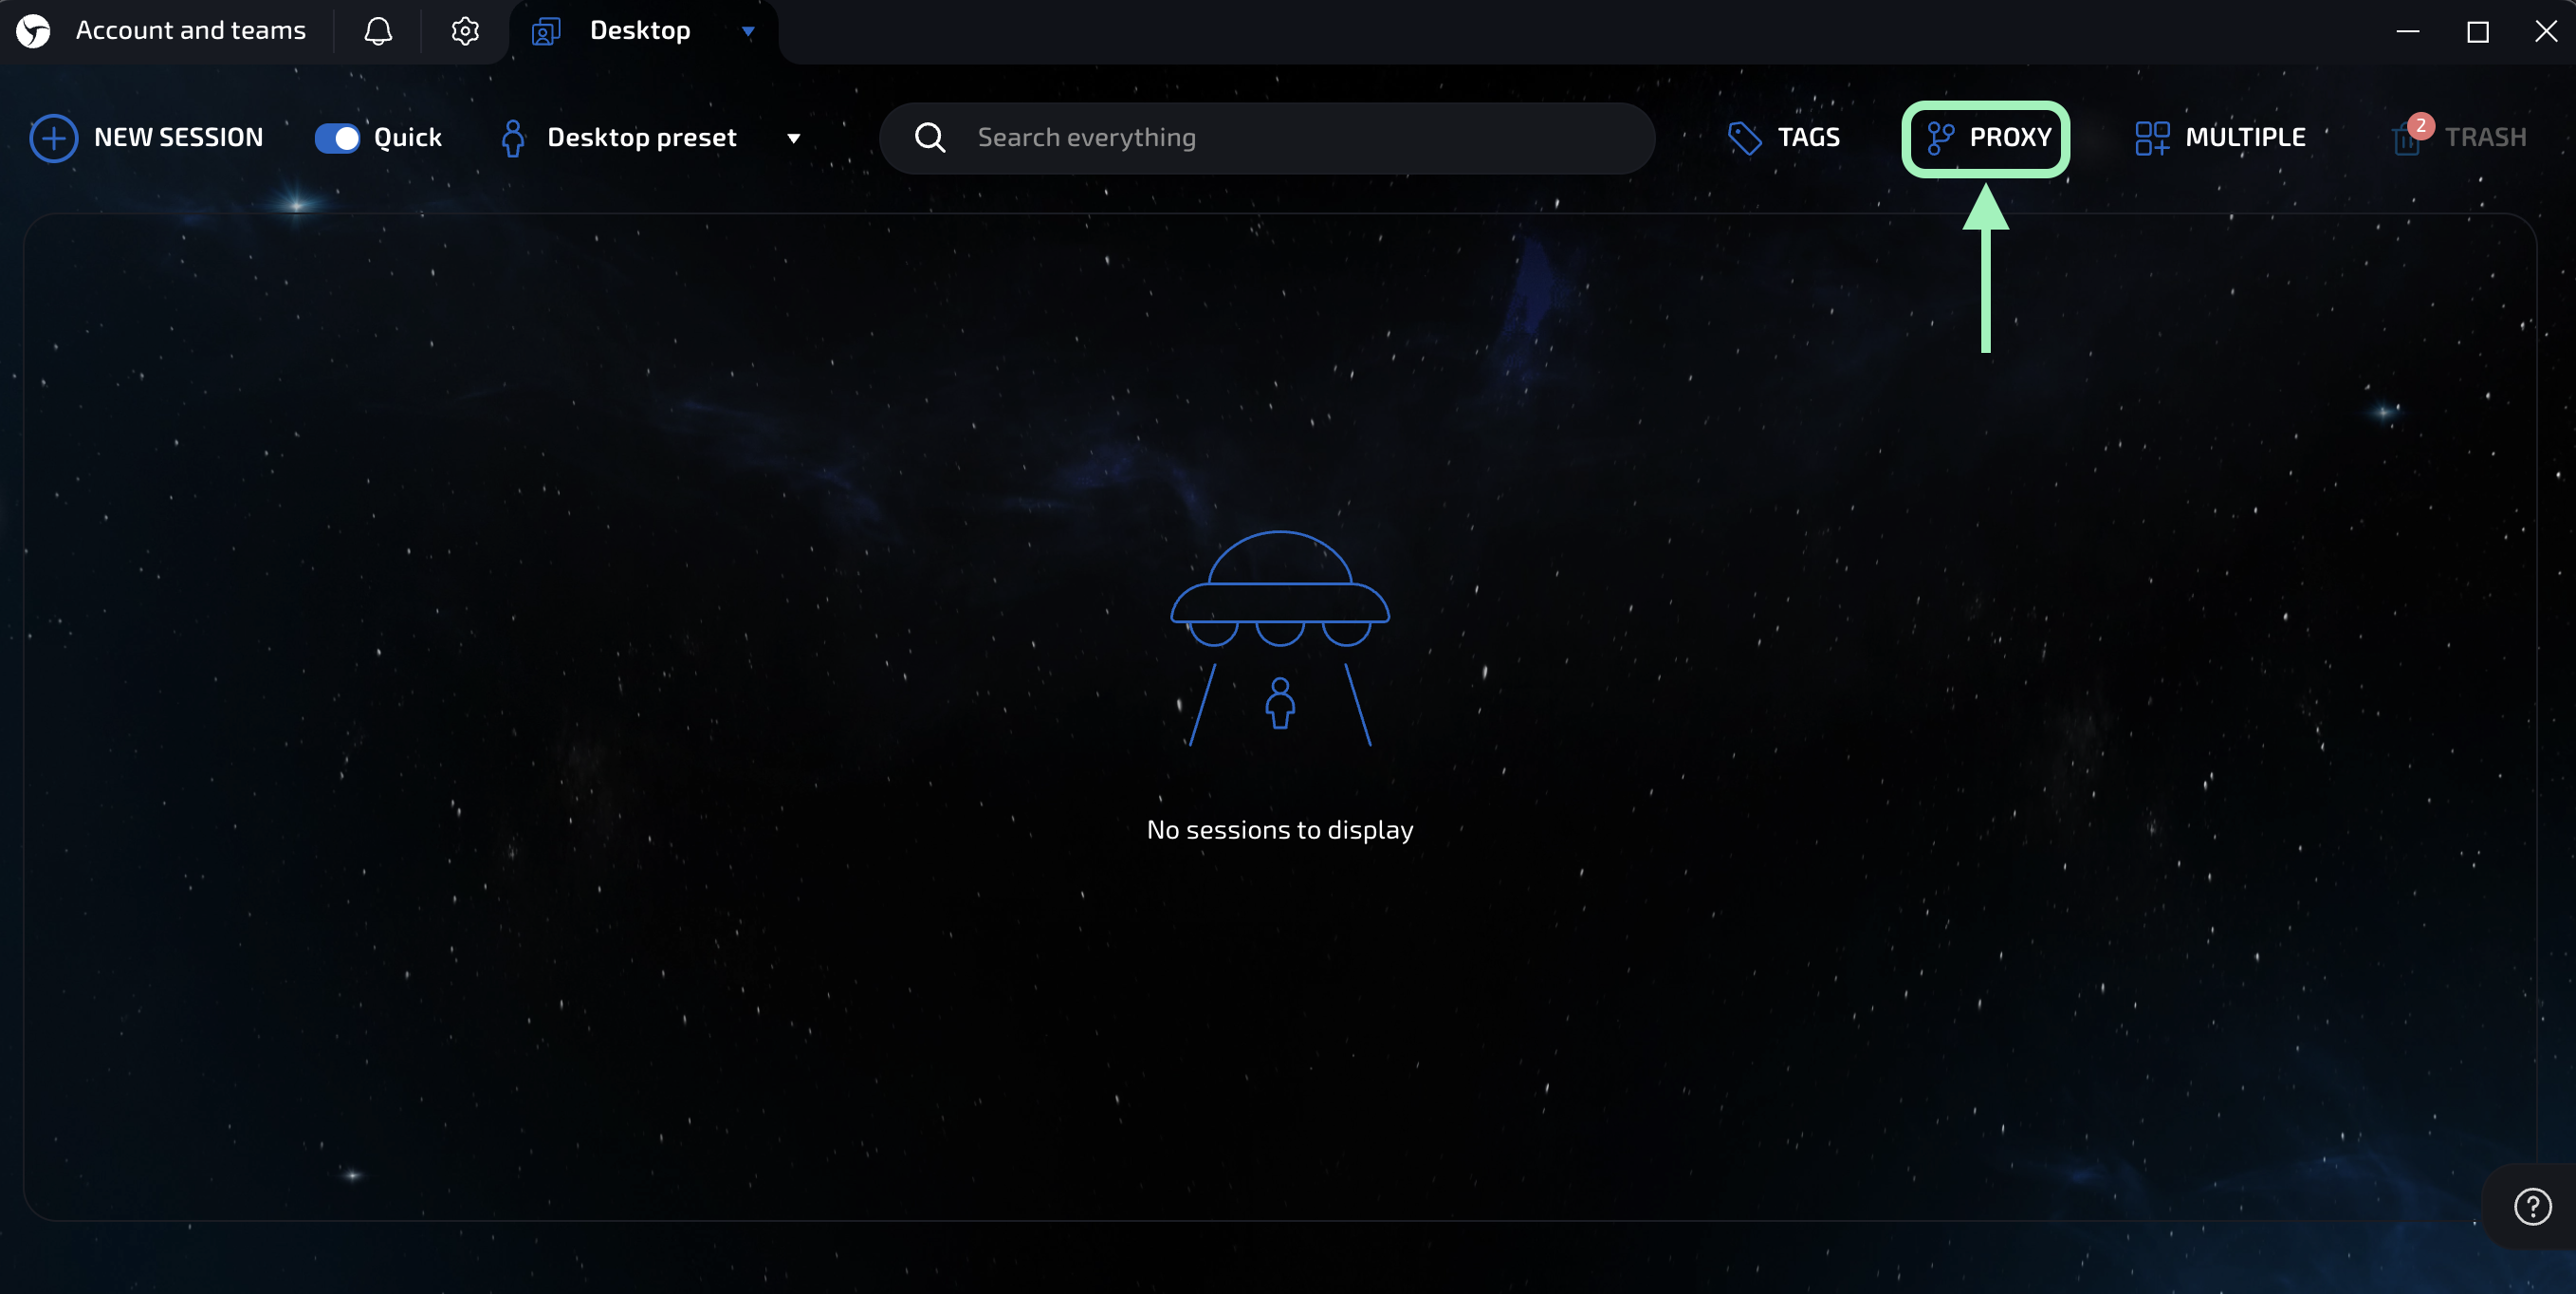
Download the Sphere browser from the official website, launch the app, and log in.
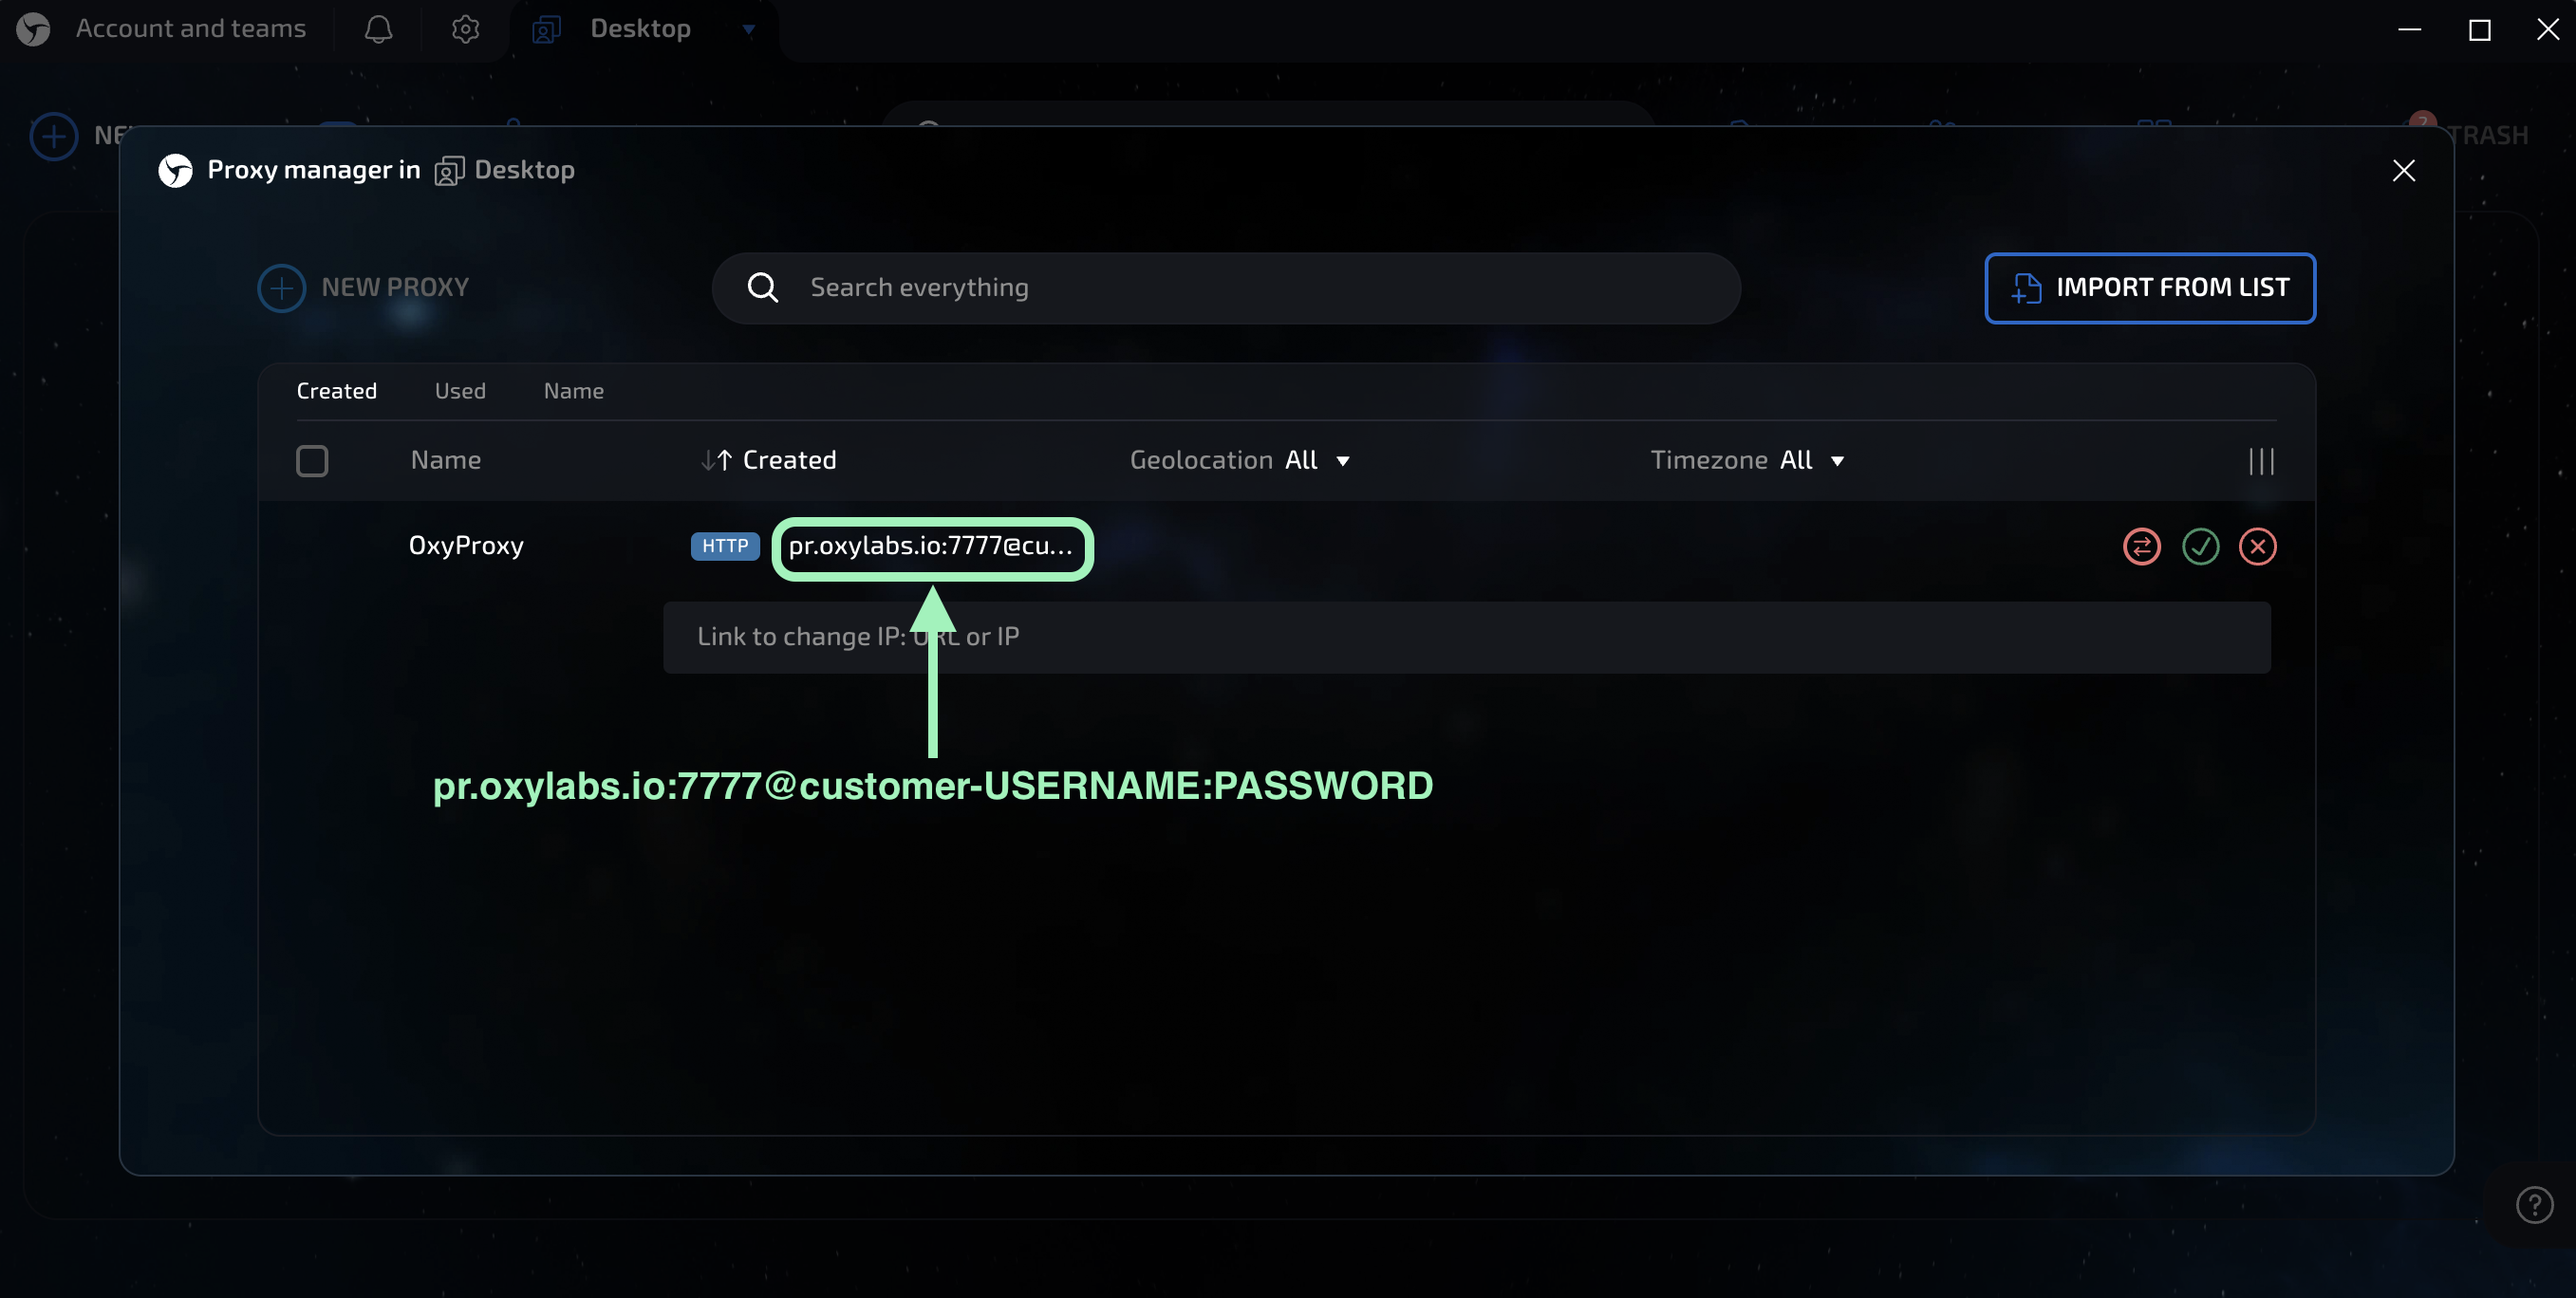
Enter proxy details
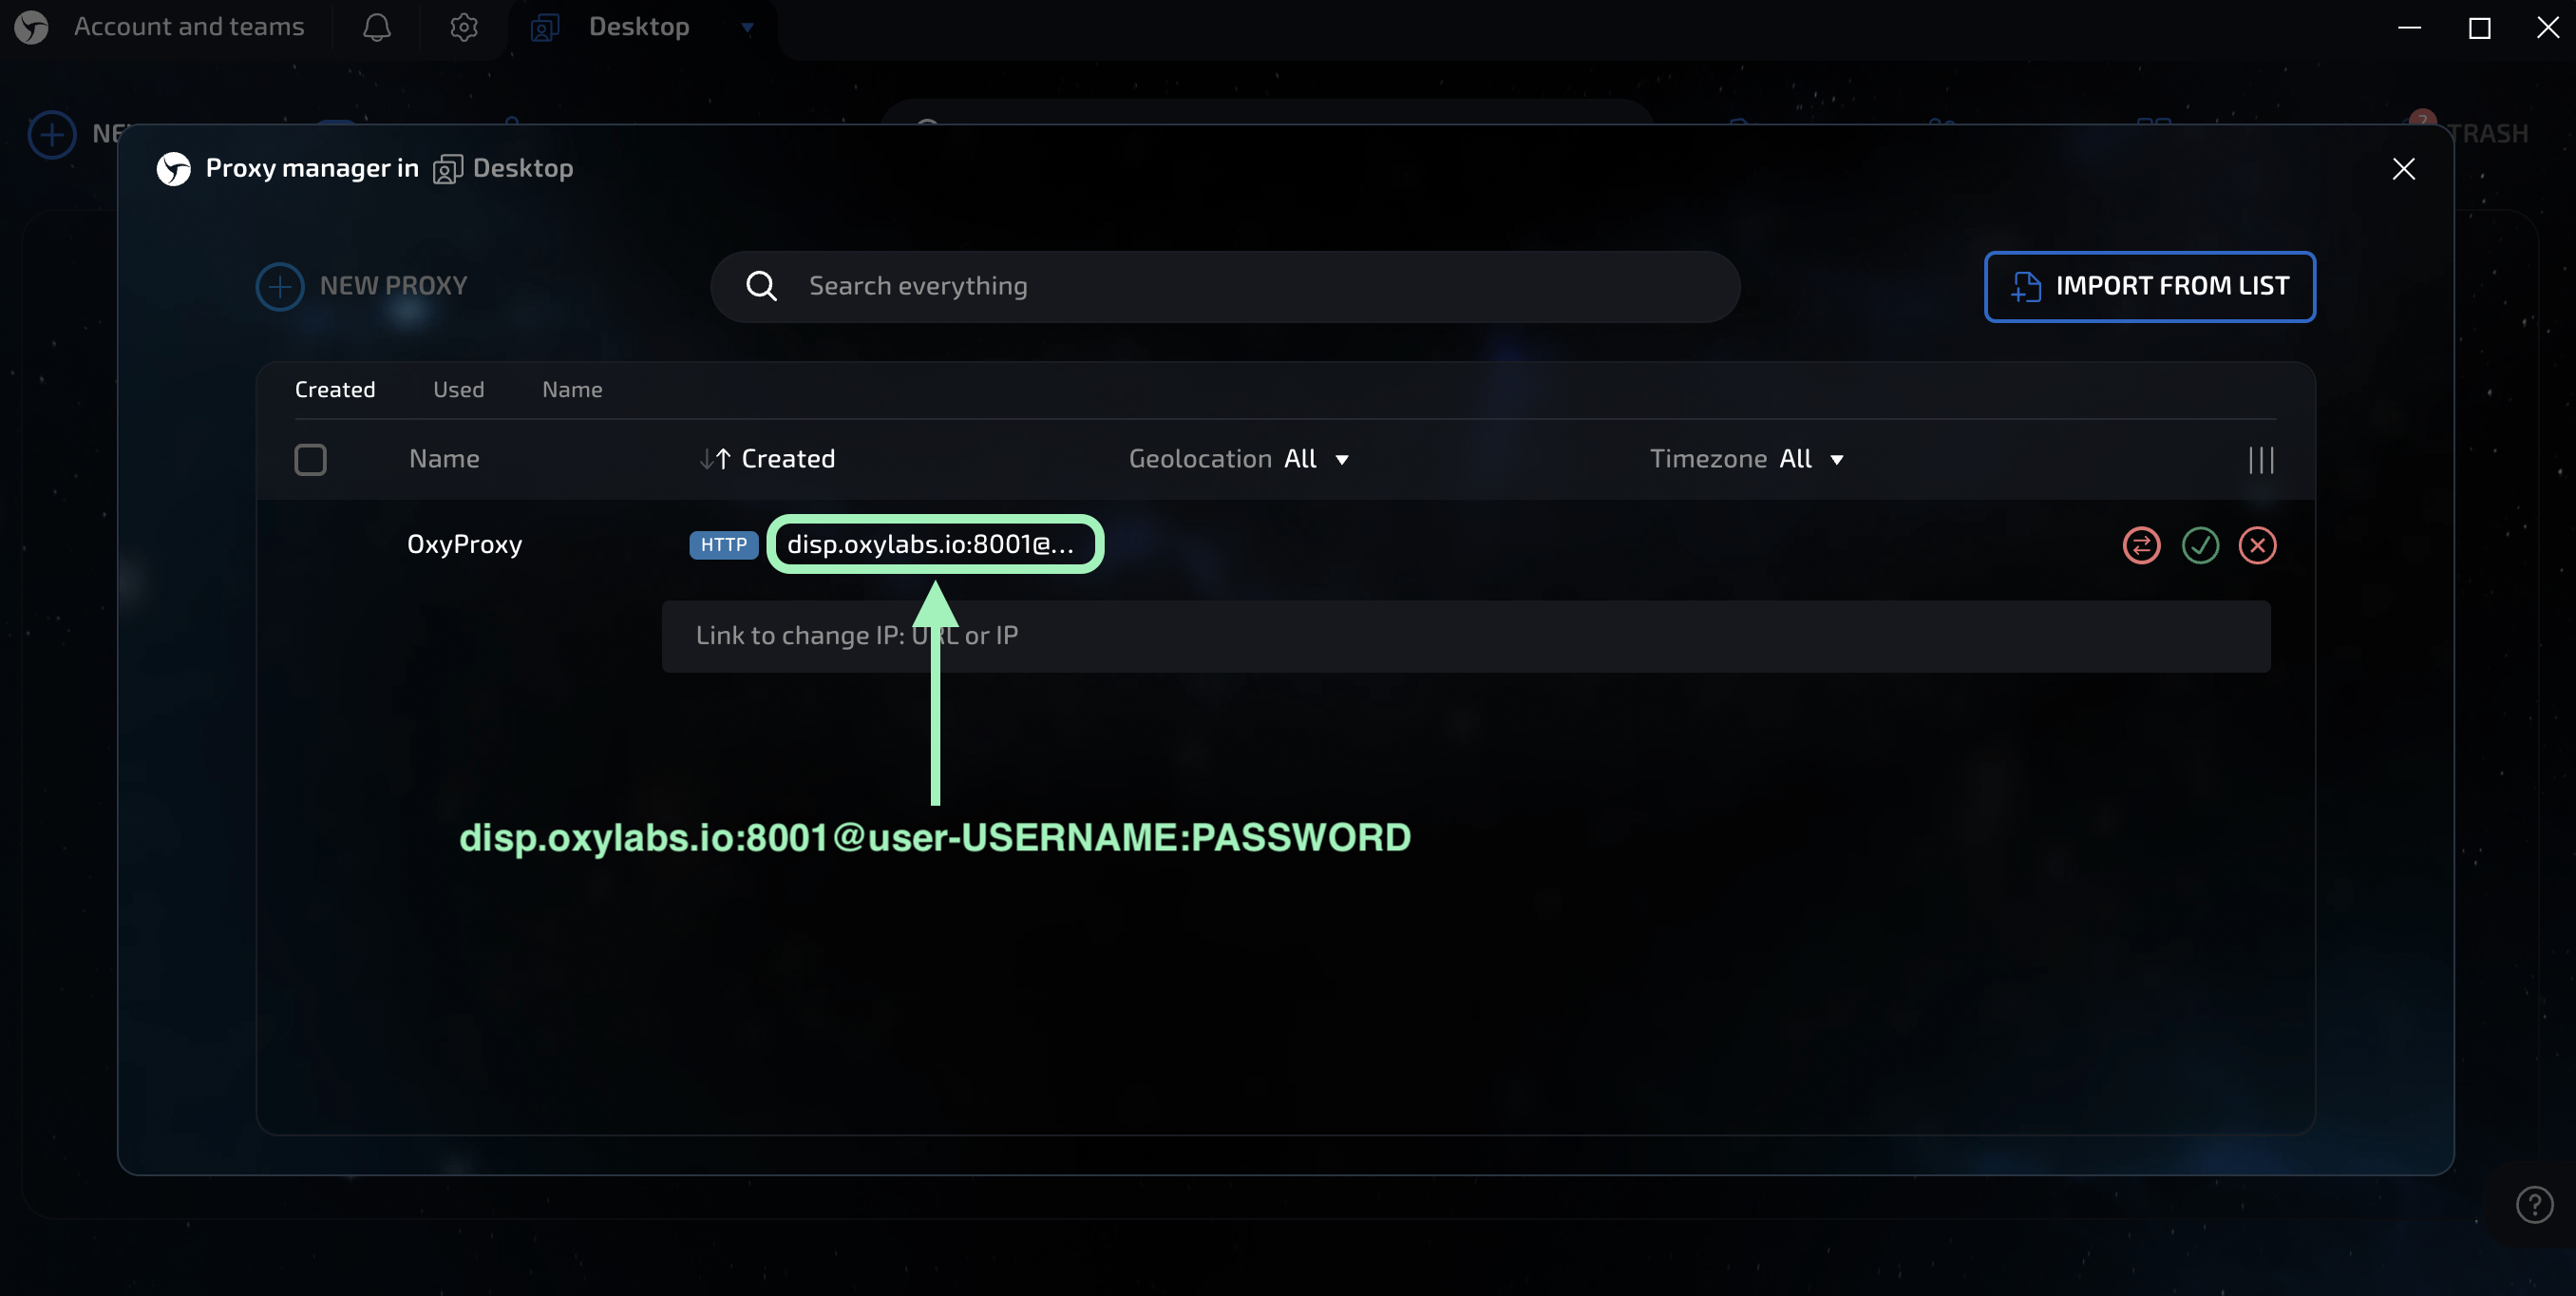
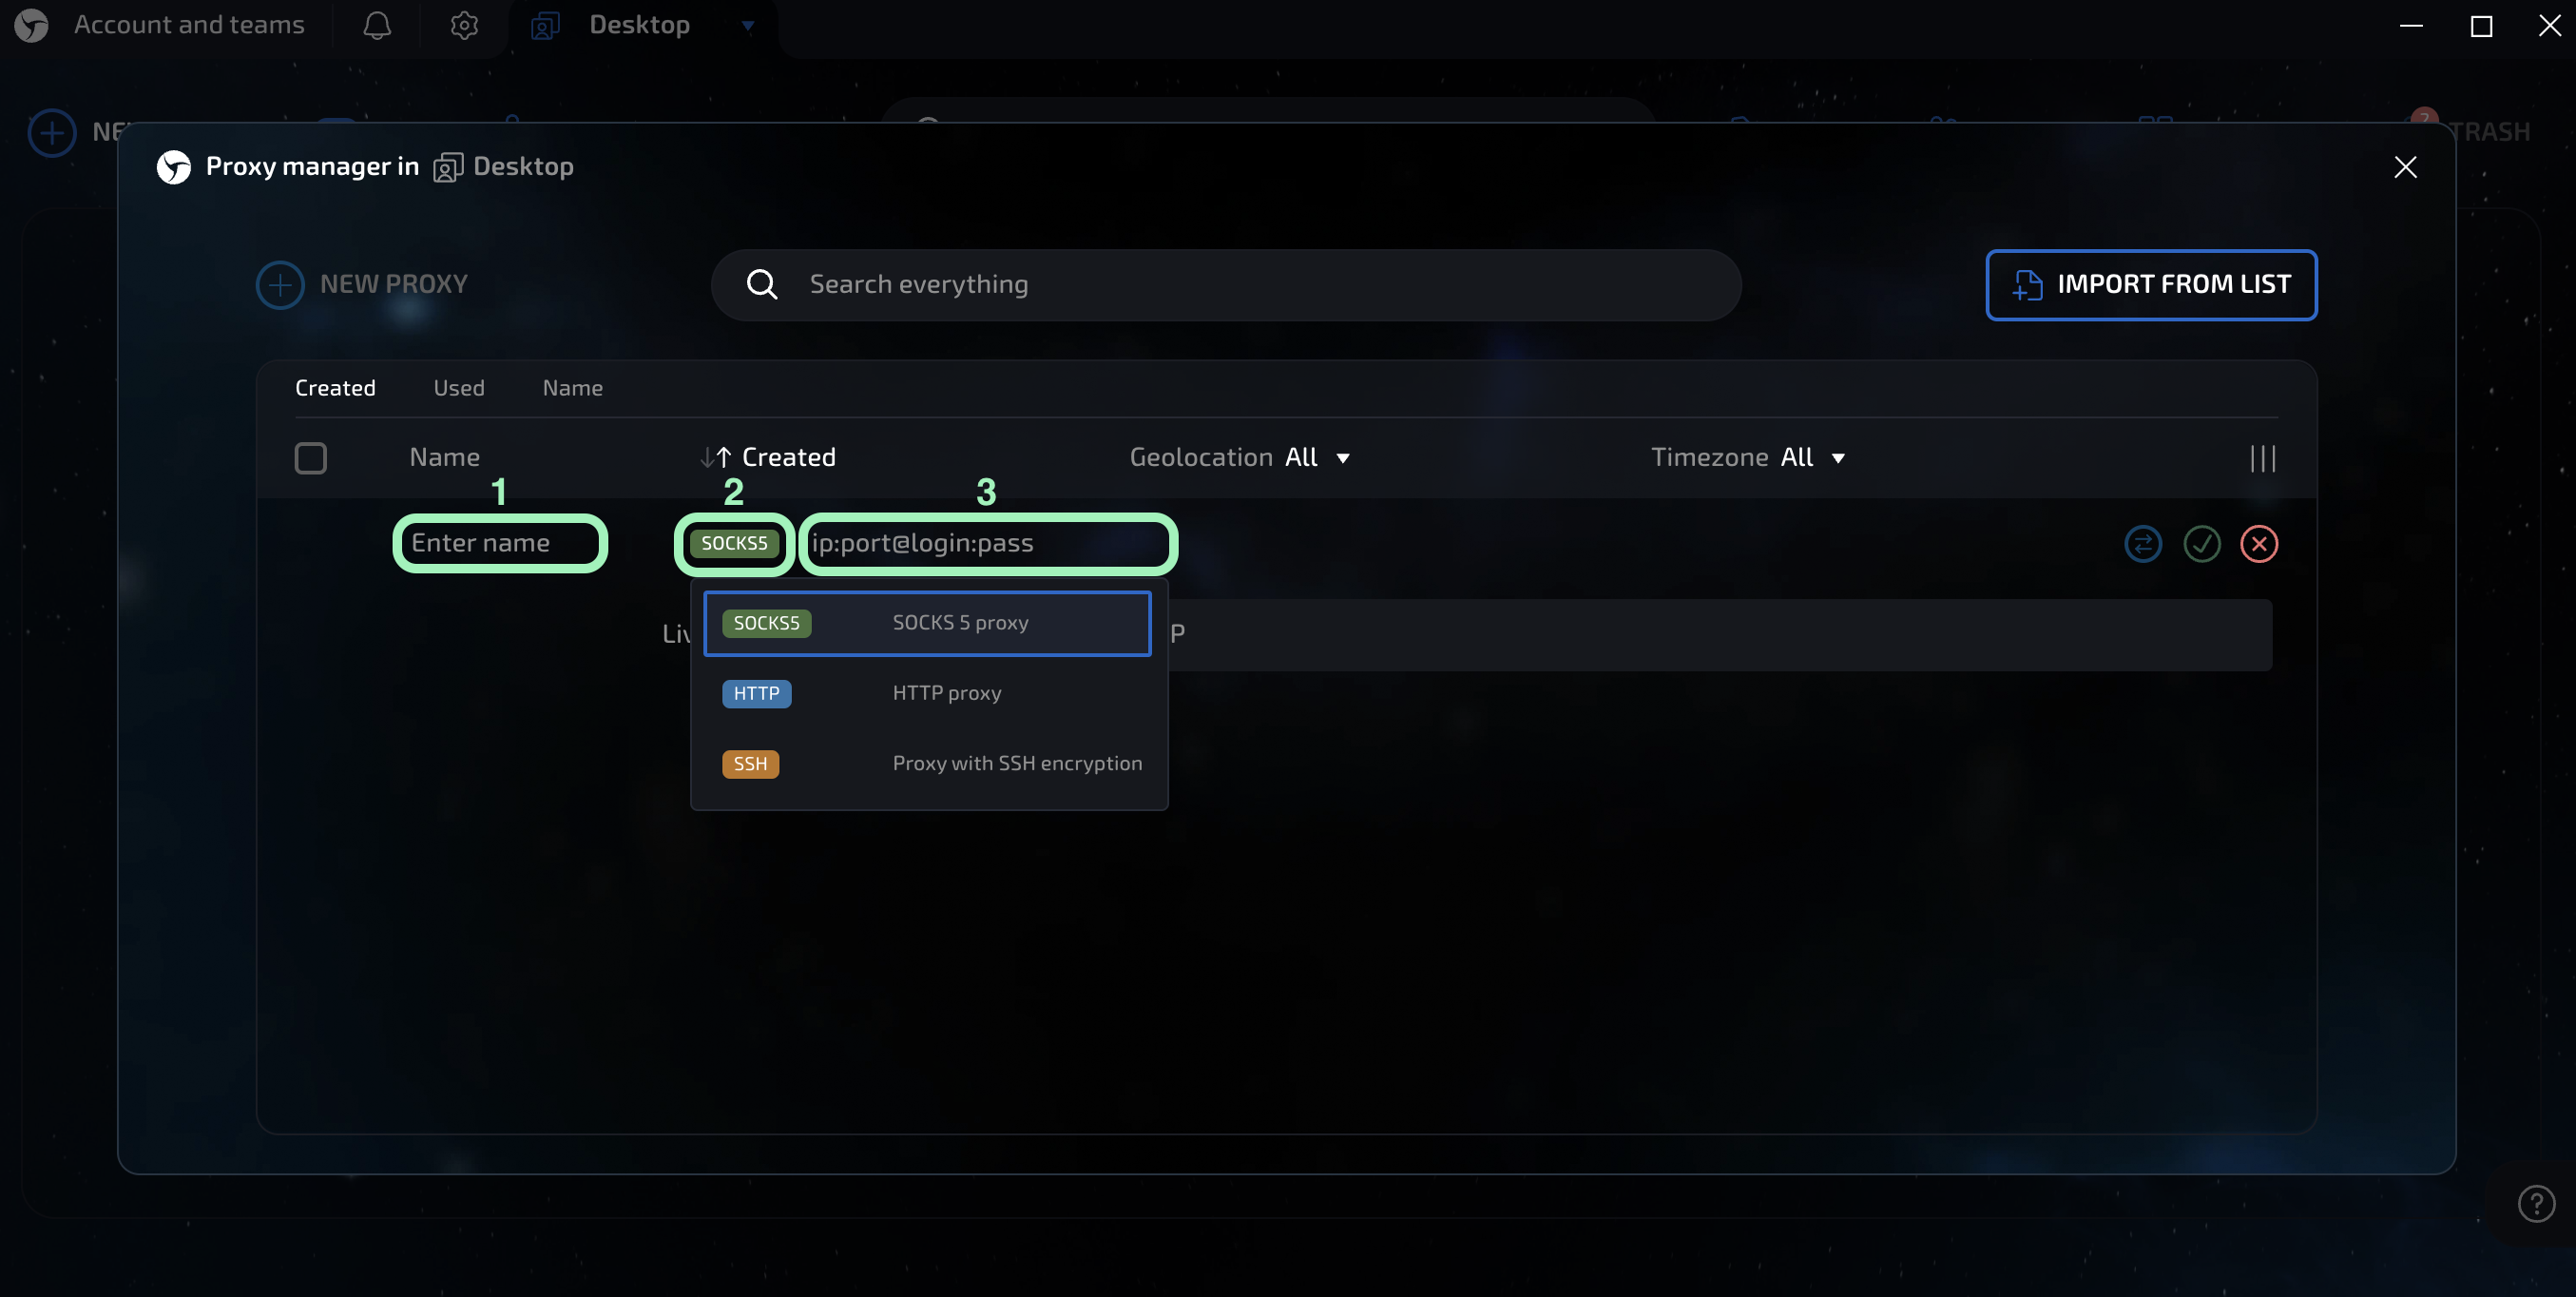
Type the Name of your proxy, select the proxy protocol (HTTP or SOCKS5), and enter your proxy details (ip:port@login:pass) according to the proxy types listed below:

Residential & Mobile Proxies
Protocol: HTTP or SOCKS5
IP: pr.oxylabs.io
Port: 7777
Login: customer-USERNAME
Pass: PASSWORD
Note: Don't forget to add customer- prefix to your username.

You may also use additional parameters with residential and mobile proxies to set the geo-location (country, state, city, and etc.) and control sessions. Check out the Residential Proxies documentation to learn more. The table below provides an overview of available parameters and their example values.
Host: us-pr.oxylabs.io
Port: 10000
User: customer-username-cc-US
User: customer-username-st-US_texas
User: customer-username-city-paris
User: customer-username-cn-NA
User: customer-username-cc-US-postalcode-90210
User: customer-username-ASN-21928
Session (up to 1440 minutes)
User: customer-username-sessid-qwerty123-sesstime-1440
Host: us-pr.oxylabs.io
Port: 10001
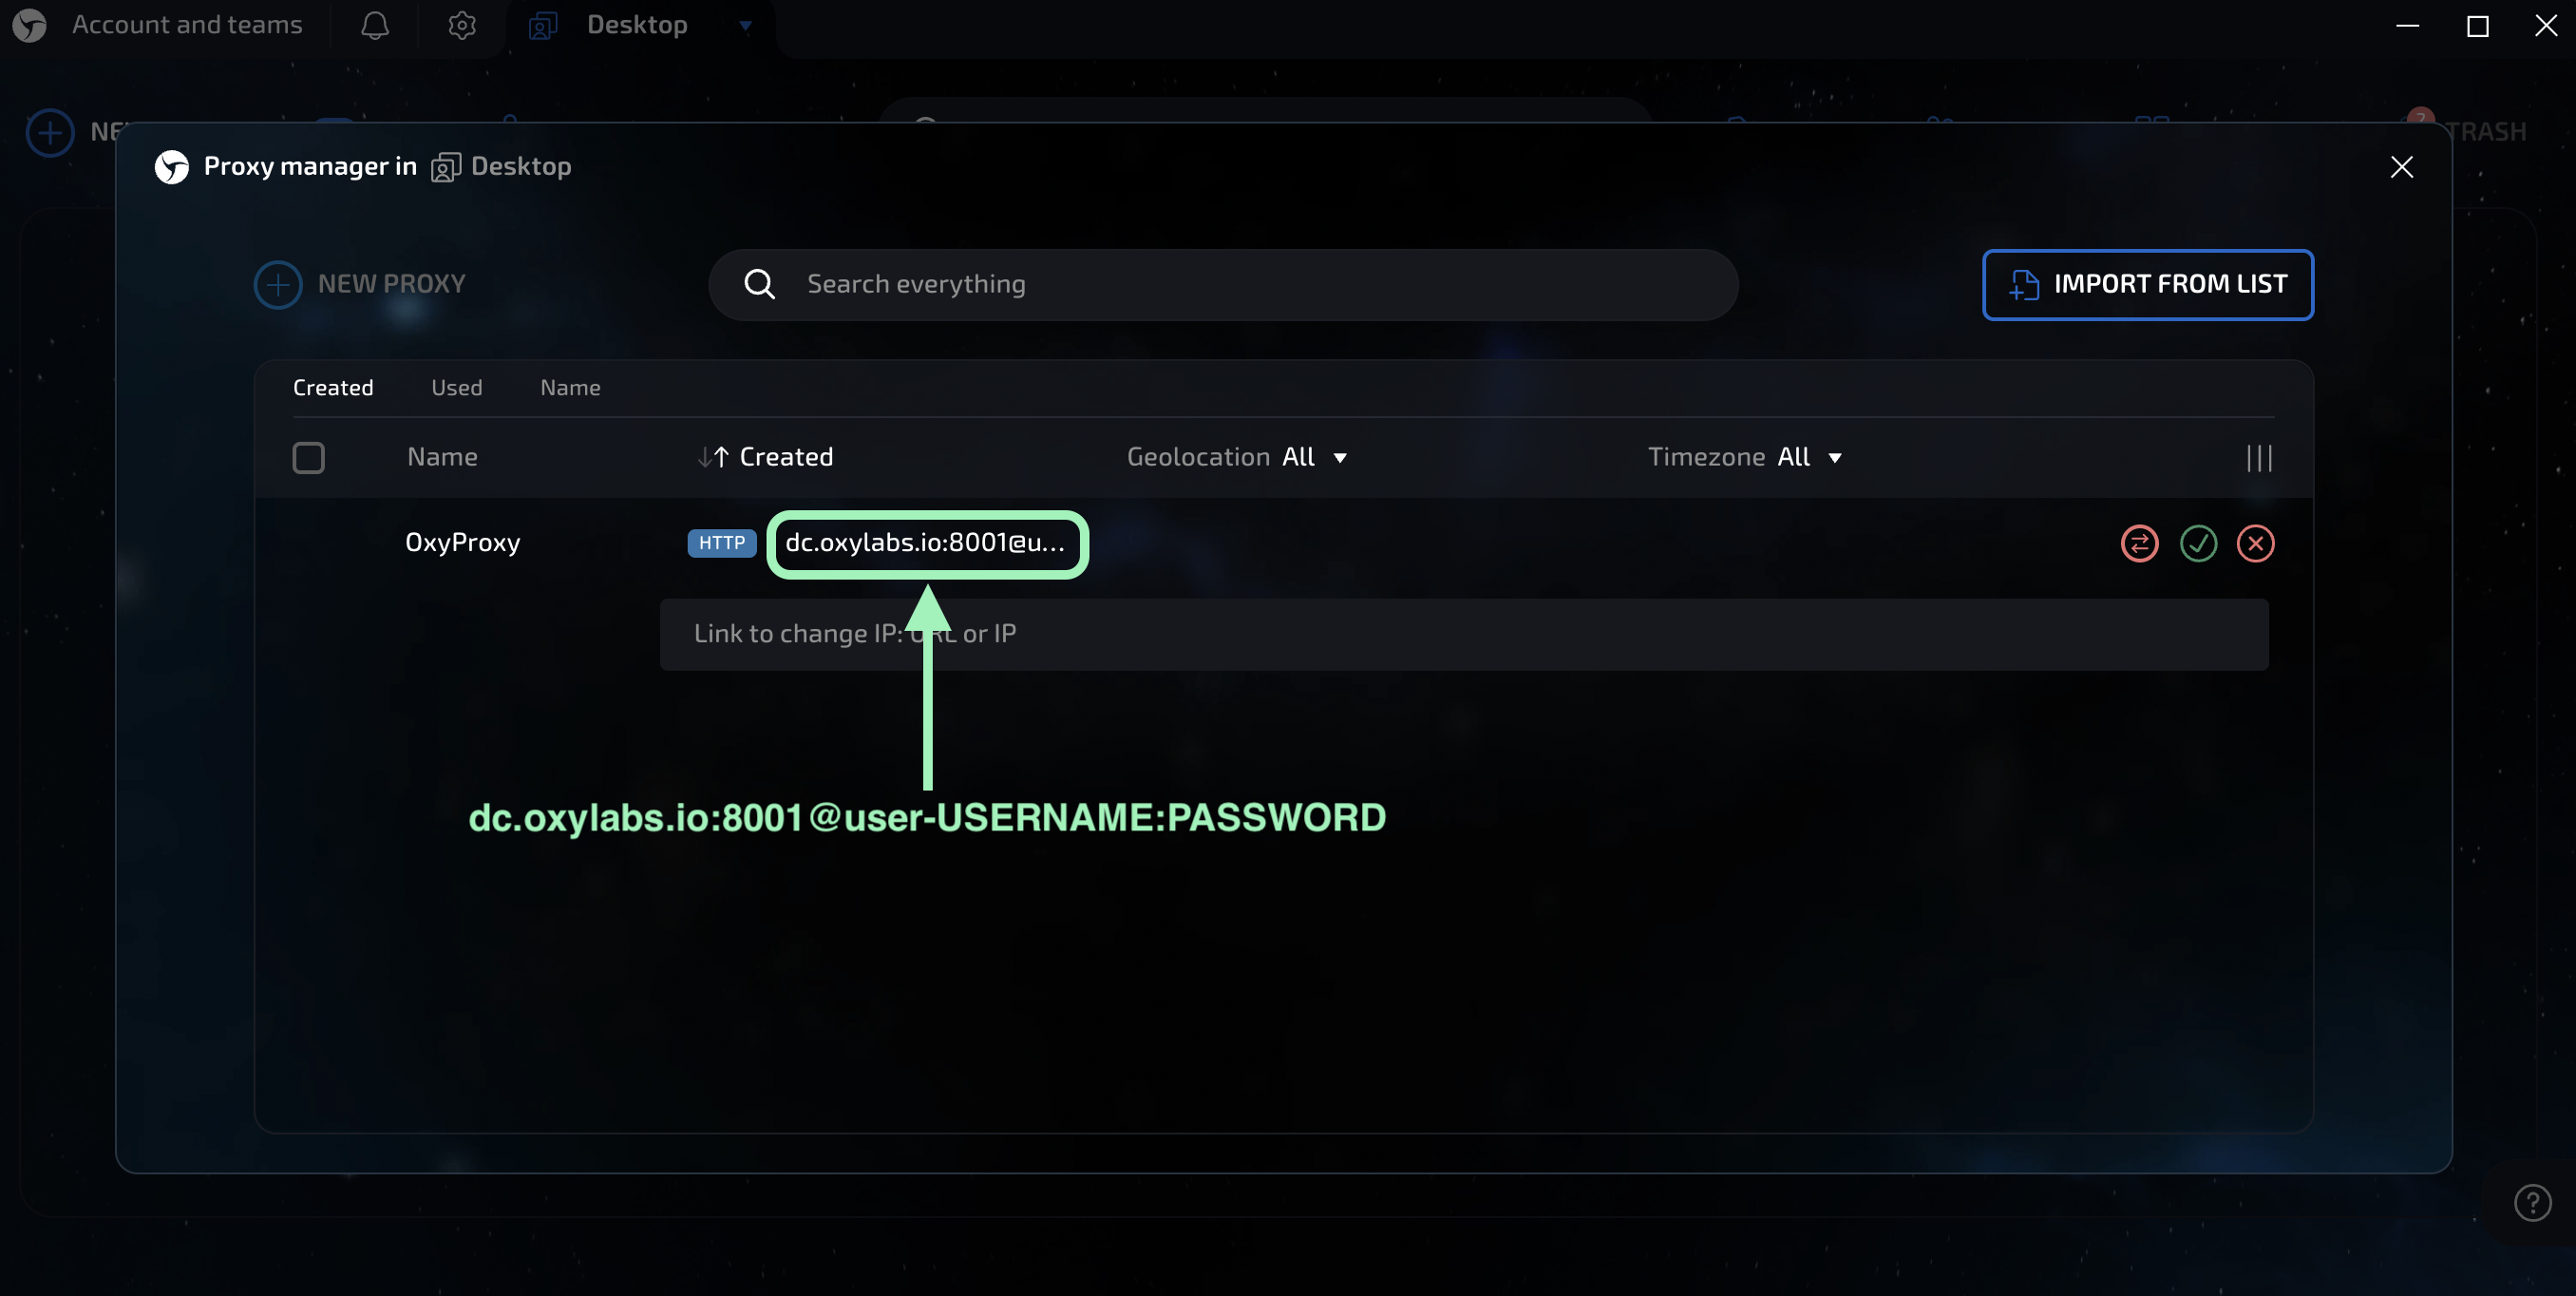
Datacenter Proxies
Protocol: HTTP or SOCKS5
IP: dc.oxylabs.io
Port: 8001
Login: user-USERNAME
Pass: PASSWORD
Note: Don't forget to add user- prefix to your username.

The port is the sequential number assigned to an IP address from the proxy list. Thus, port 8001 uses the first IP address from your list. You may also enable proxy IP rotation by setting the port to 8000.
Furthermore, you can specify the geo-location, for example, the US, by setting the Proxy username to user-USERNAME-country-US.
The port 8001 picks a random IP address but stays consistent during a session. Alternatively, you can rotate proxy IPs with each request by using port 8000.
If you want to use a specific geo-location, for example, the US, set the Proxy username to user-USERNAME-country-US.
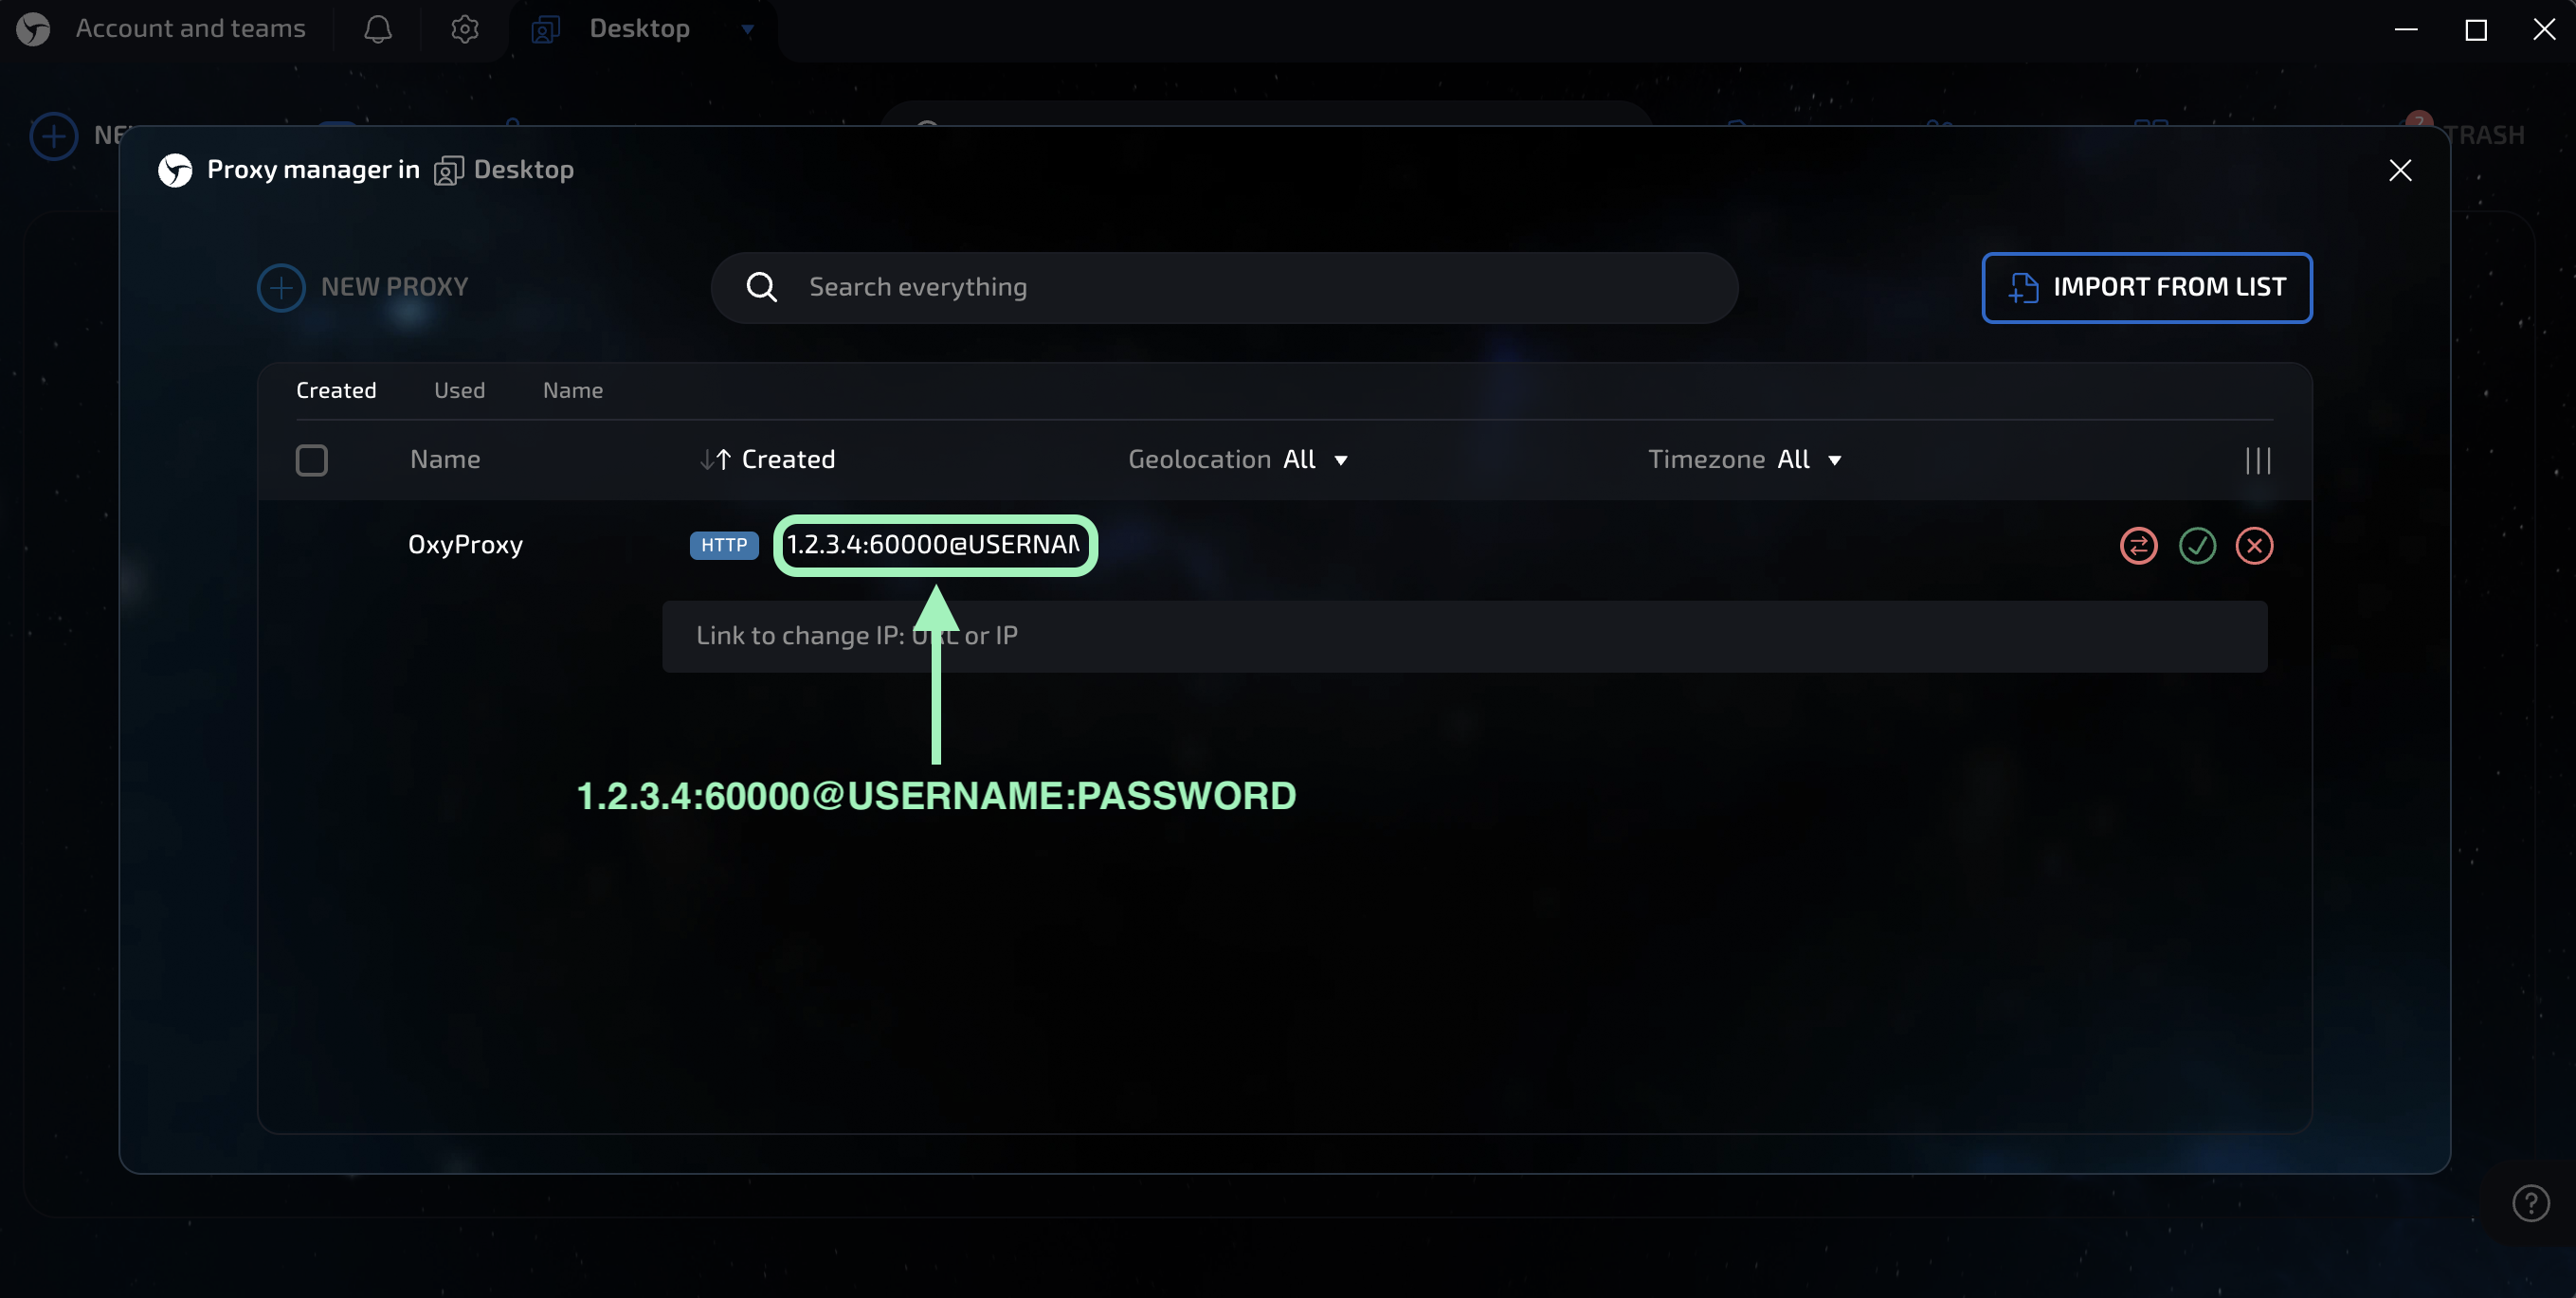
Dedicated Datacenter Proxies (Enterprise)
Protocol: HTTP or SOCKS5
IP: 1.2.3.4 (IP address from your proxy list)
Port: 60000 (HTTP/HTTPS) or 1180 (SOCKS5)
Login: USERNAME
Pass: PASSWORD

For Enterprise Dedicated Datacenter Proxies (purchased via sales), you’ll have to choose an IP address from the acquired proxy list.
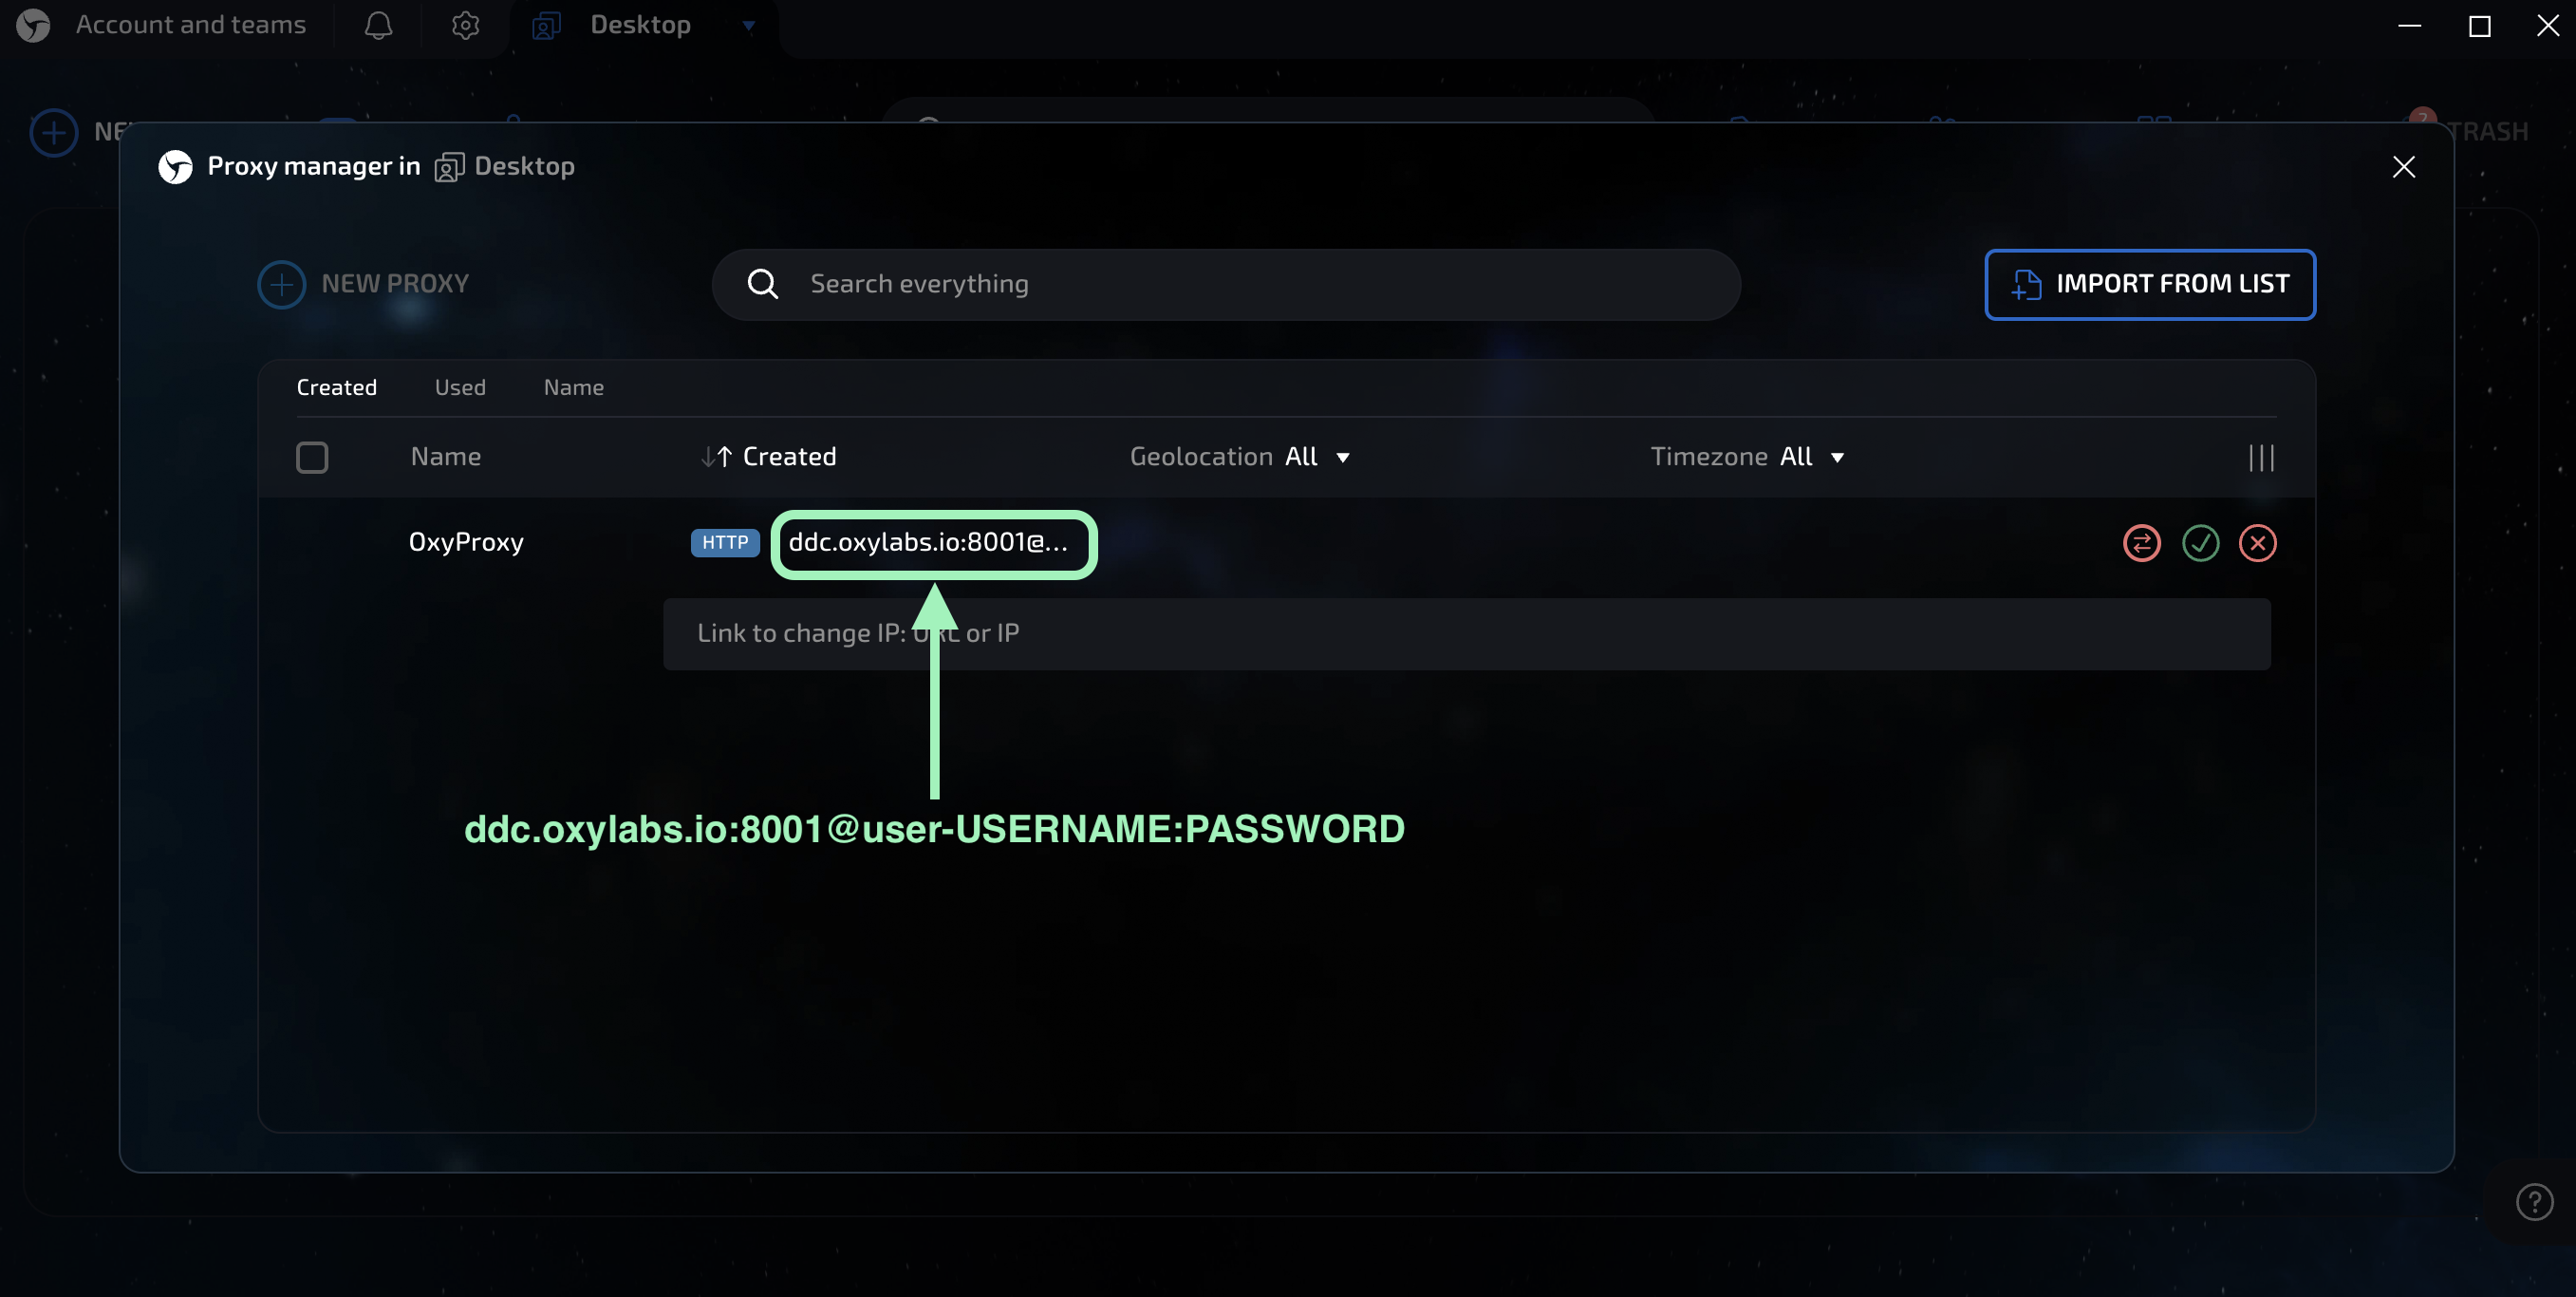
Dedicated Datacenter Proxies (Self-service)
Protocol: HTTP or SOCKS5
IP: ddc.oxylabs.io
Port: 8001
Login: user-USERNAME
Pass: PASSWORD
Note: Don't forget to add user- prefix to your username.

For Self-Service Dedicated Datacenter Proxies (purchased via Oxylabs dashboard), the port indicates the sequential number of an IP address from the acquired proxy list. If you want to get a different IP with each request, change the Port to 8000 to enable proxy rotation.
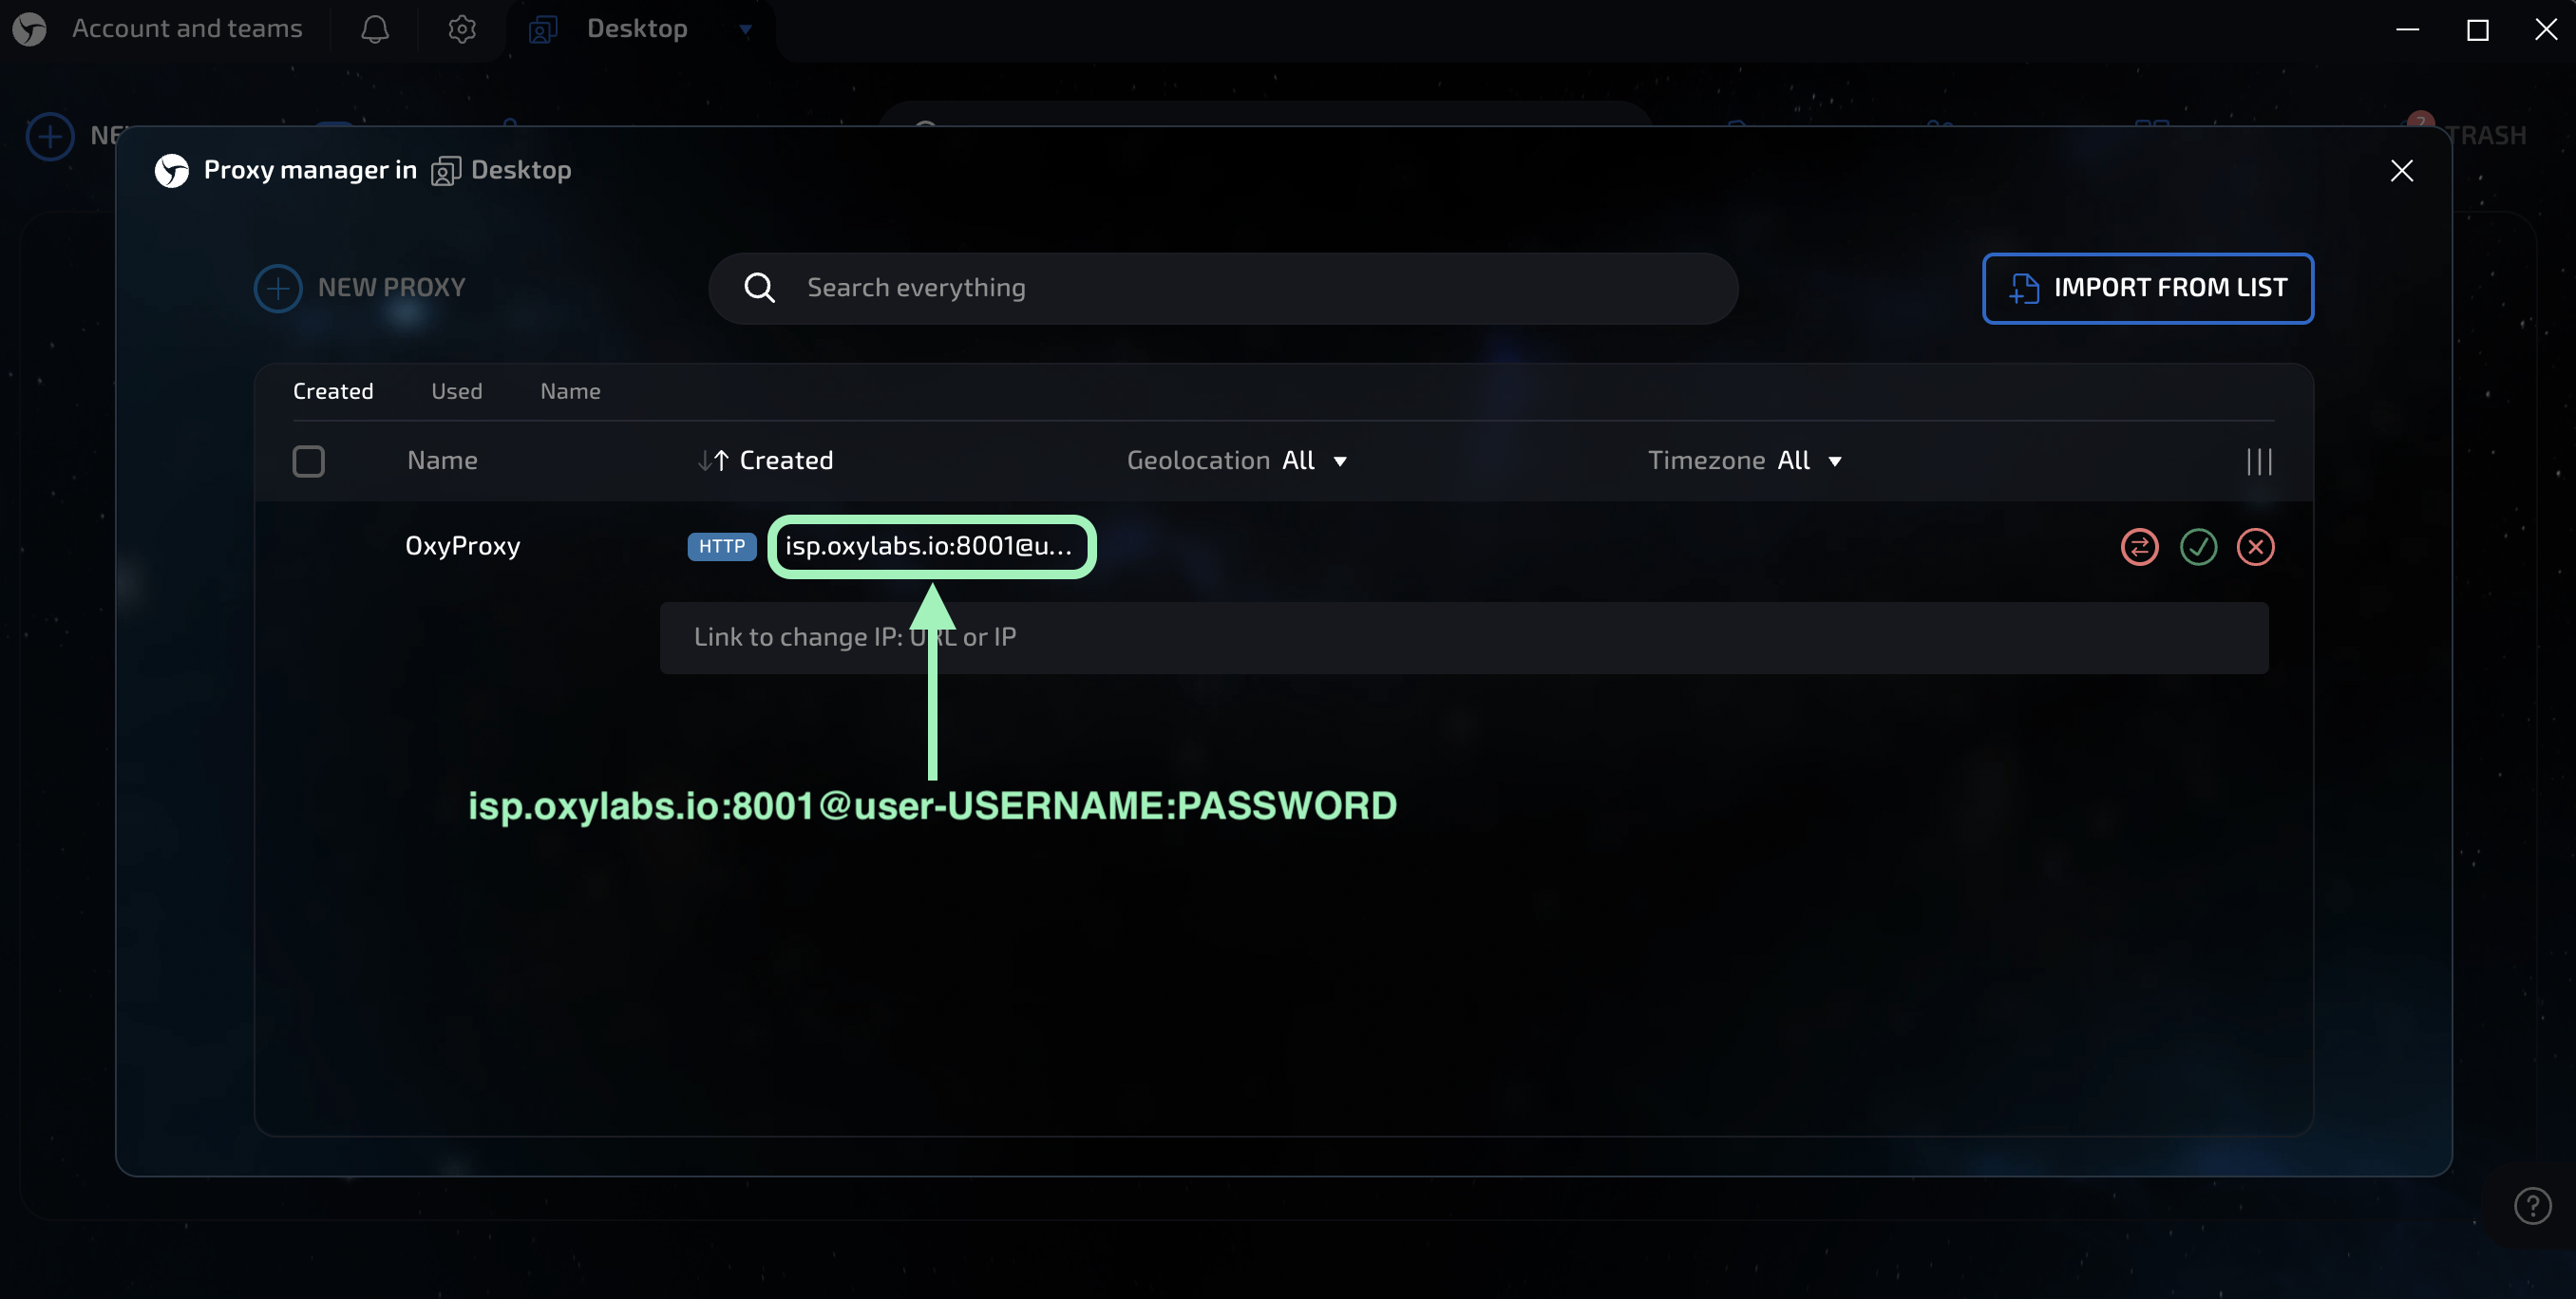
ISP Proxies
Protocol: HTTP or SOCKS5
IP: isp.oxylabs.io
Port: 8001
Login: user-USERNAME
Pass: PASSWORD
Note: Don't forget to add user- prefix to your username.

ISP Proxies assign each port to a specific IP address and location. Port 8001 always uses the first IP from your proxy list. Use port 8000 to enable proxy rotation.
To get rotating IPs from a specific country's proxy pool, set the username using this format: user-USERNAME-country-XX, where XX is the country code (e.g., US for United States).
Dedicated ISP Proxies
Protocol: HTTP or SOCKS5
IP: disp.oxylabs.io
Port: 8001
Login: user-USERNAME
Pass: PASSWORD
Note: Don't forget to add user- prefix to your username.

You will need to choose the port assigned to an IP address from the purchased proxy list, which you can find on the Oxylabs dashboard. The 8001 port will pick the first IP address from your list for all requests. Use port 8000 for automatic proxy IP rotation.
Testing
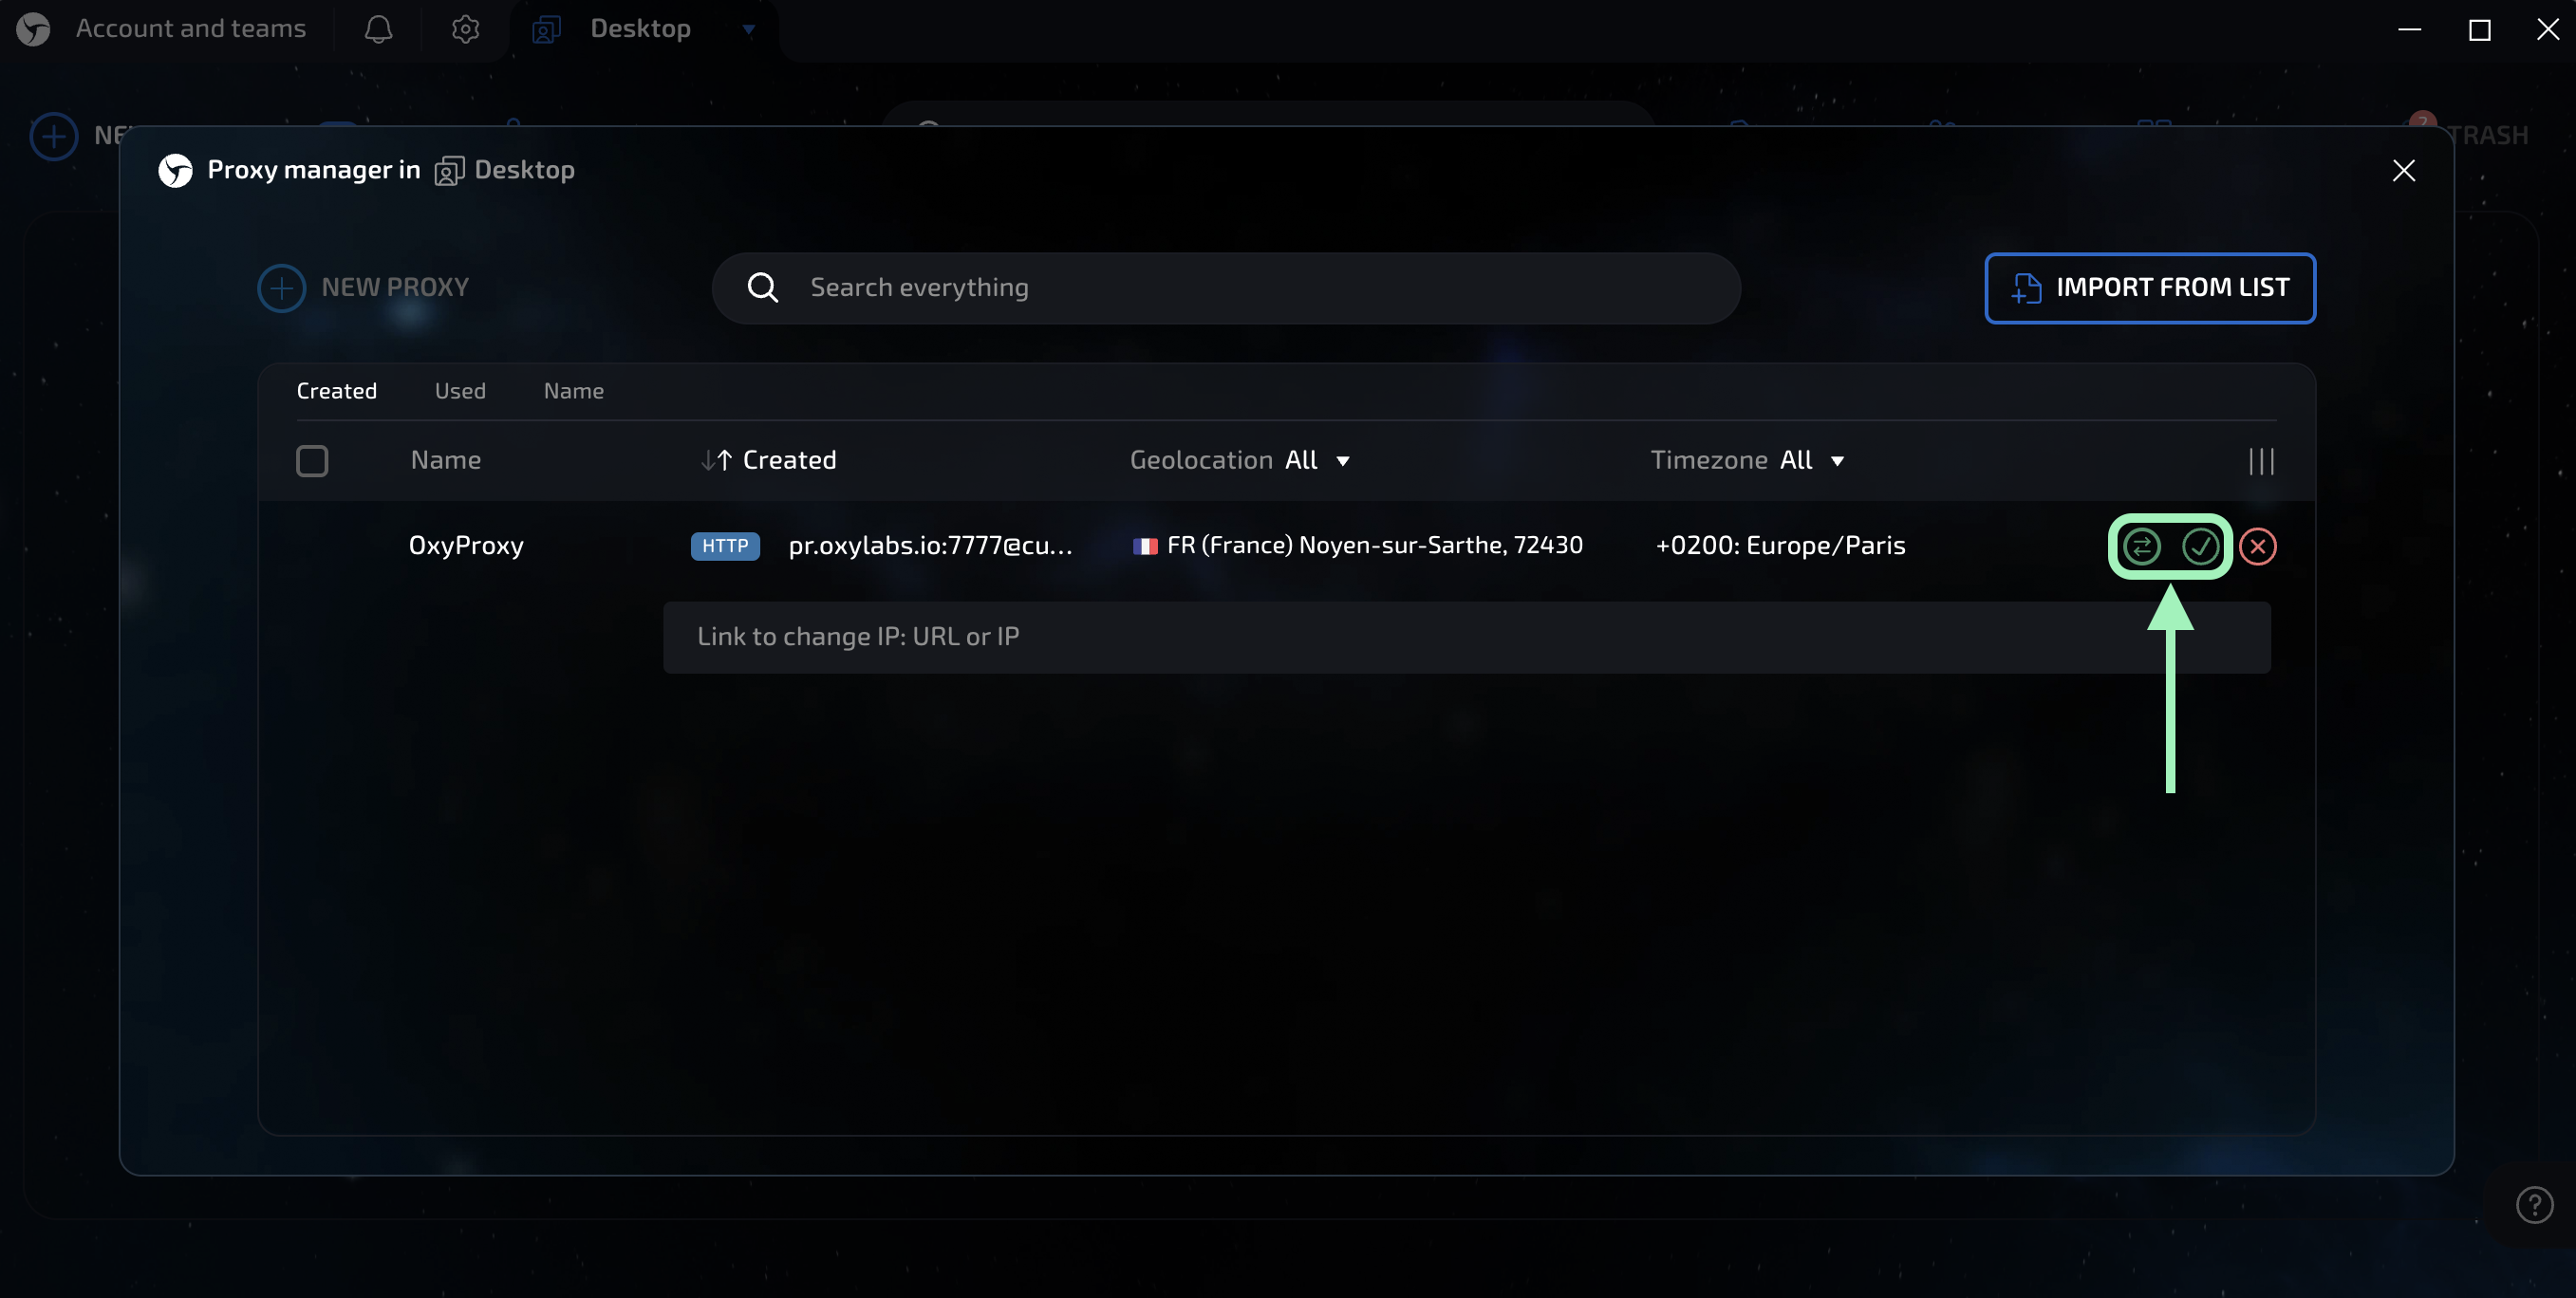
To check proxy functionality, either click anywhere or on the dedicated proxy test button.

If the test is successful, a valid geolocation and its corresponding time zone will appear next to your proxy details.
Finally, click the green check mark (save proxy). You can add as many proxies as you like and pair or unpair them with different browser sessions.
Set proxies
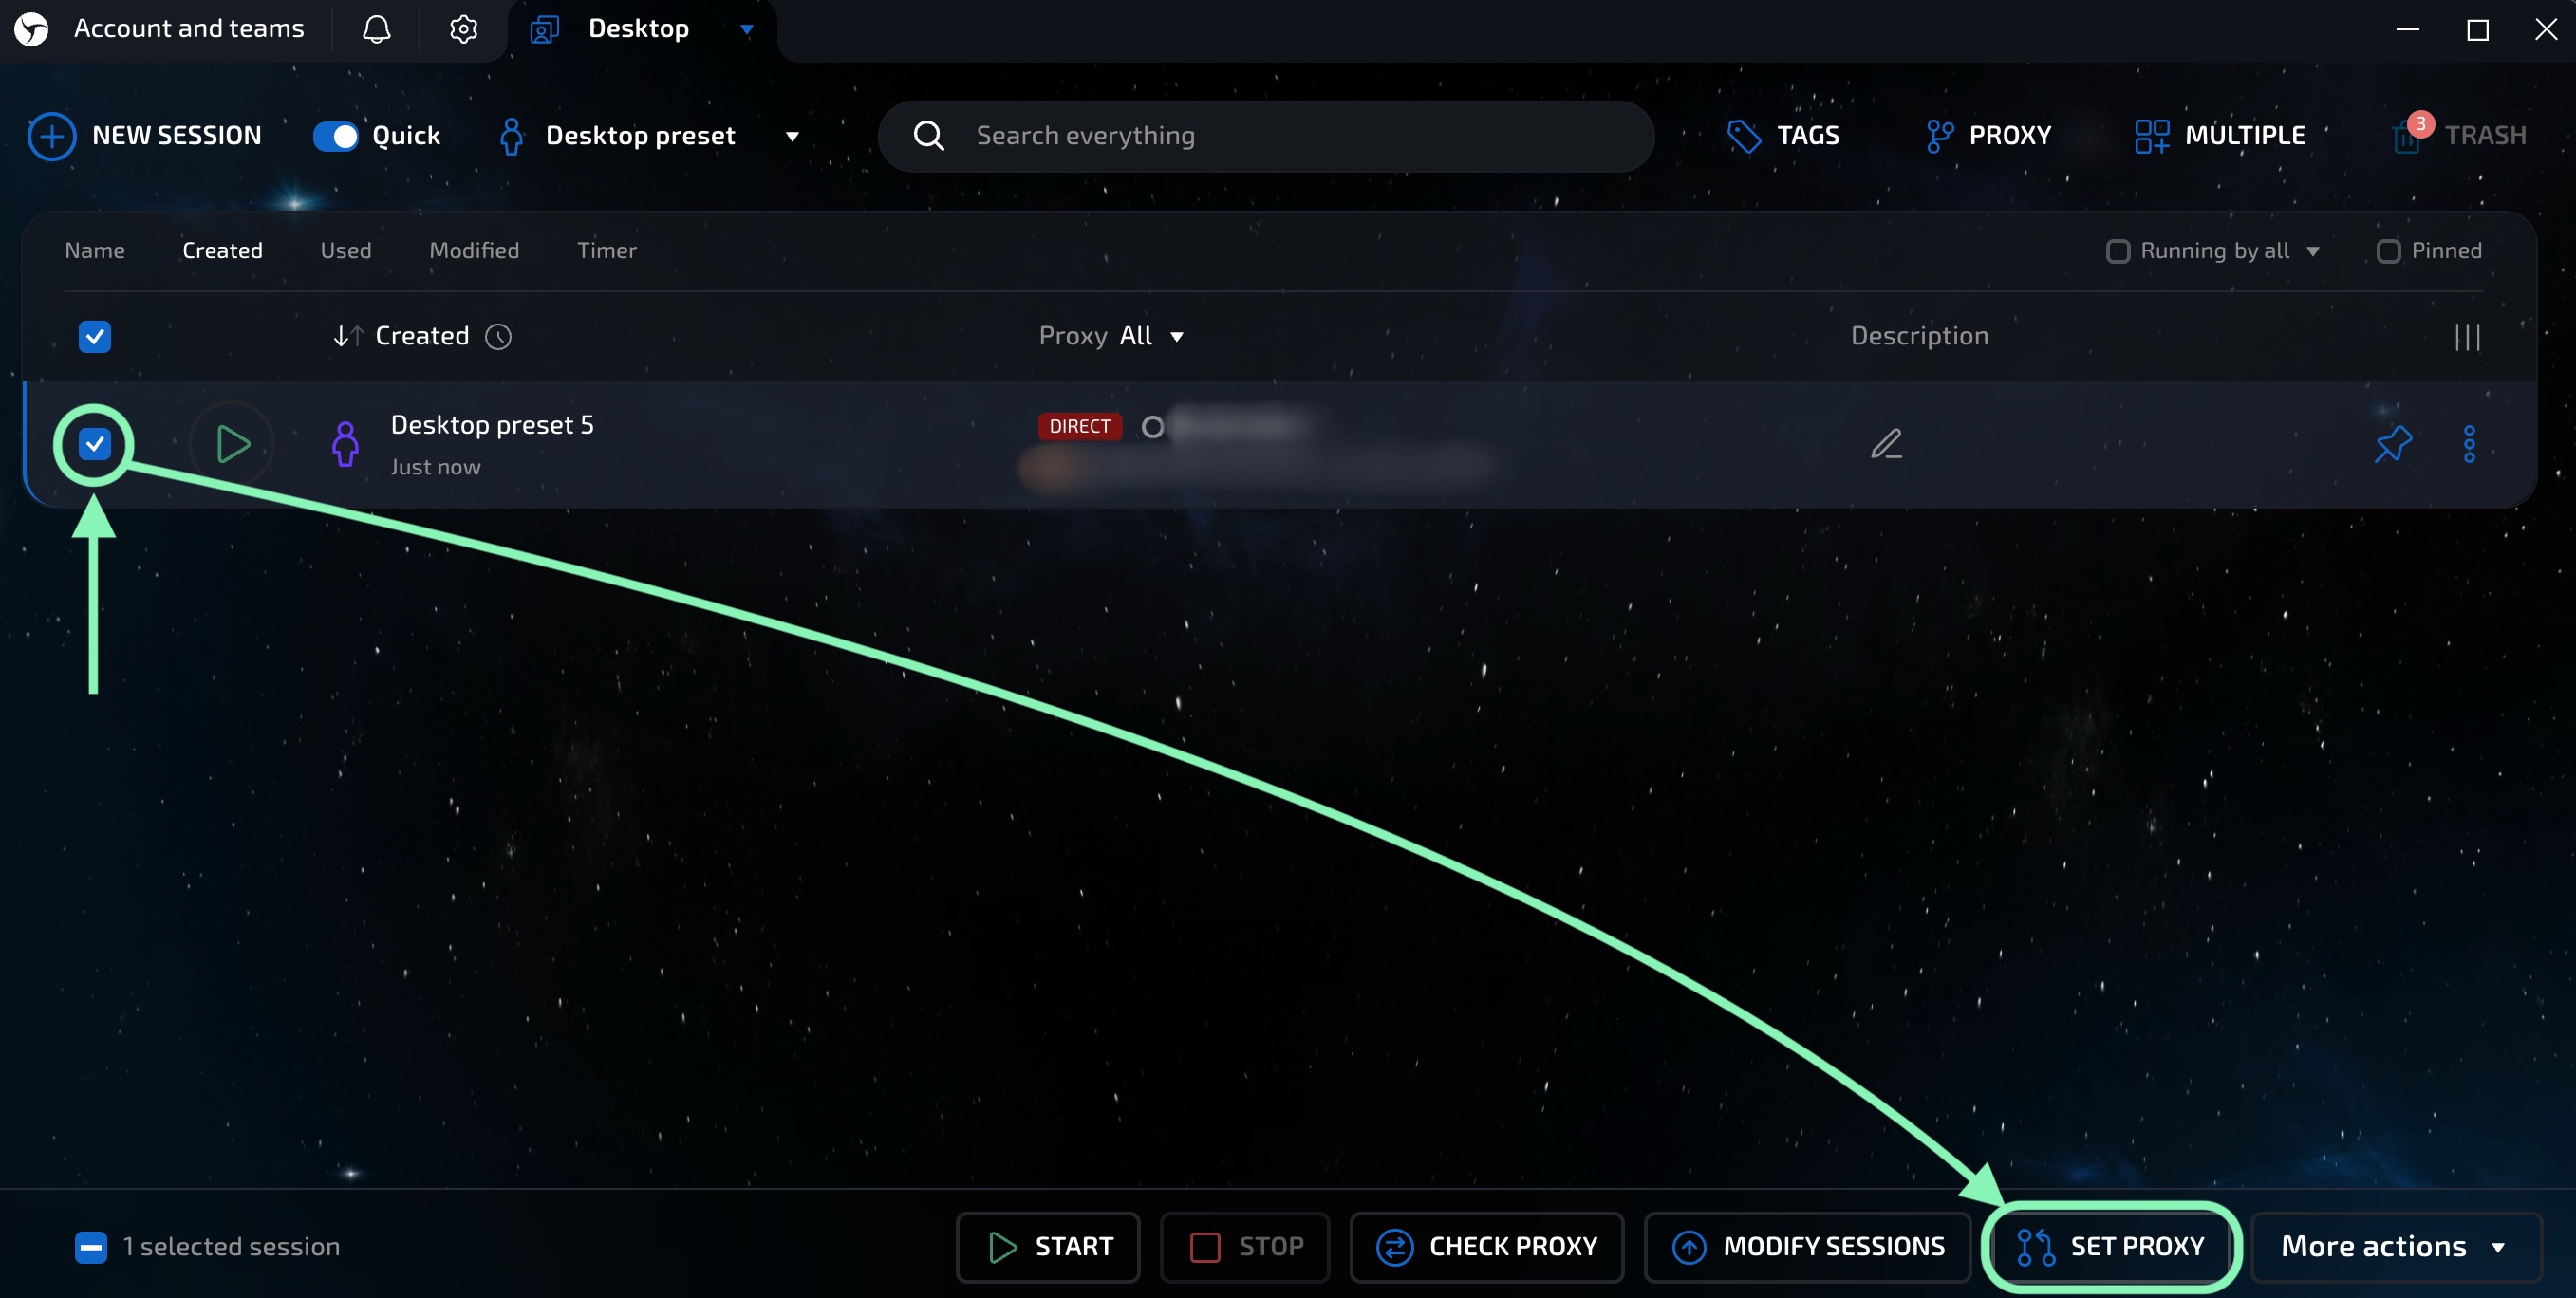
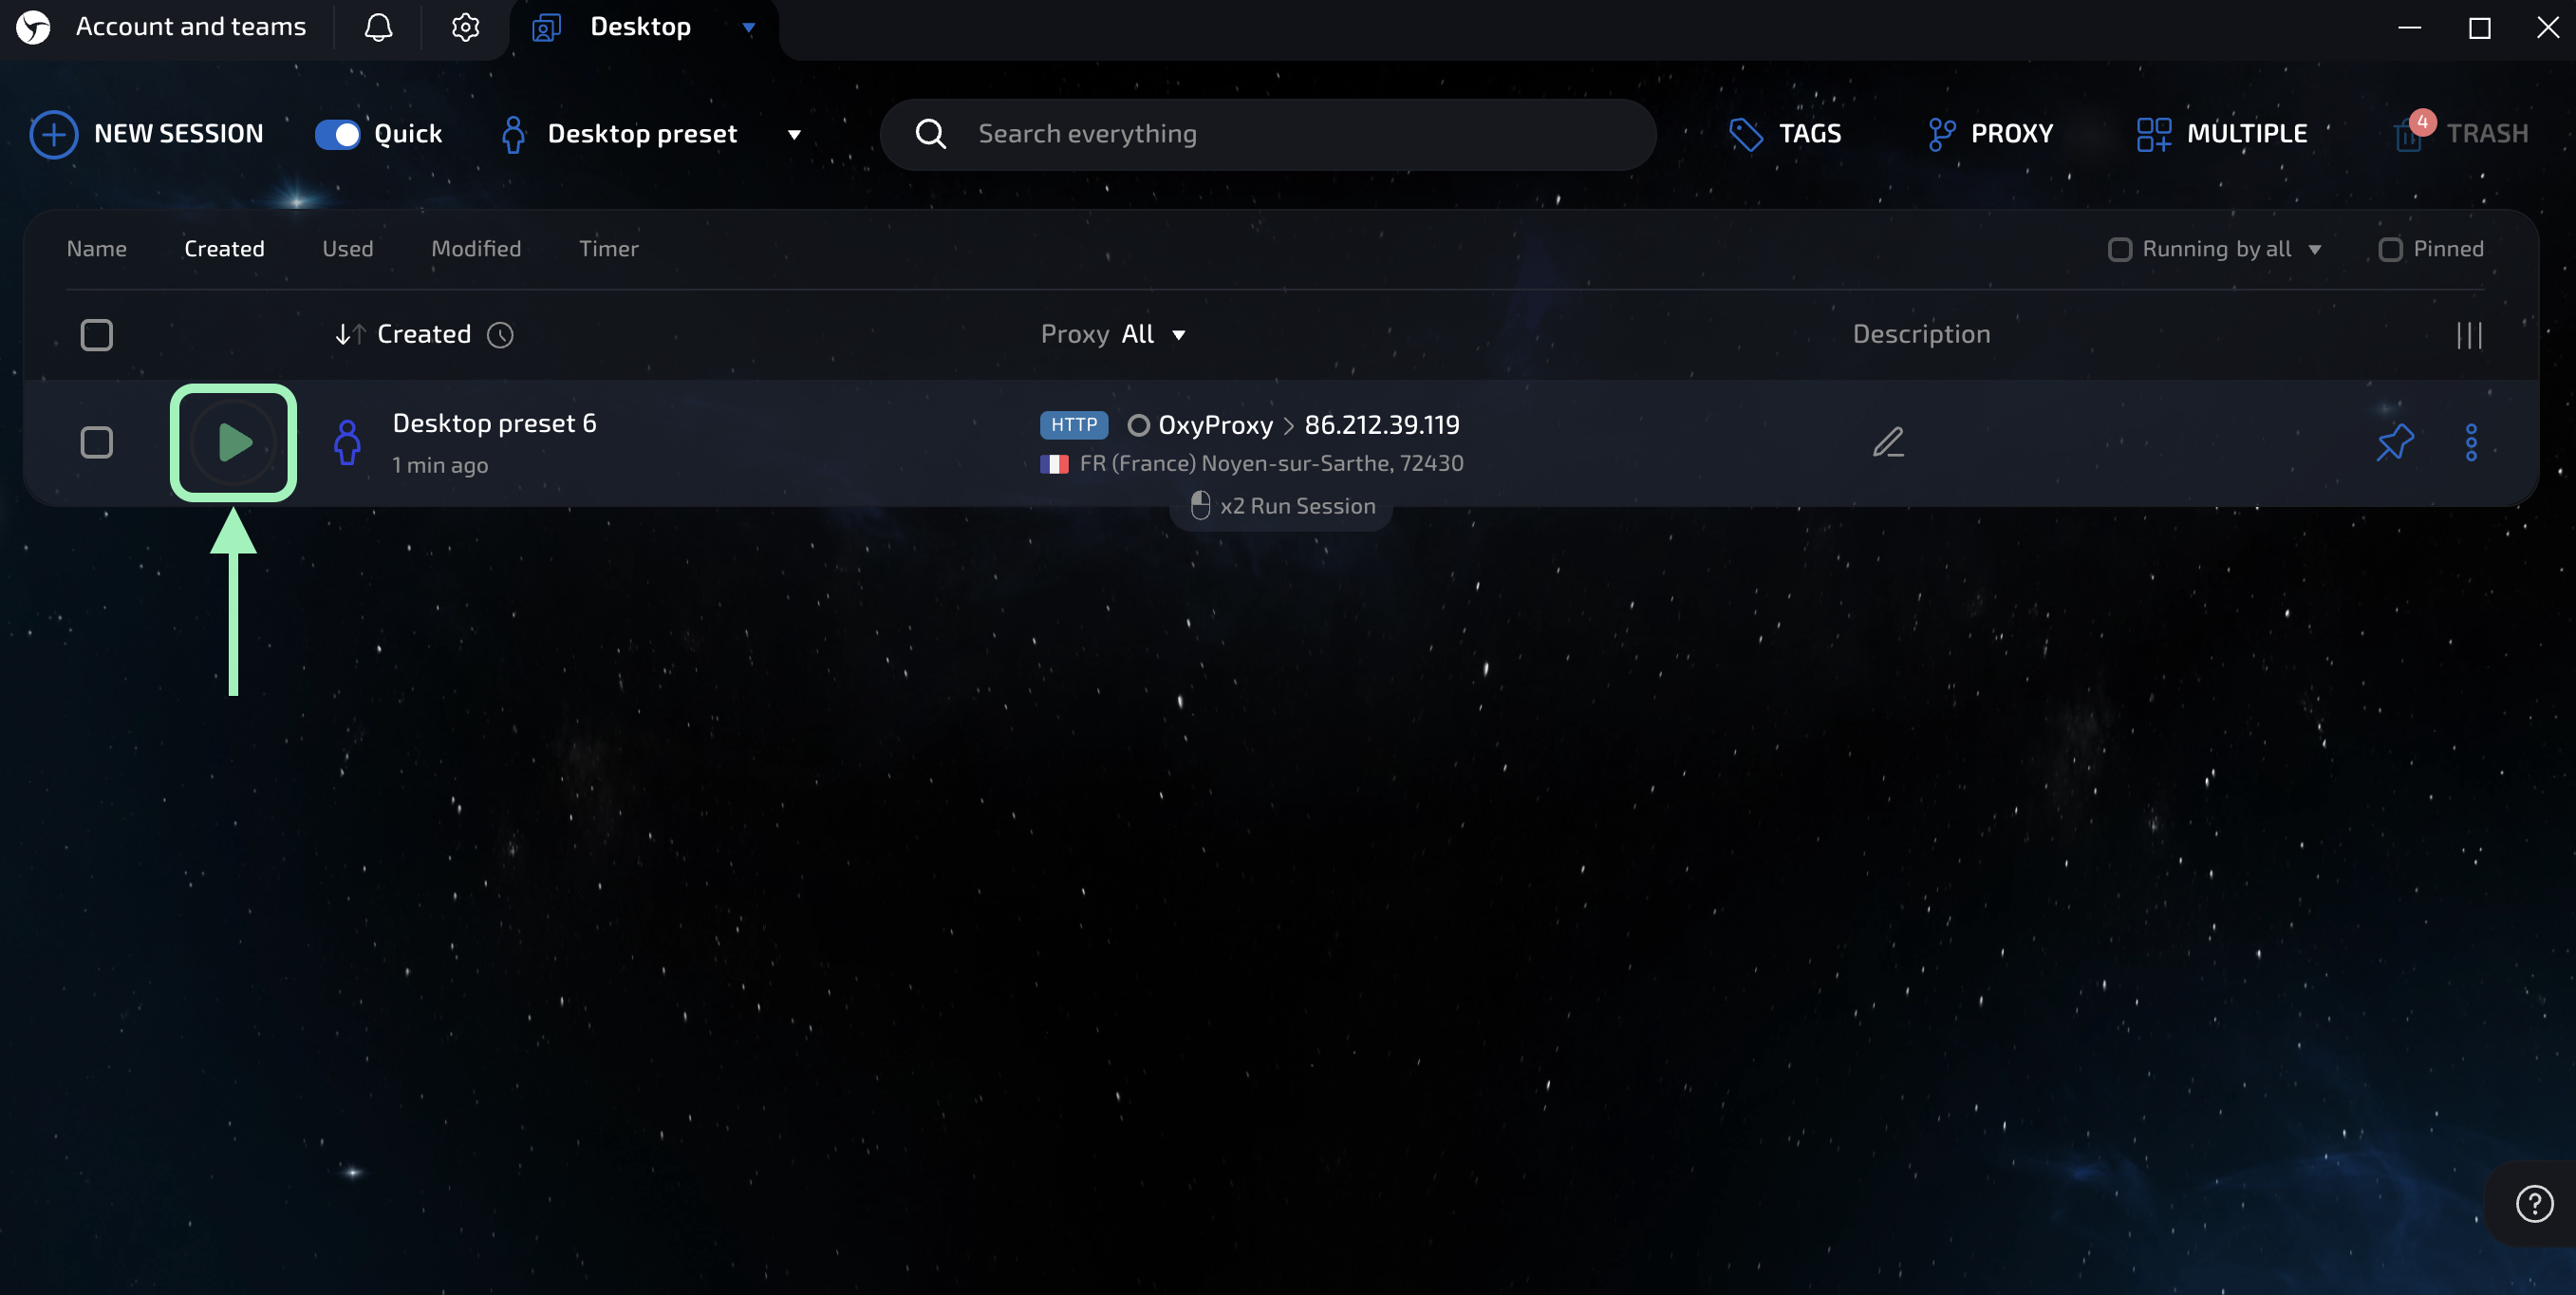
A new profile uses a direct connection by default, so to use your proxies with browser sessions, select a profile (the boxes on the left) and click Set proxy.

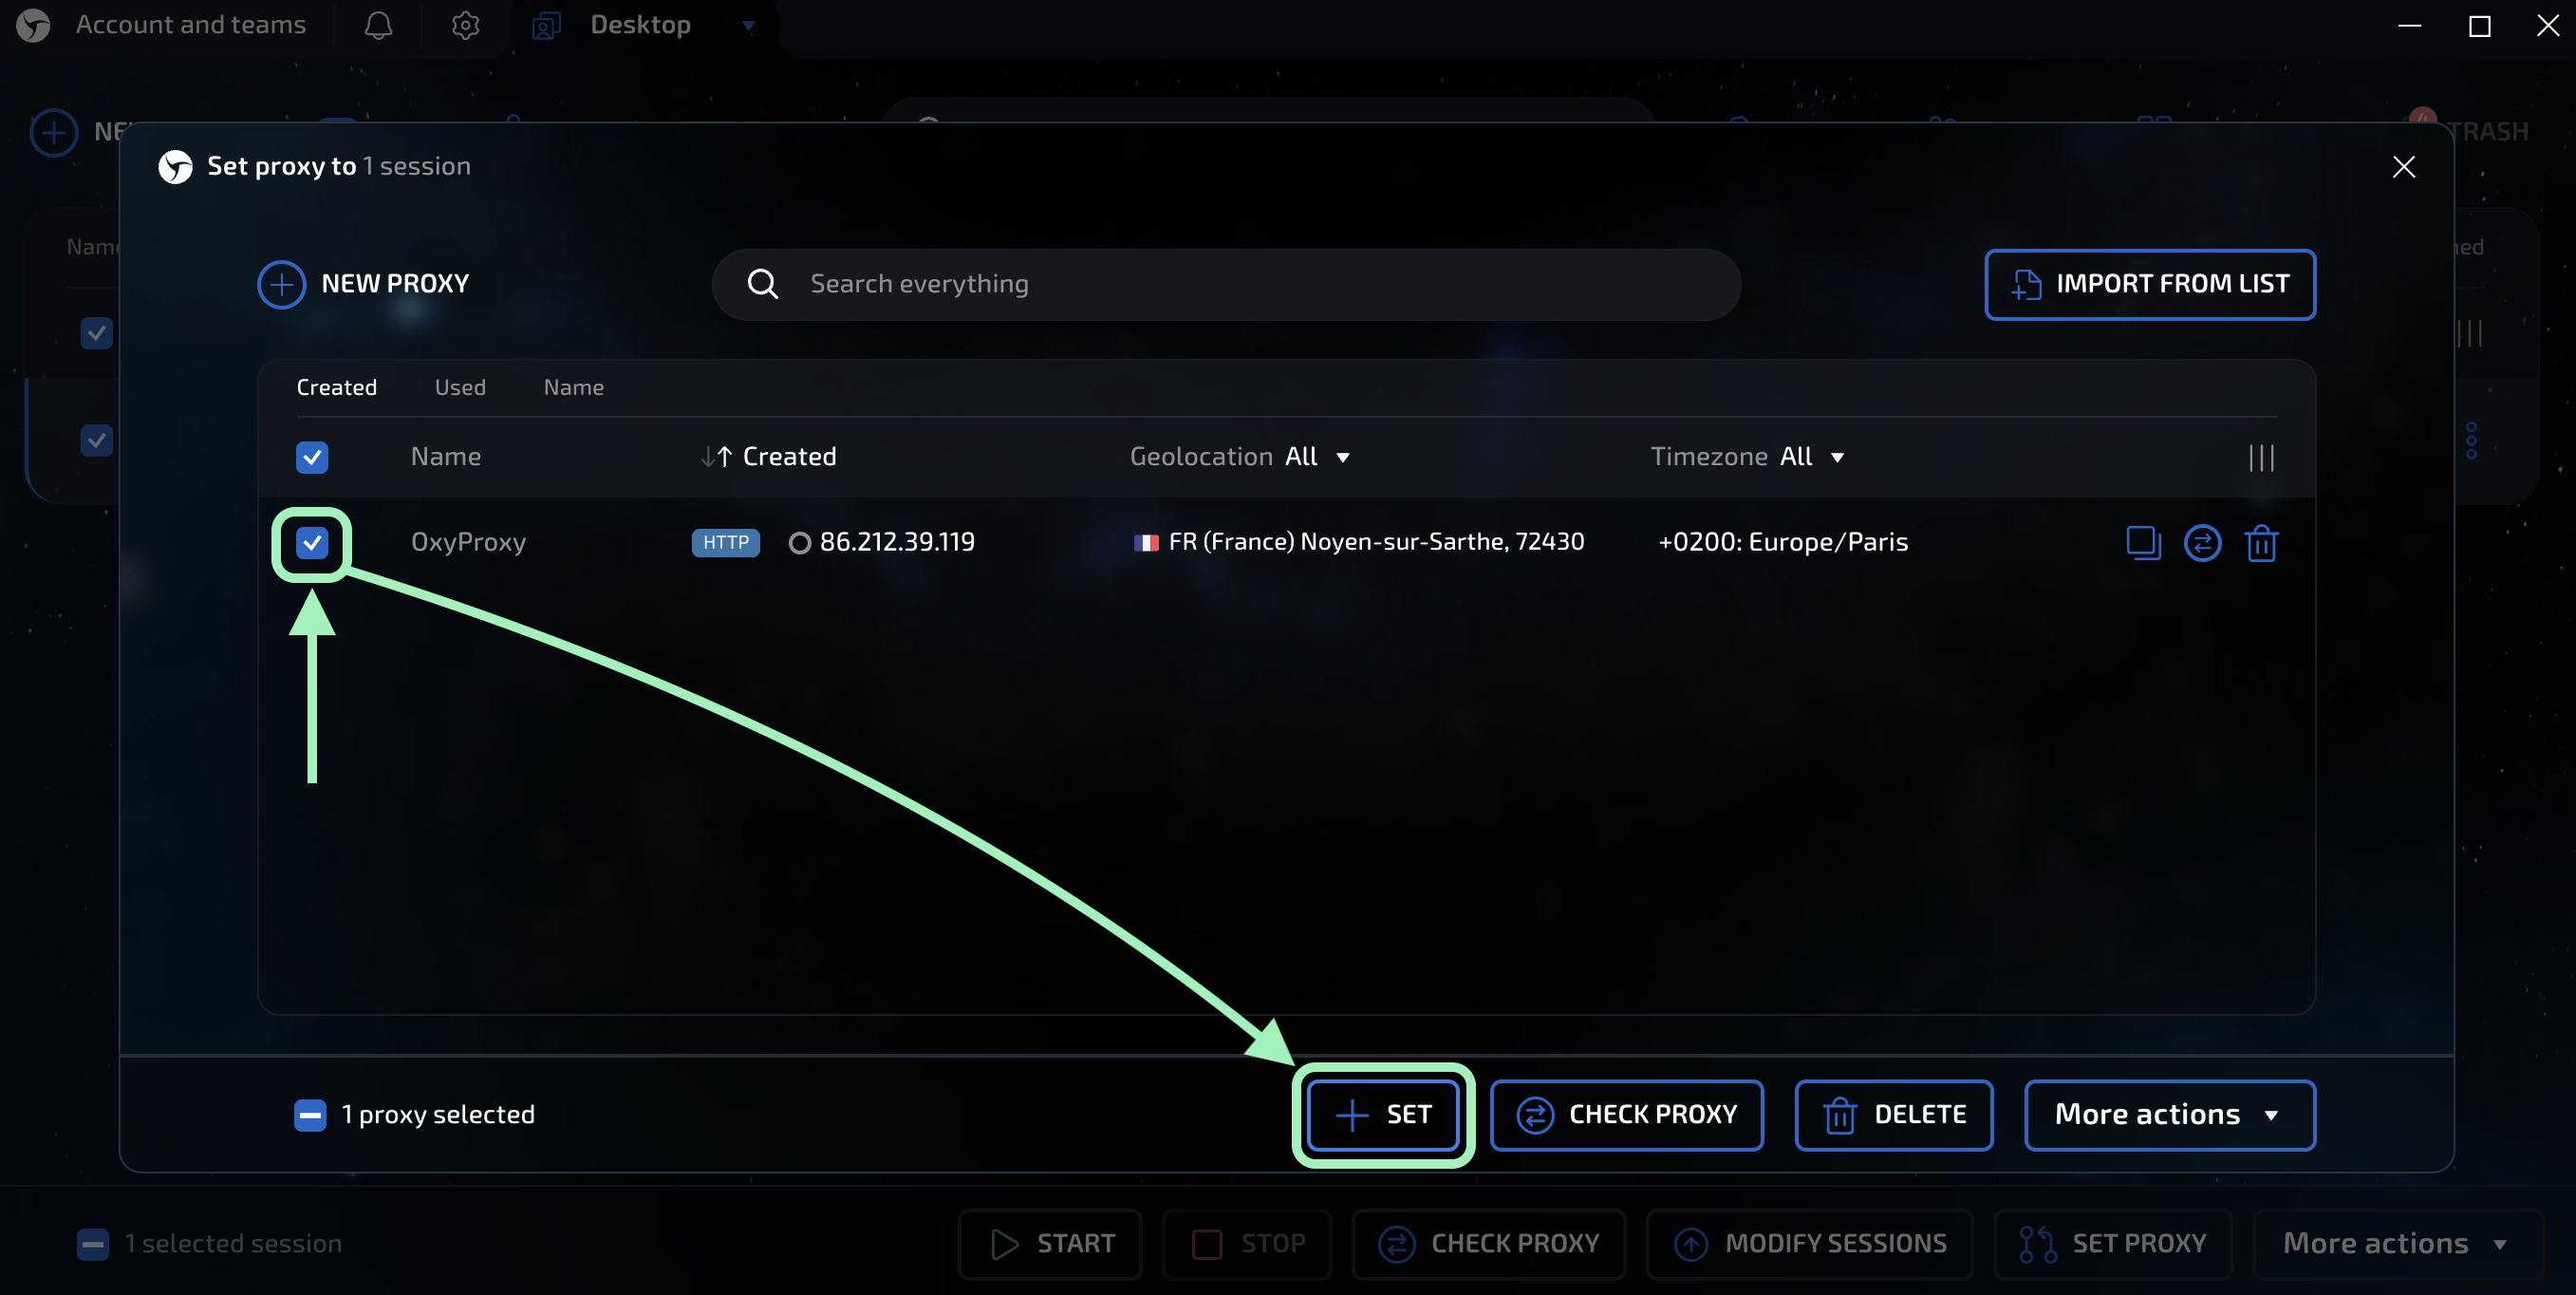
In the pop-up window, use the boxes on the left to select the proxies you wish to set on the chosen profile(s) and click Set to finish proxy setup.

And that’s it. You’ve successfully integrated your Oxylabs proxies with the Linken Sphere browser. You can find the original Linken Sphere browser integration blog post here.
If you have any questions or concerns regarding our solutions or the process above, please email us at hello@oxylabs.io.
Last updated
Was this helpful?