> For the complete documentation index, see [llms.txt](https://developers.oxylabs.io/llms.txt). Markdown versions of documentation pages are available by appending `.md` to page URLs; this page is available as [Markdown](https://developers.oxylabs.io/integrations/proxy-integrations/octoparse.md).
# Octoparse
Integrate Octoparse with Oxylabs Proxies for no-code web scraping. Set up automatic IP rotation and handle common scraping challenges.
[**Octoparse**](https://www.octoparse.com/) is a data extraction tool. It allows you to scrape public data without coding and handle most scraping challenges by enabling automatic IP rotation and extended session time.
Follow the steps below to integrate Octoparse with the following Oxylabs proxies:
* [**Residential & Mobile Proxies**](#residential-and-mobile-proxies)
* [**Datacenter Proxies**](#datacenter-proxies)
* [**Dedicated Datacenter Proxies (Enterprise)**](#dedicated-datacenter-proxies-enterprise)
* [**Dedicated Datacenter Proxies (Self-service)**](#dedicated-datacenter-proxies-self-service)
* [**ISP Proxies**](#isp-proxies)
* [**Dedicated ISP Proxies**](#dedicated-isp-proxies)
### **Step 1**
[**Download**](https://www.octoparse.com/download/mac), install, and then open Octoparse.
### **Step 2**
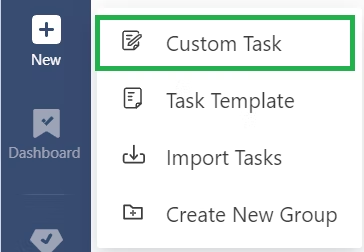
Create a new task by clicking the **+New** button in the top-left corner, and choosing **Custom Task.**
### **Step 3**
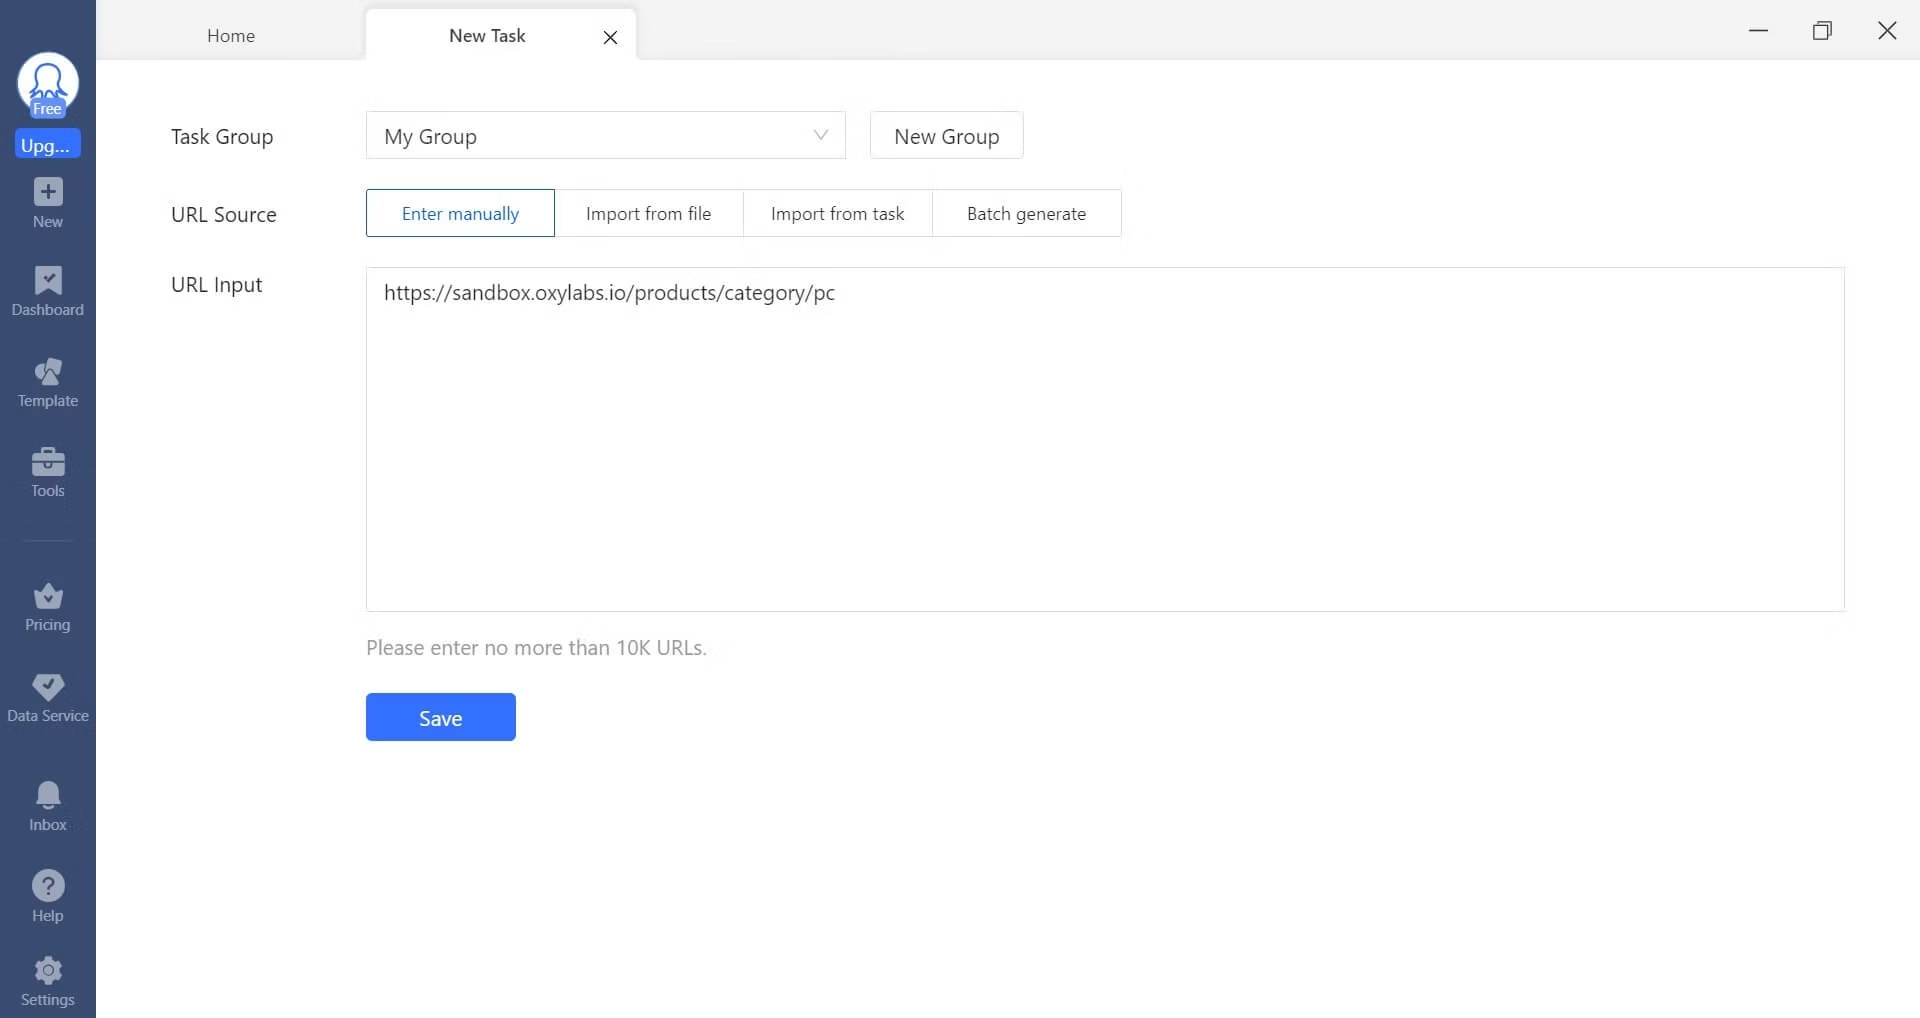
Type the URL of the webpage you intend to extract data from in the **URL Input** and click the **Save** button. We'll use [**Oxylabs scraping sandbox**](https://sandbox.oxylabs.io/products/category/pc) as an example.
### **Step 4**
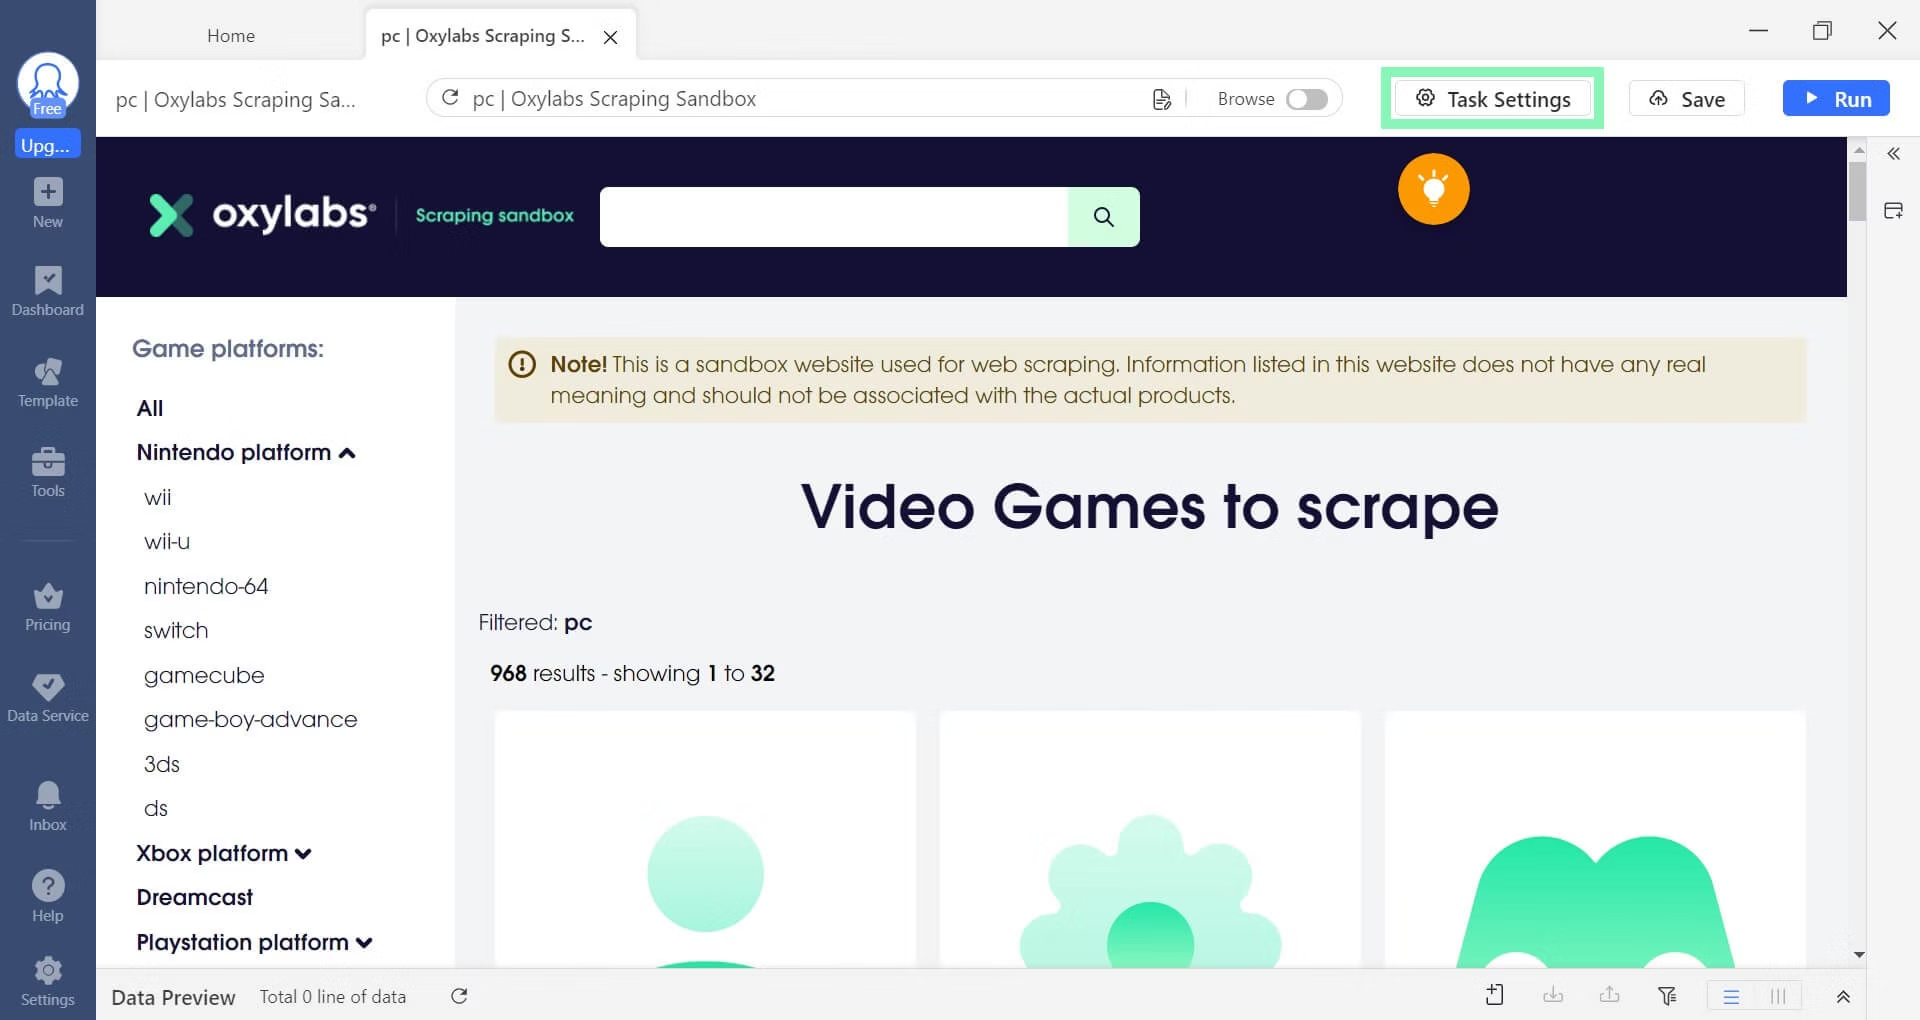
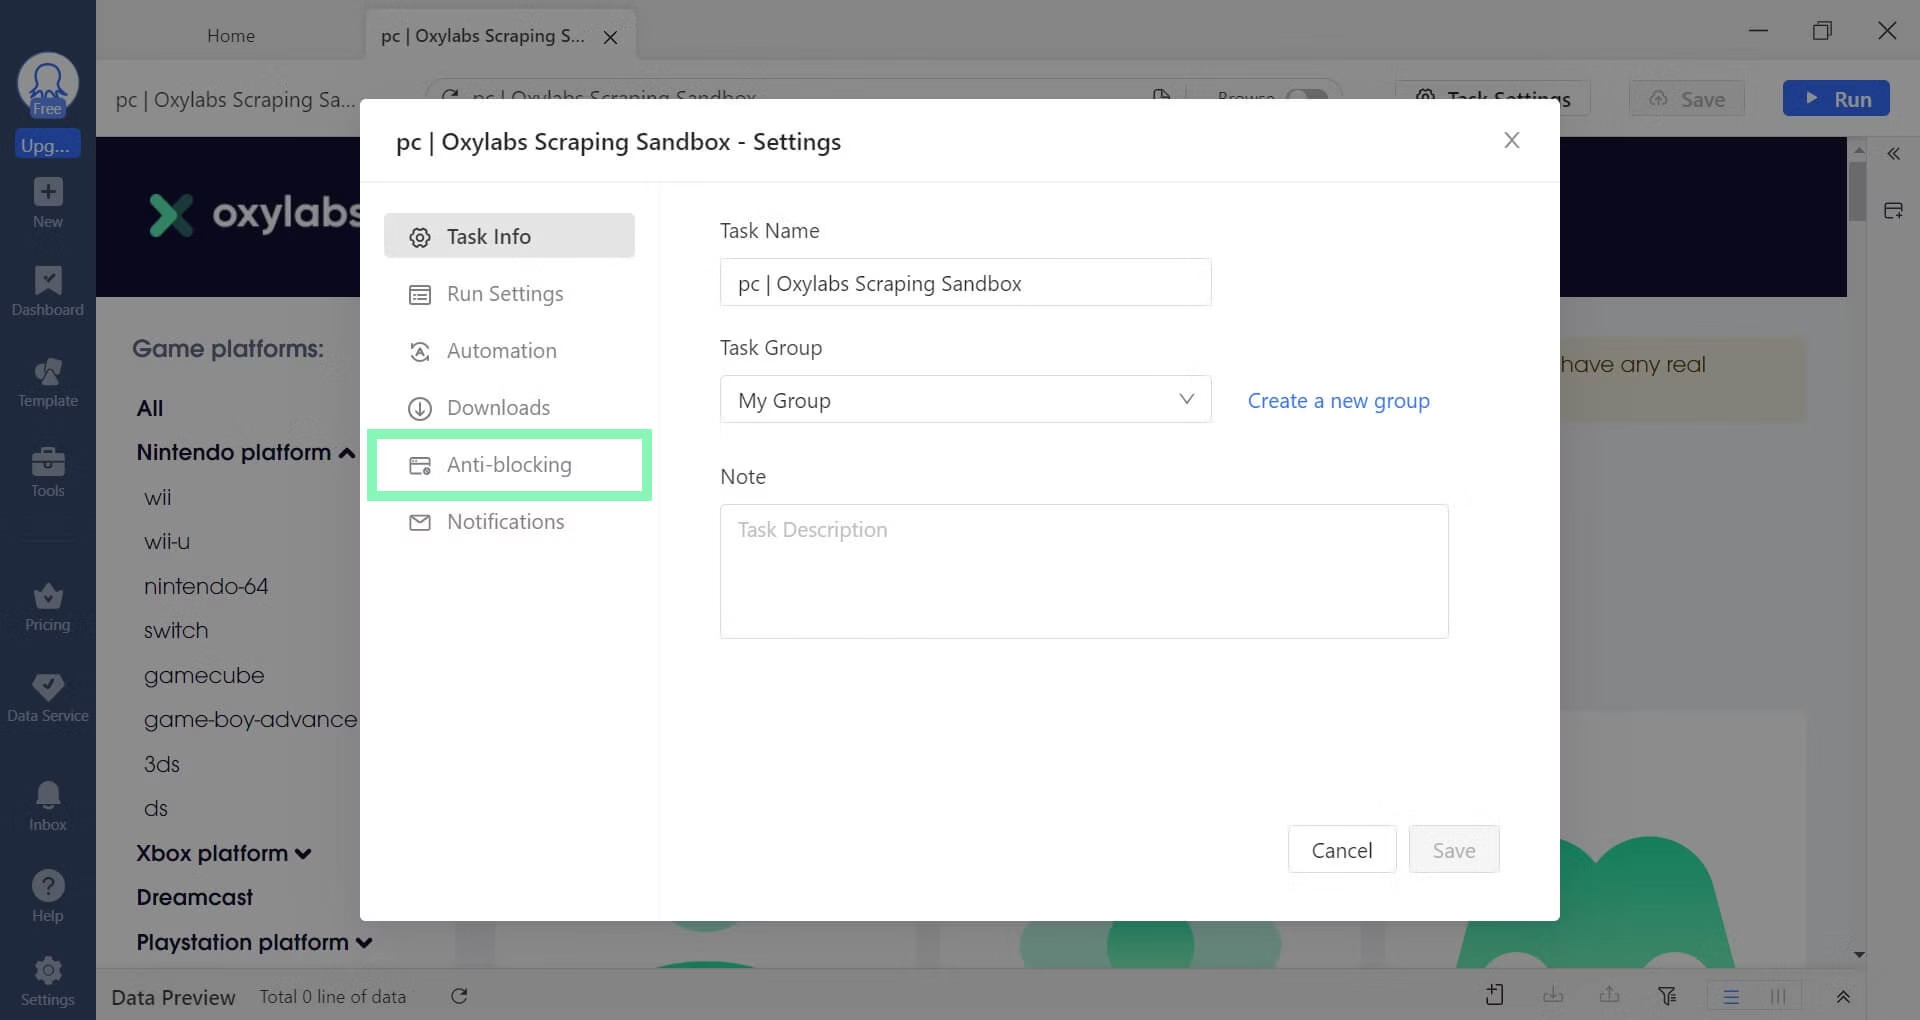
After your selected URL loads, go to **"Task Settings"** and select **"Anti-blocking"**.
### **Step 5**
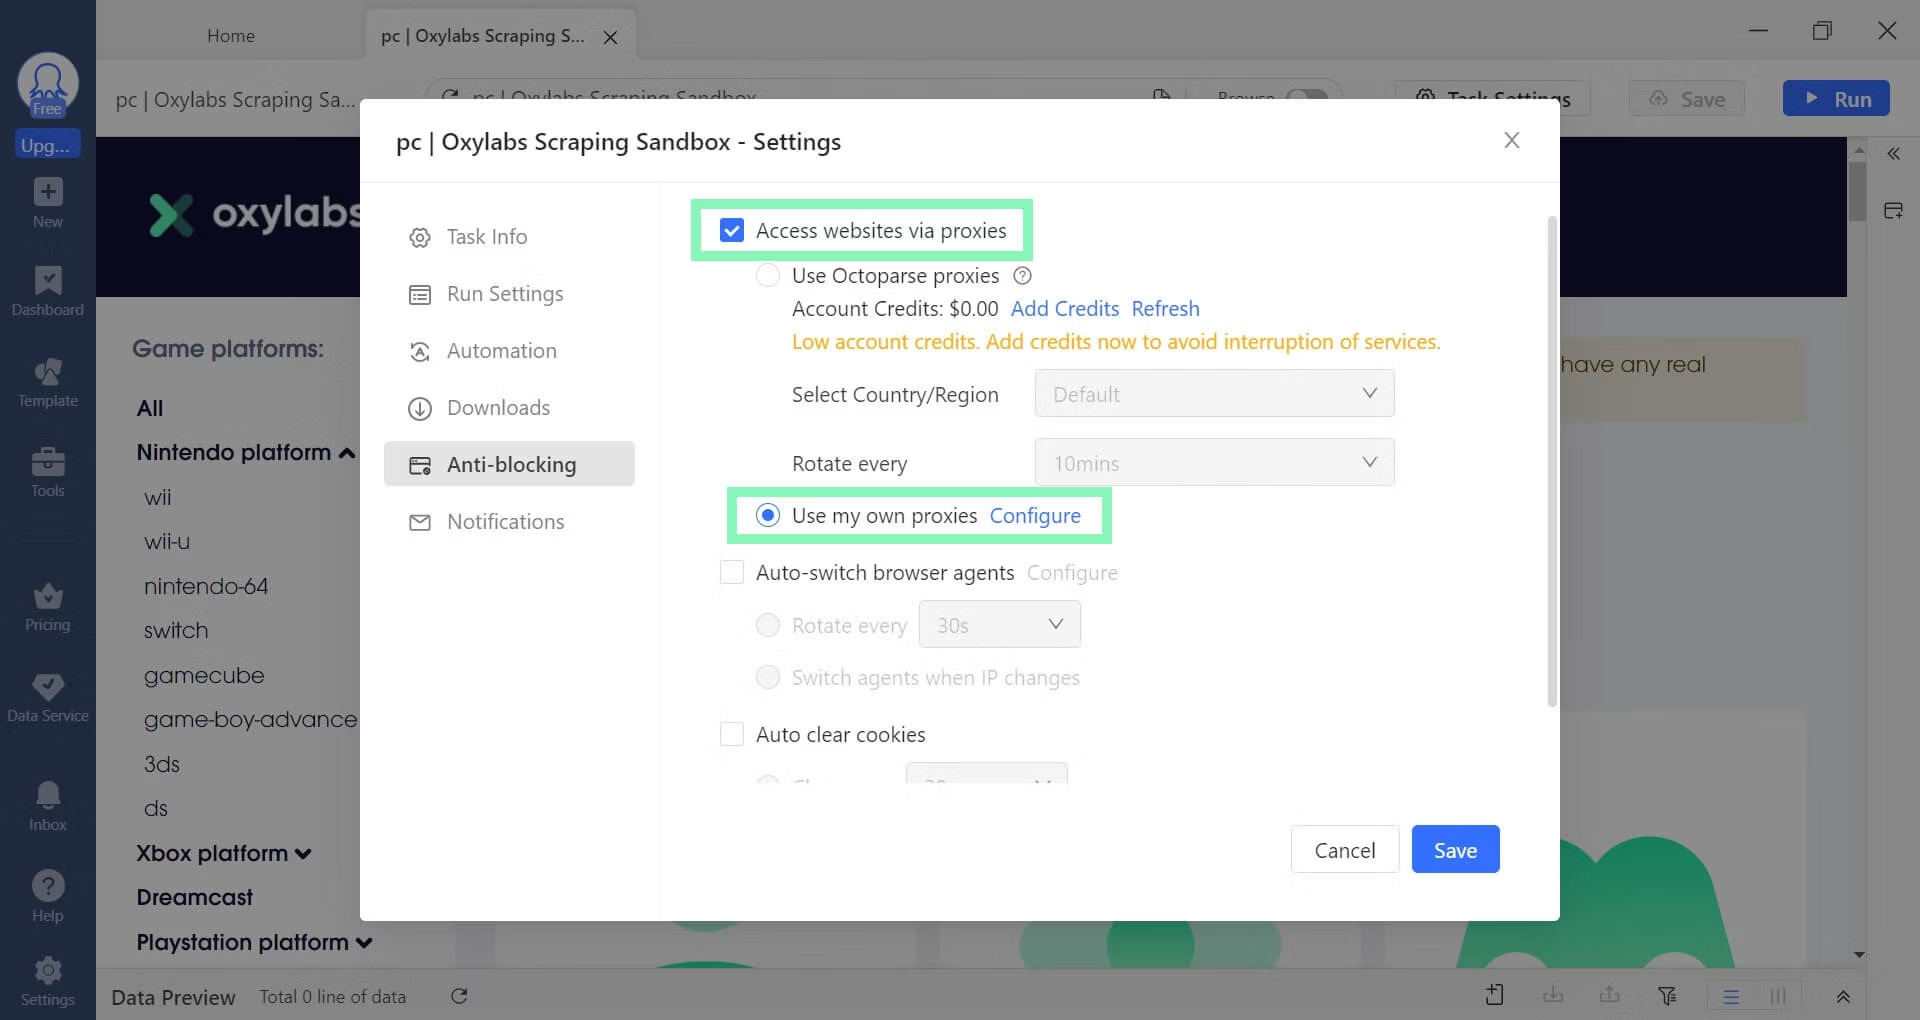
Now, check **Access websites via proxies**, enable **Use my own proxies,** and click **Configure**.
### **Step 6**
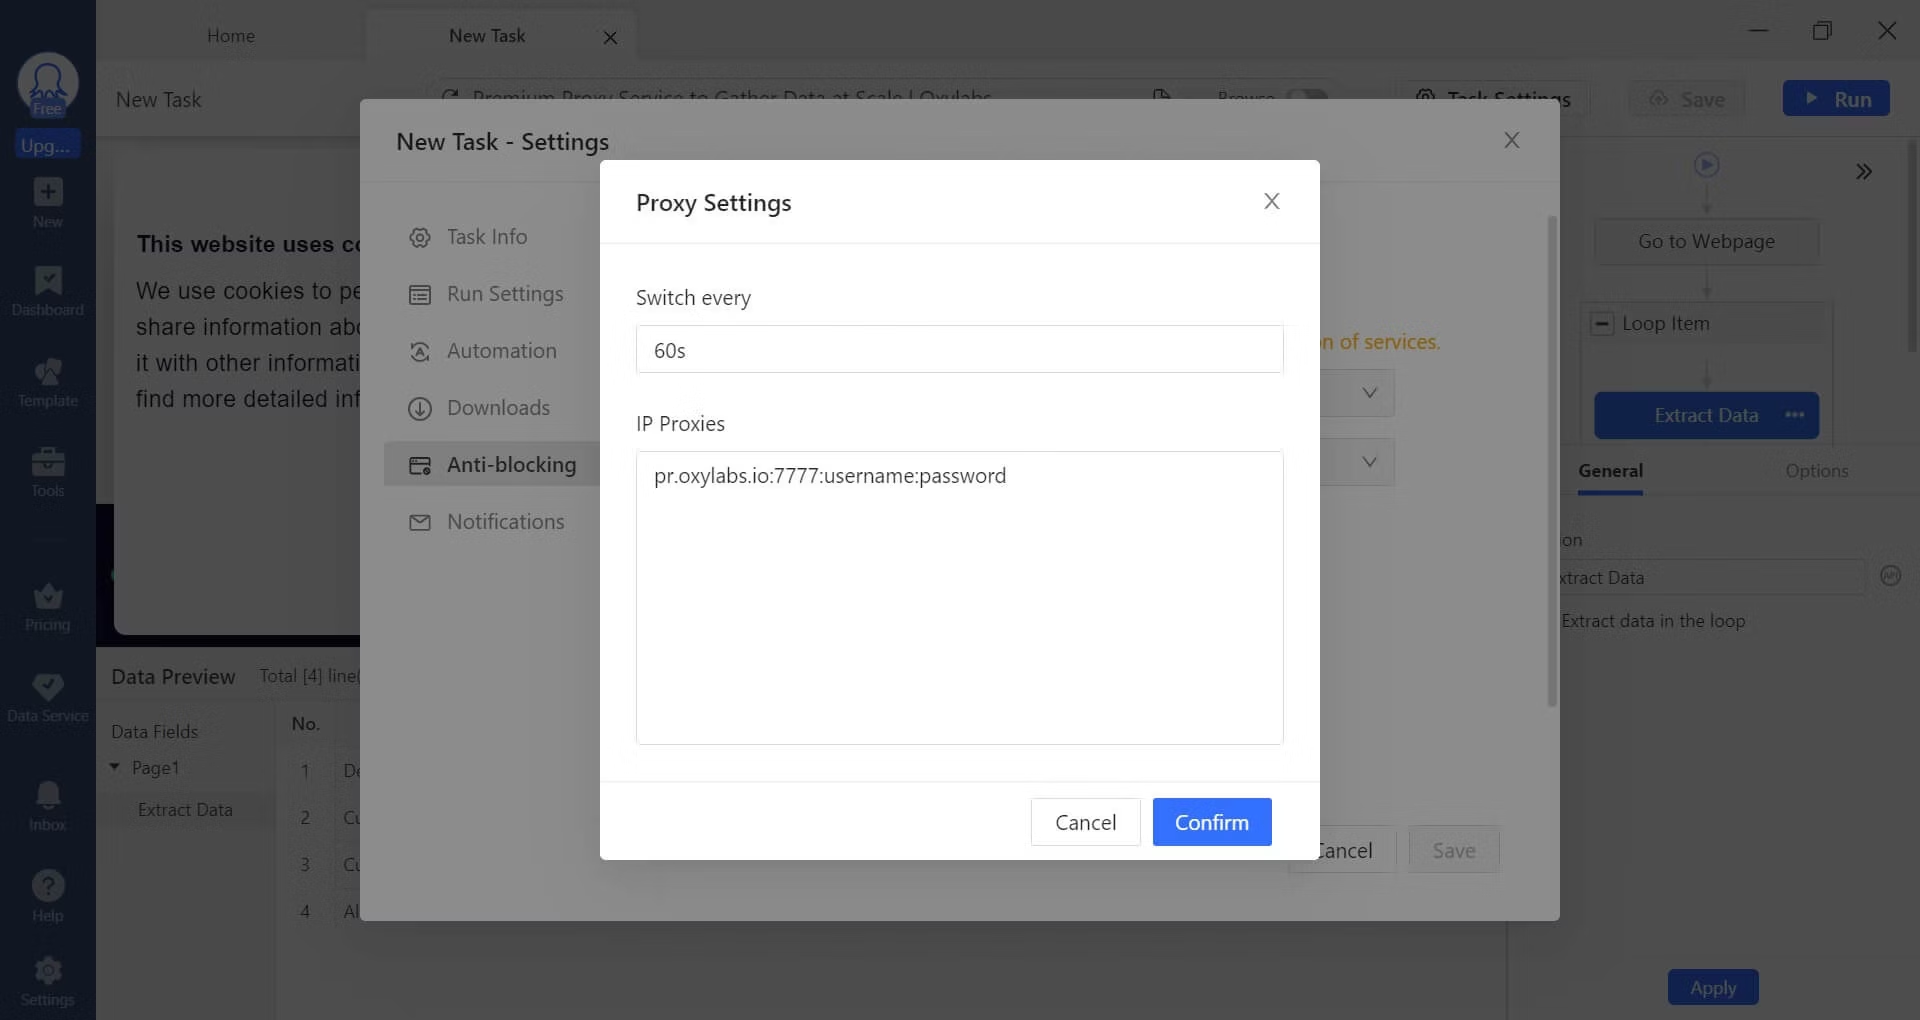
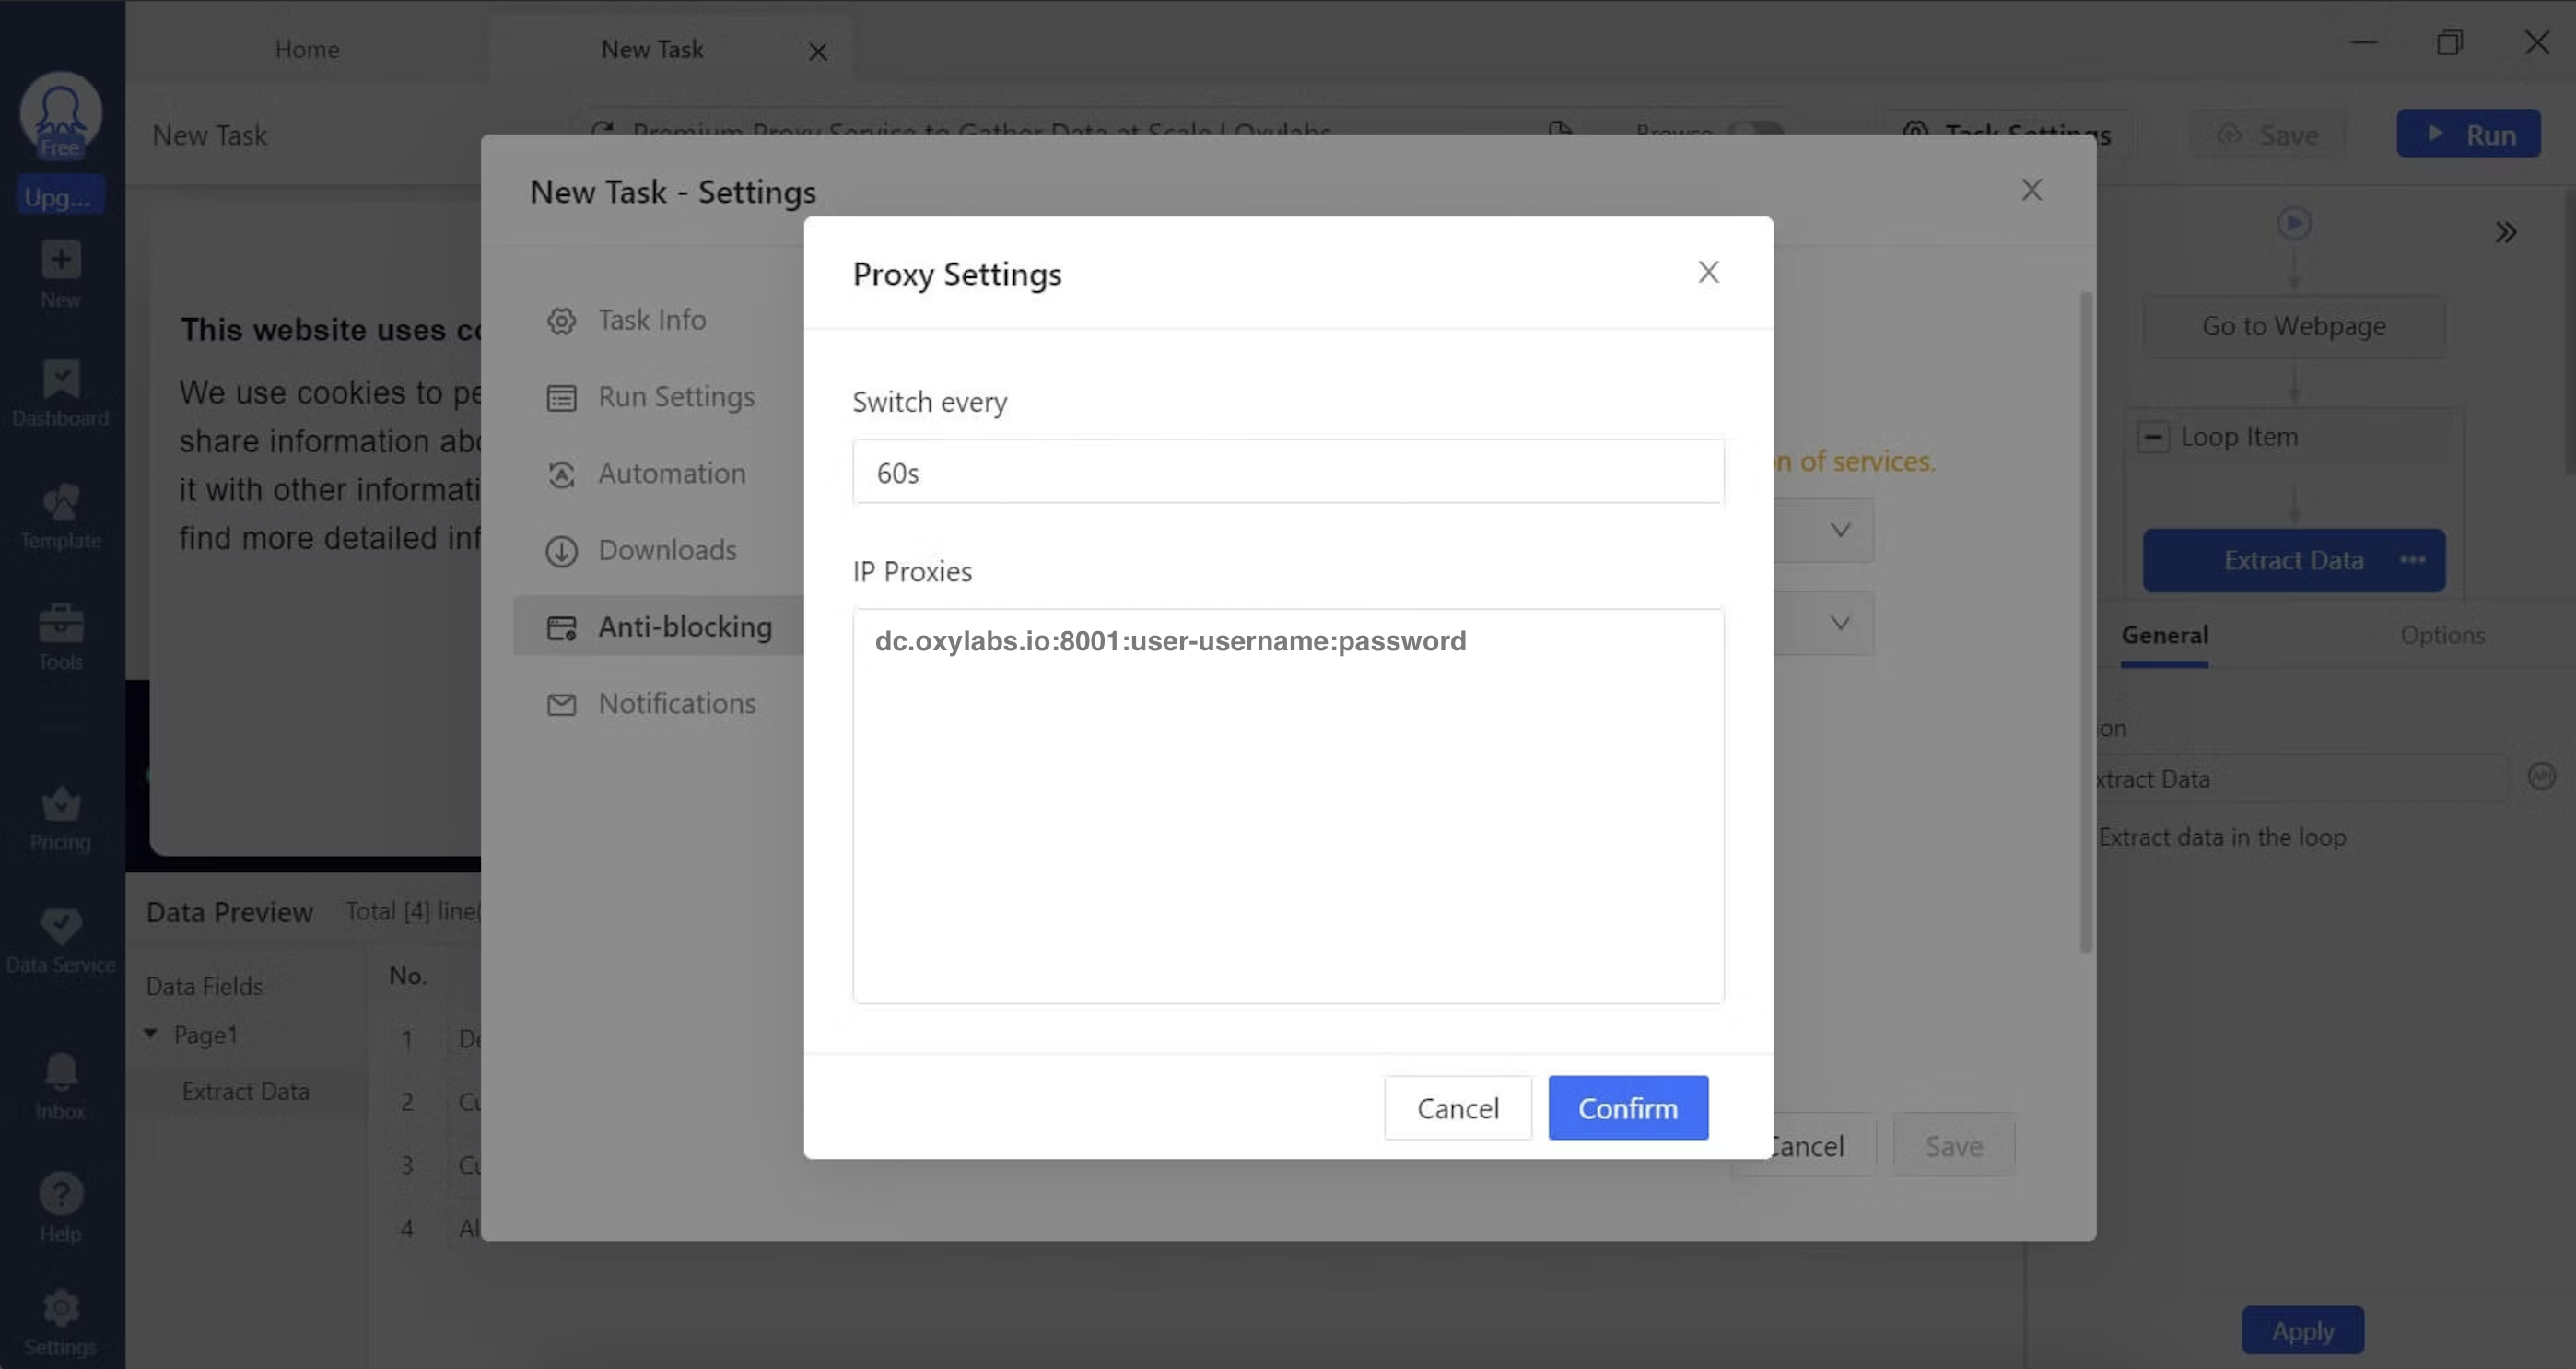
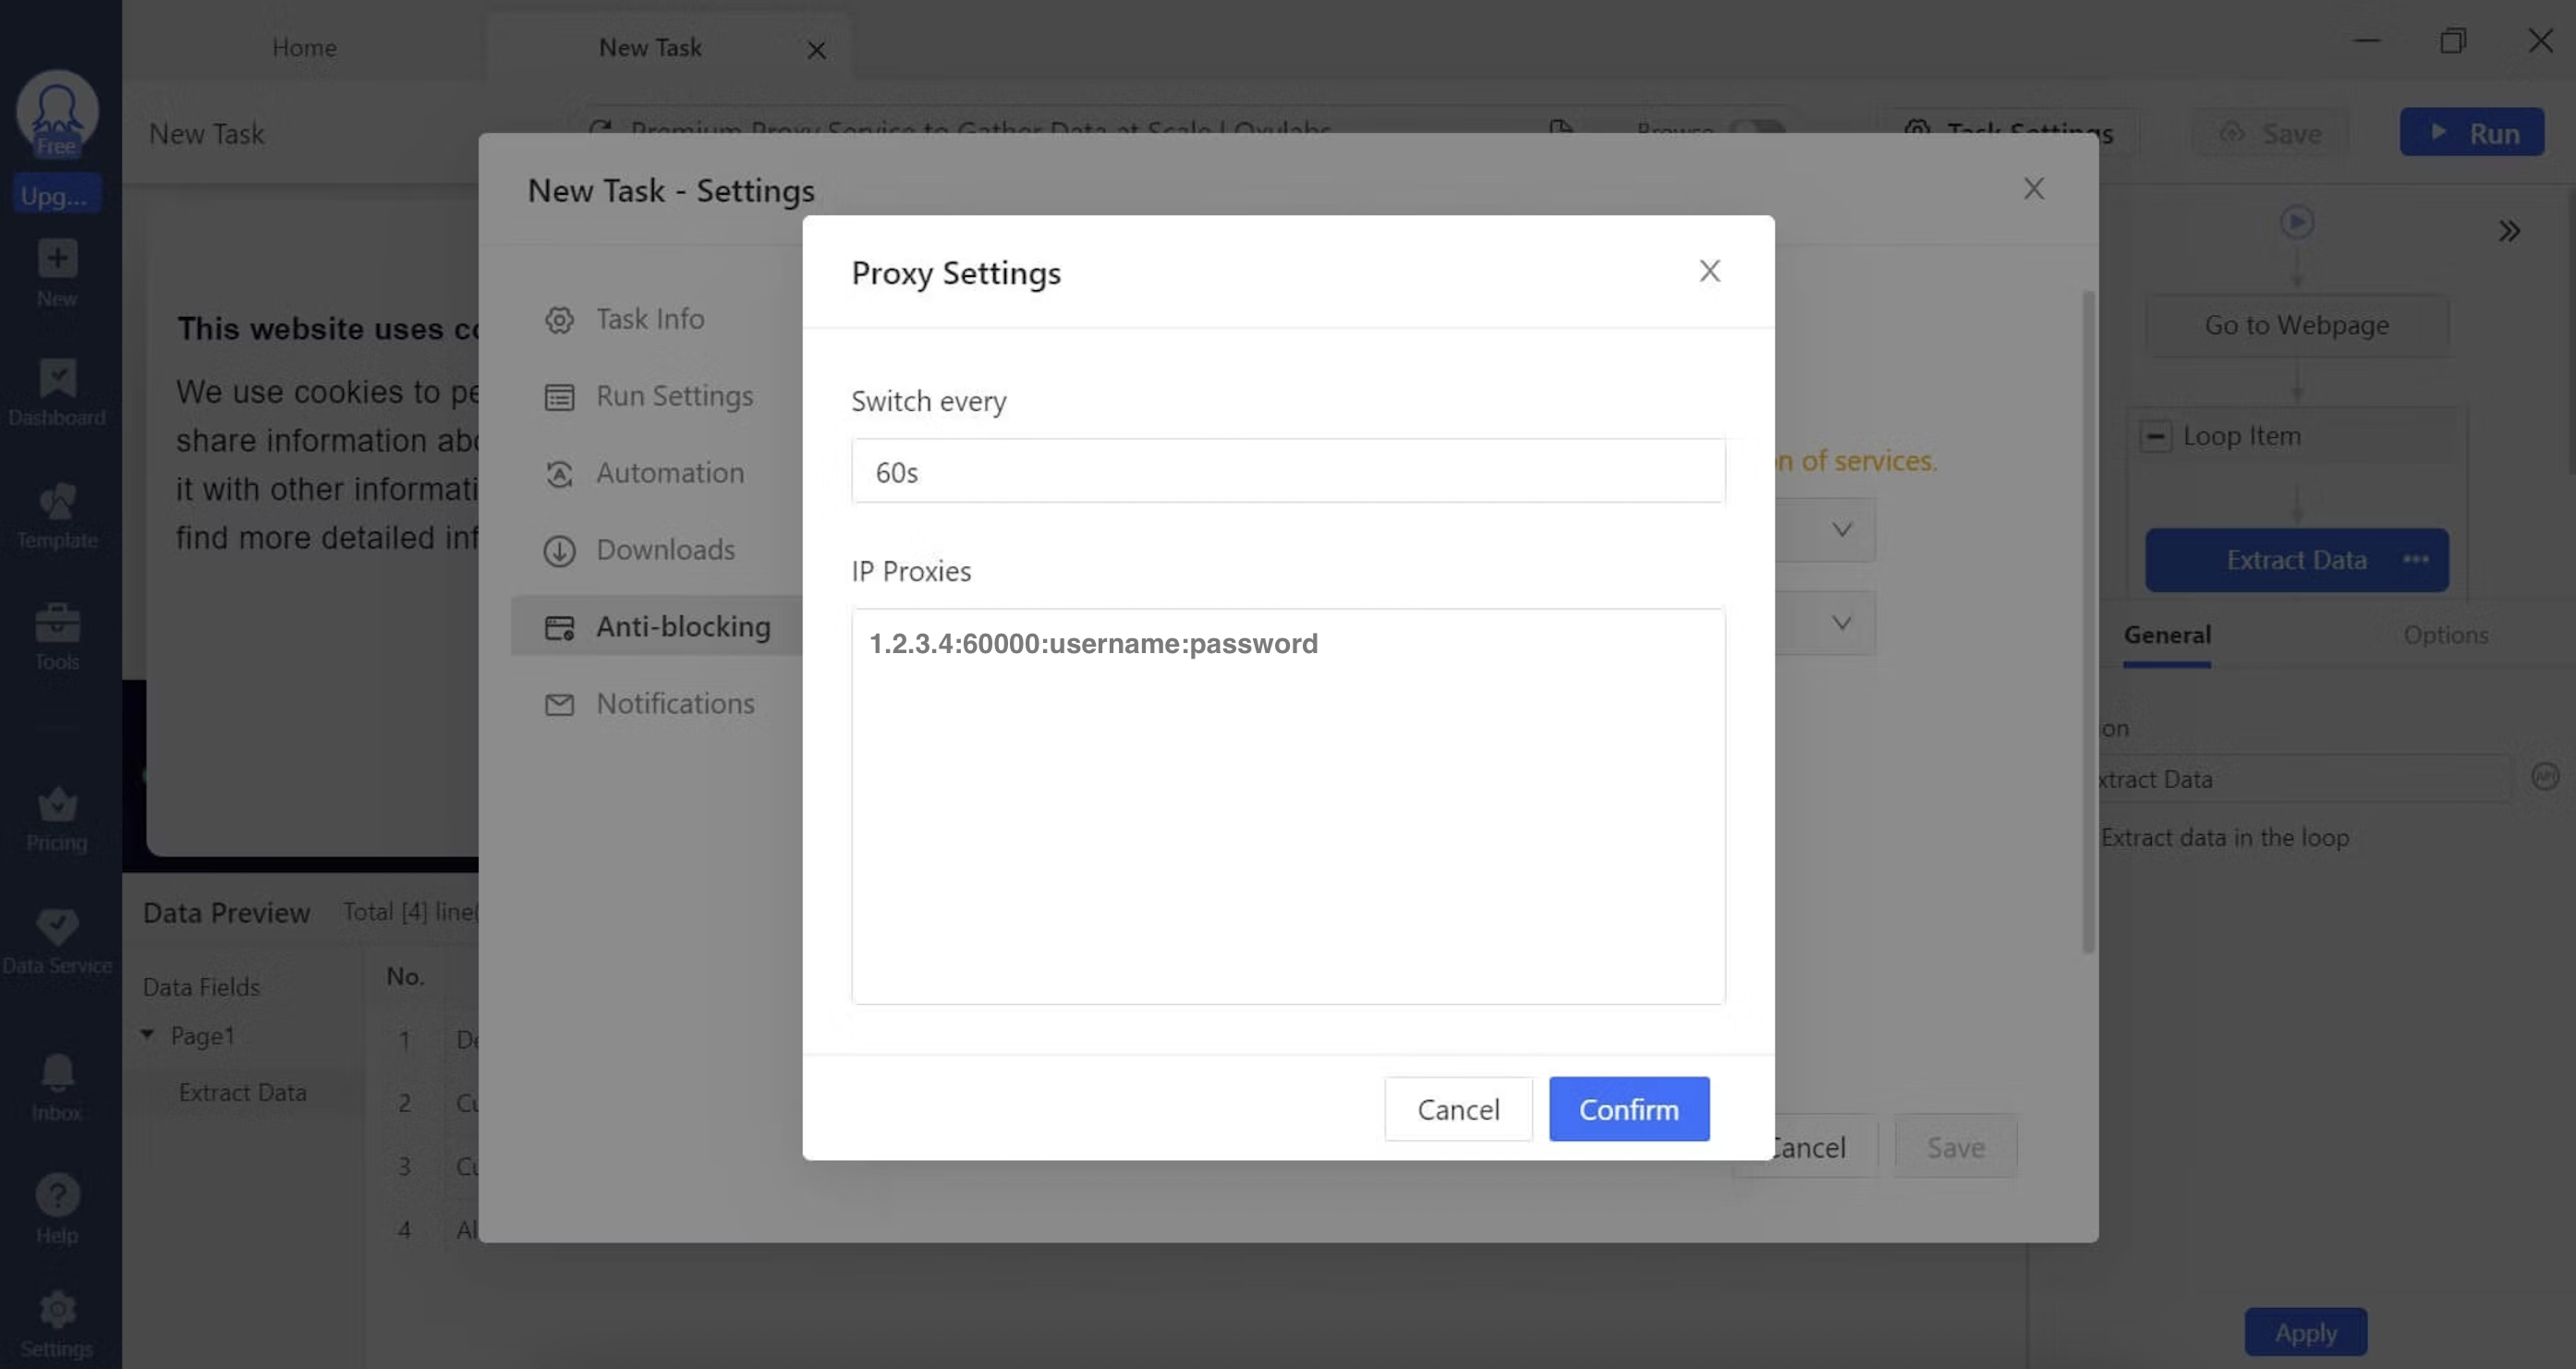
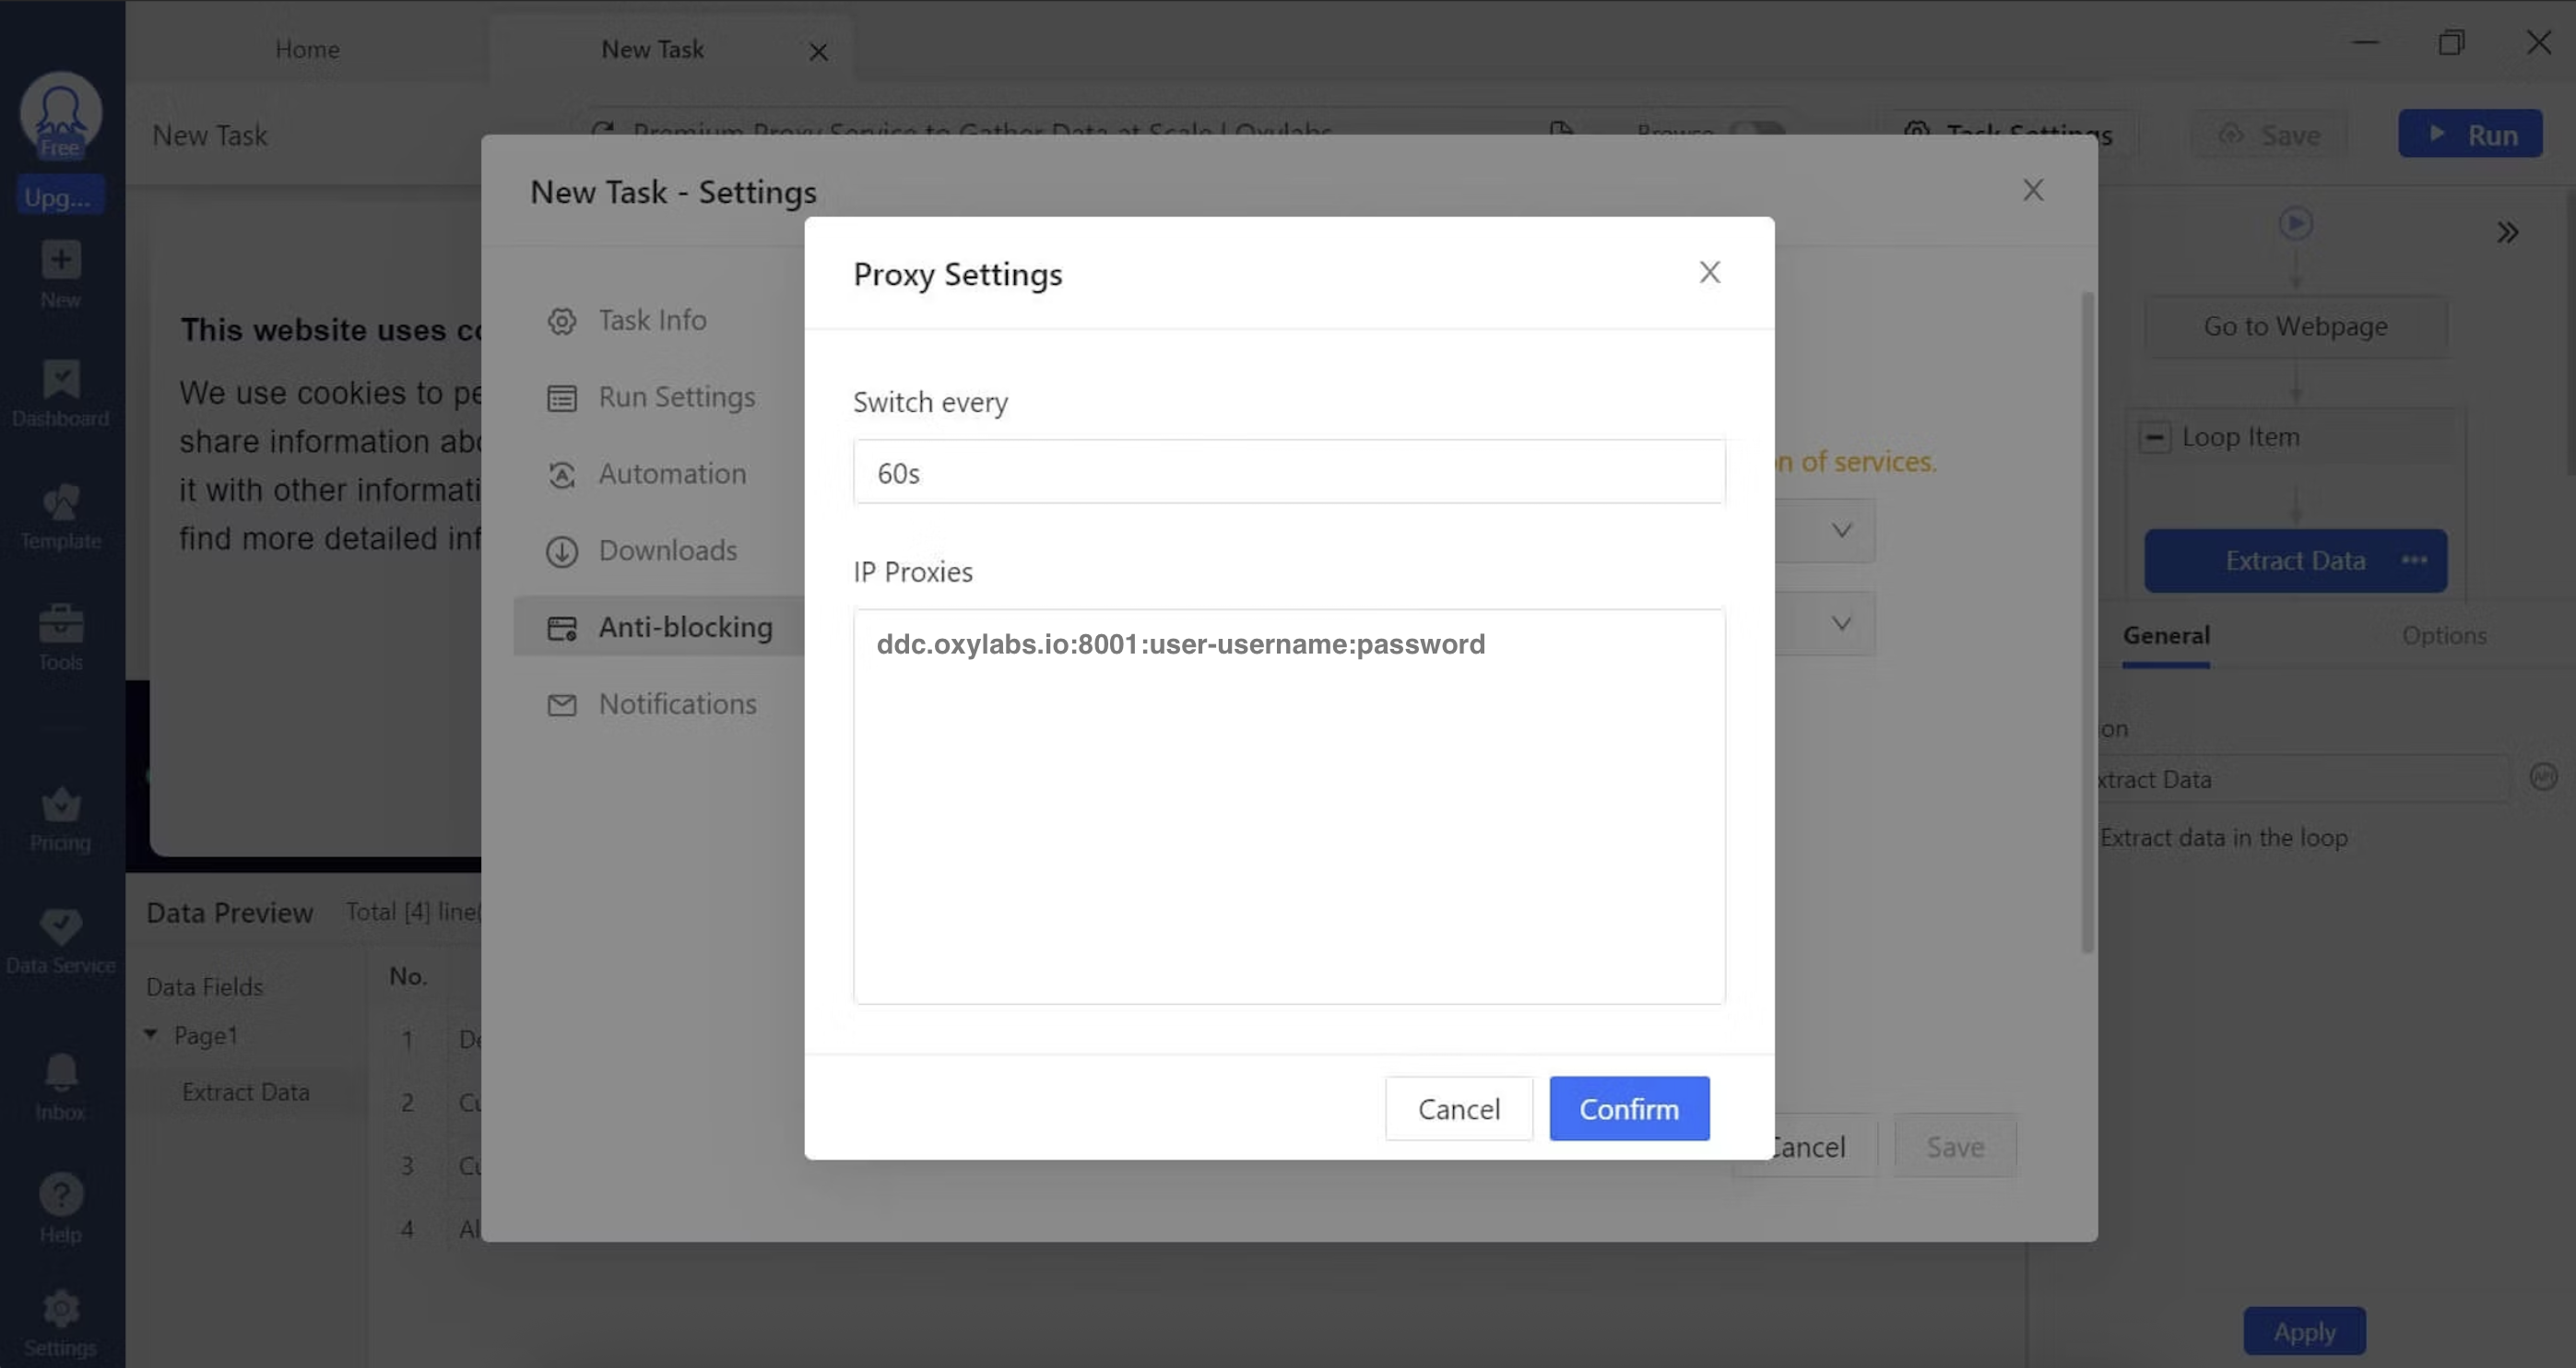
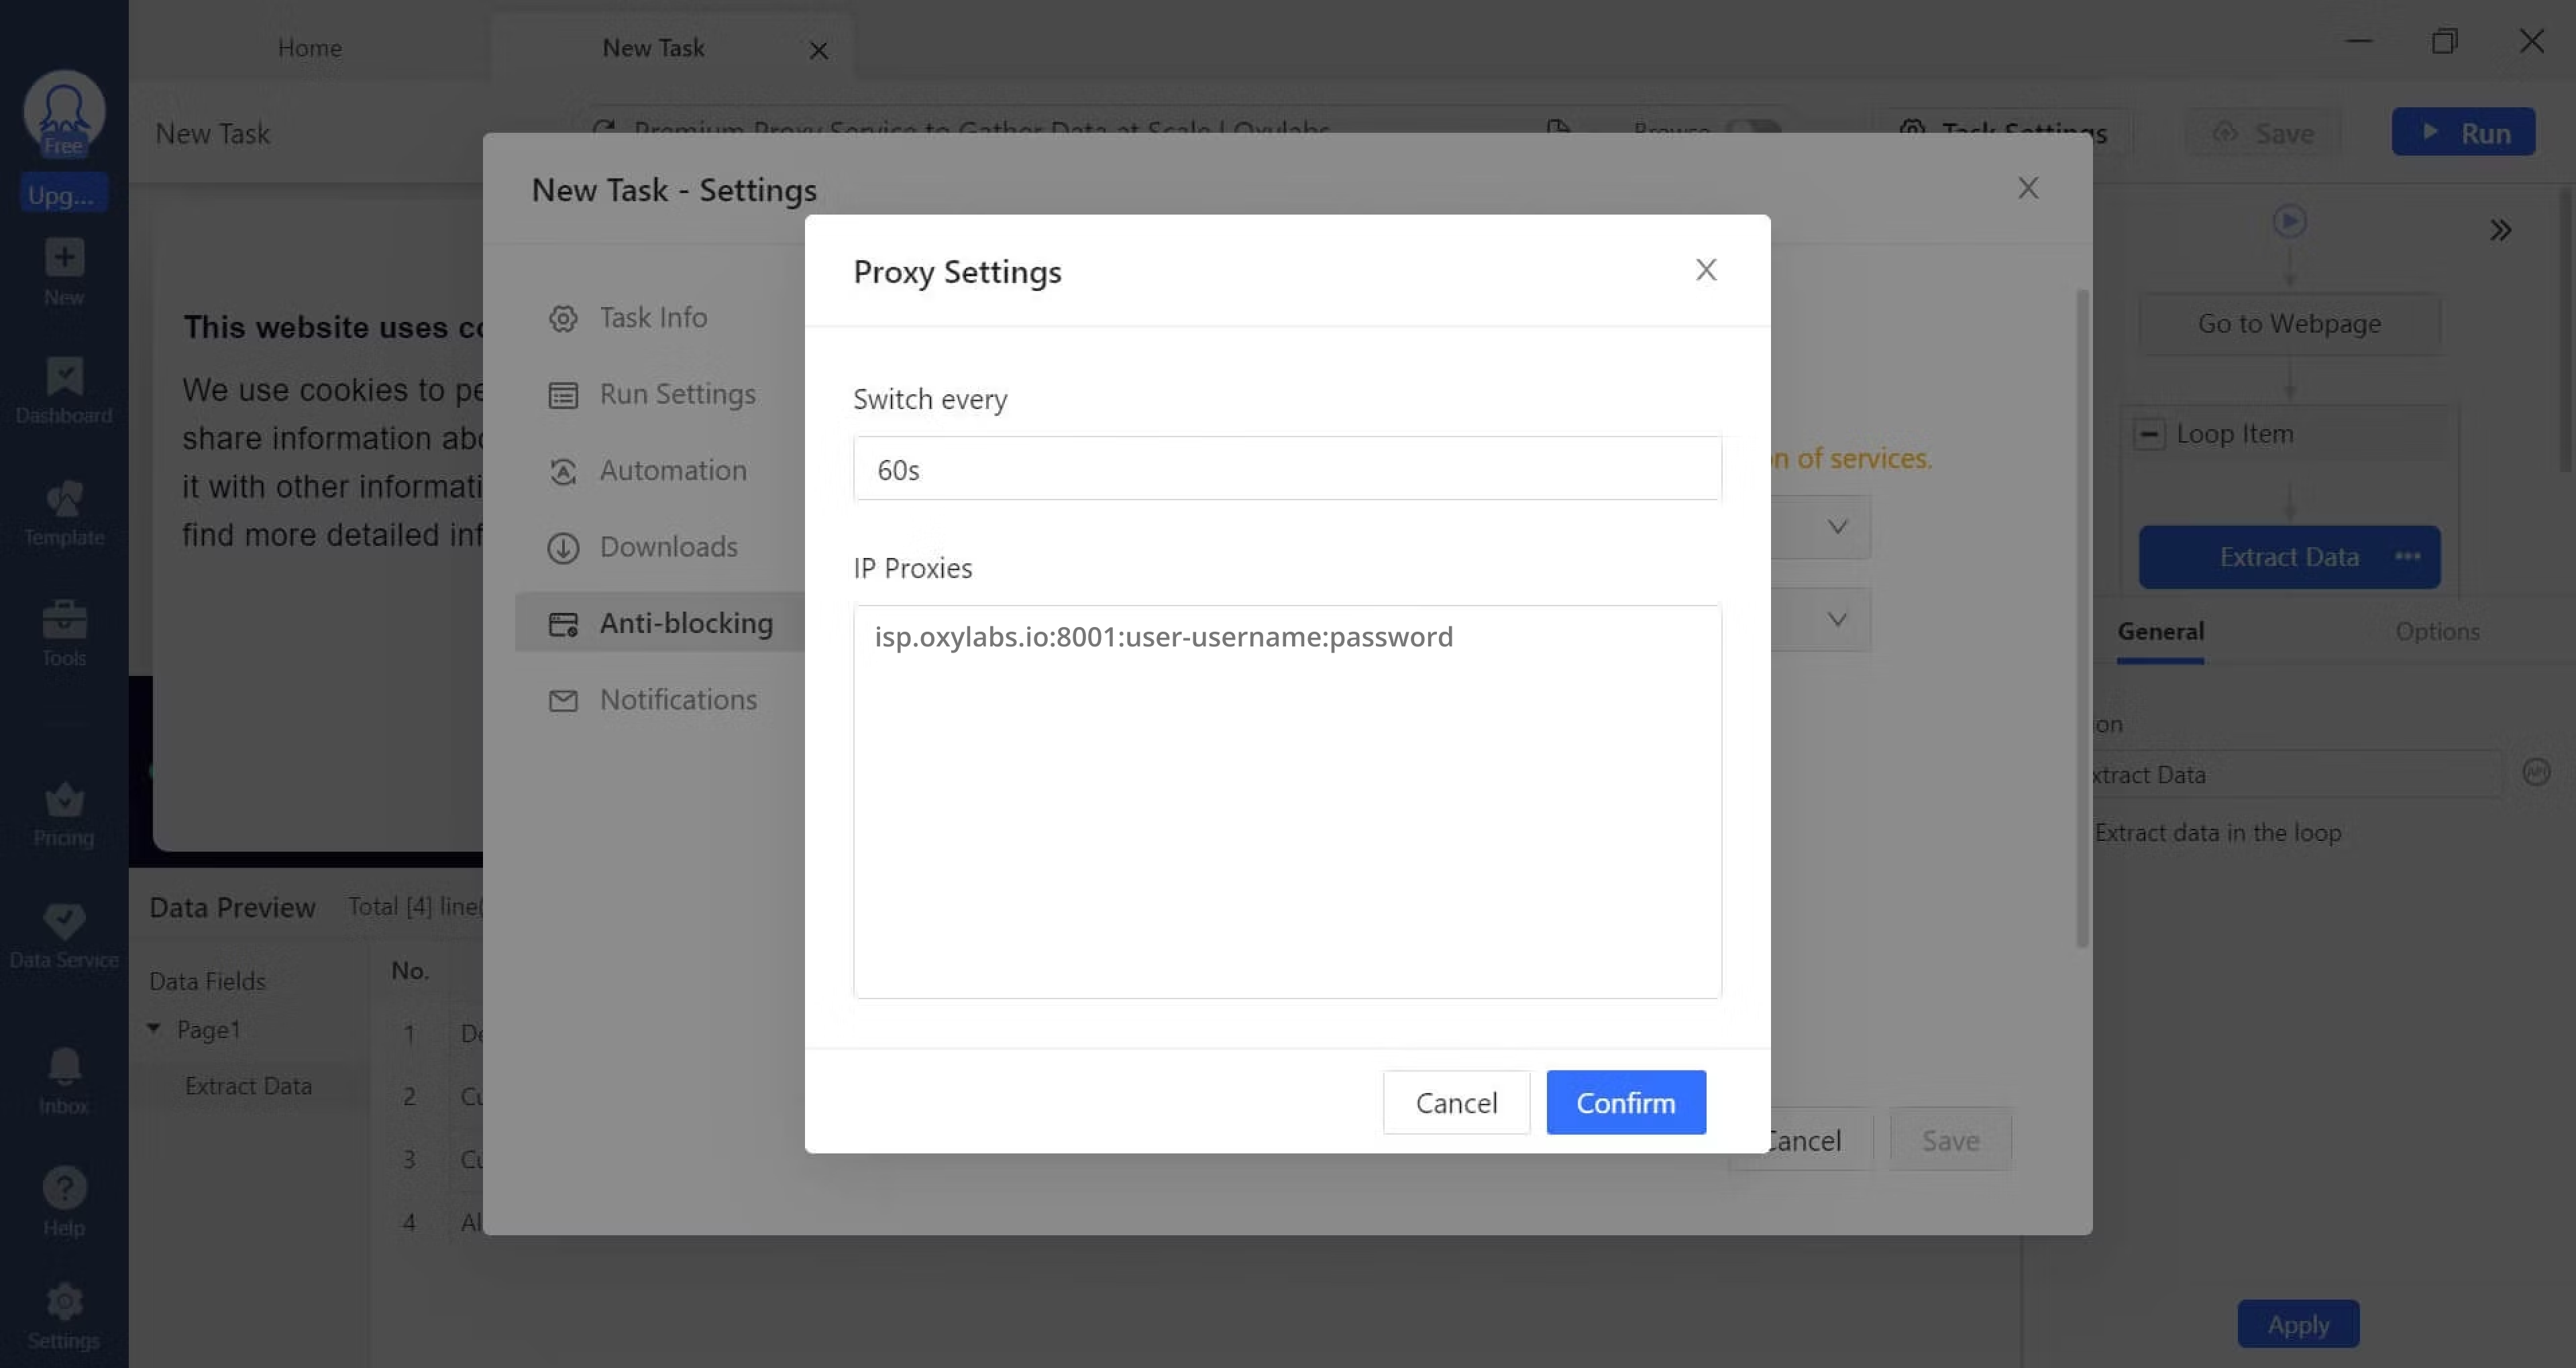
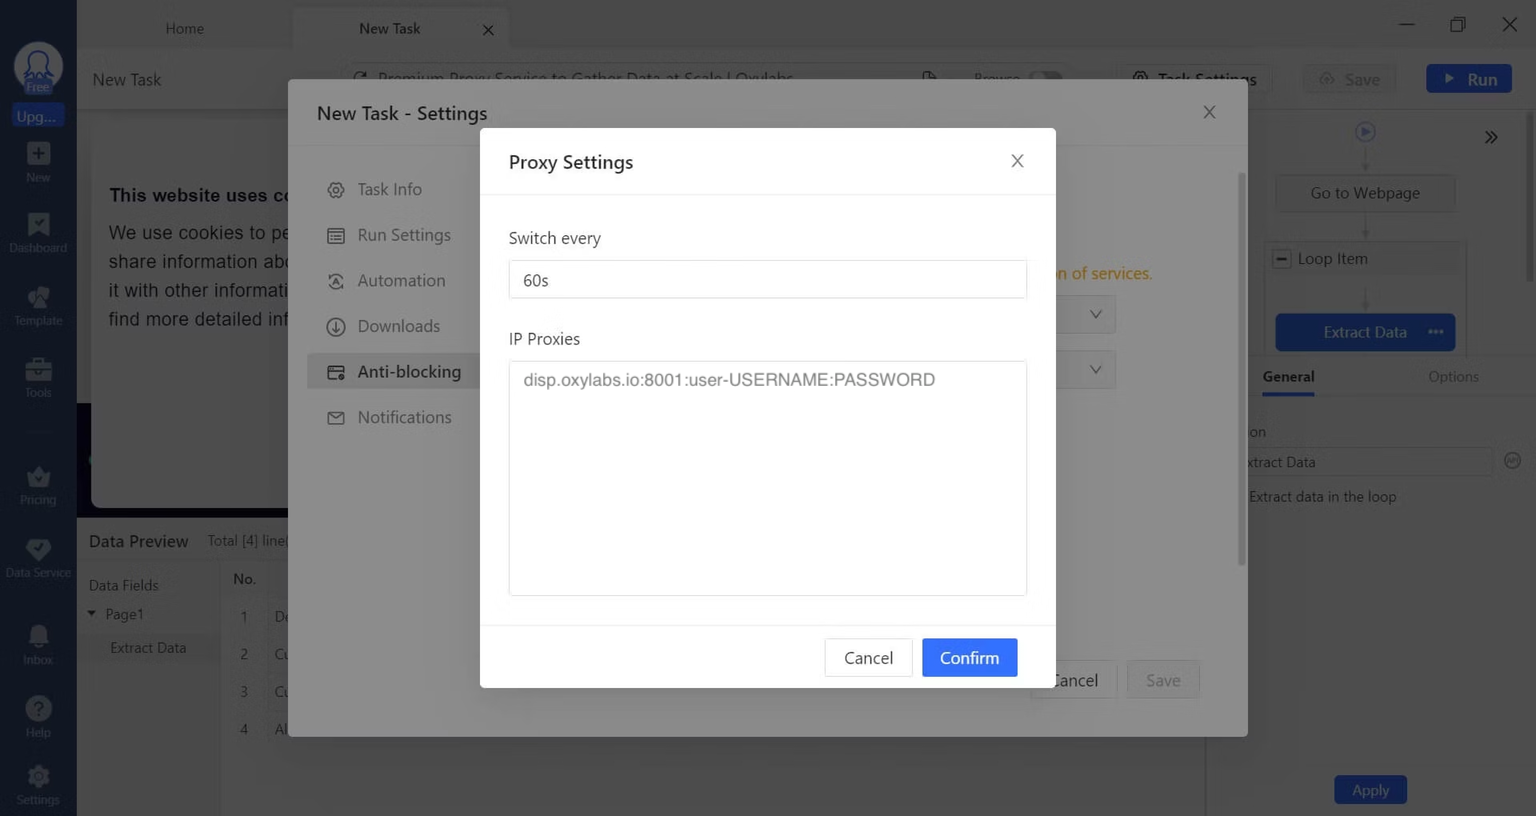
When you click on the **Configure** button, a pop-up window will appear. Specify your chosen proxy details in the `IP/host:port:username:password` format:
* [Residential & Mobile Proxies](#residential-and-mobile-proxies)
* [Datacenter Proxies](#datacenter-proxies)
* [Dedicated Datacenter Proxies (Enterprise)](#dedicated-datacenter-proxies-enterprise)
* [Dedicated Datacenter Proxies (Self-service)](#dedicated-datacenter-proxies-self-service)
* [ISP Proxies](#isp-proxies)
* [Dedicated ISP Proxies](#dedicated-isp-proxies)
#### Residential & Mobile Proxies
**IP/host:** `pr.oxylabs.io`
**Port:** `7777`
**Username:** `customer-username`
**Password:** `password`
{% hint style="warning" %}
Don't forget to add the `customer-` part to your username.
{% endhint %}
{% hint style="info" %}
You can also use country-specific entries to acquire a desired country exit node with a sticky session. For example, to use a US exit node, enter `us-pr.oxylabs.io` next to **Host or IP Address** and `10001` next to **Port**. You can find a complete list of location-specific information in our [documentation](/products/proxies/residential-proxies/location-settings.md).
{% endhint %}
#### Datacenter Proxies
**IP/host:** `dc.oxylabs.io`
**Port:** `8001`
**Username:** `user-username`
**Password:** `password`
{% hint style="info" %}
Don't forget to add the `user-` prefix to the username.
{% endhint %}
For the **Pay-per-IP** subscription, the port is the sequential number assigned to an IP address from the given list. Thus, port `8001` uses the first IP address from your list.
For the **Pay-per-traffic** subscription, port `8001` picks a random IP address but stays consistent during a session.
{% hint style="info" %}
You can also specify geo-location, for example, the US, within the user authentication string: `user-USERNAME-country-US:PASSWORD`. See our [documentation](/products/proxies/datacenter-proxies.md) for more details.
{% endhint %}
#### Dedicated Datacenter Proxies (Enterprise)
**IP/host:** a specific IP address (e.g., `1.2.3.4`)
**Port:** `60000`
**Username:** `username`
**Password:** `password`
{% hint style="info" %}
For Enterprise Dedicated Datacenter Proxies, you’ll have to choose an IP address from the [**acquired list**](/products/proxies/dedicated-datacenter-proxies/enterprise/proxy-lists.md).
{% endhint %}
#### Dedicated Datacenter Proxies (Self-service)
**IP/host:** `ddc.oxylabs.io`
**Port:** `8001`
**Username:** `user-username`
**Password:** `password`
{% hint style="warning" %}
Don't forget to add the `user-` part to your username.
{% endhint %}
{% hint style="info" %}
You will need to choose a port that's assigned to an IP address from the purchased [**proxy list**](/products/proxies/dedicated-datacenter-proxies/self-service/proxy-list.md)**,** that you can find in Oxylabs dashboard.
{% endhint %}
#### ISP Proxies
**IP/host:** `isp.oxylabs.io`
**Port:** `8001`
**Username:** `user-username`
**Password:** `password`
{% hint style="warning" %}
Don't forget to add the `user-` part to your username.
{% endhint %}
{% hint style="info" %}
You will need to choose the port assigned to an IP address from the purchased [**proxy list**](/products/proxies/isp-proxies/proxy-list.md)**,** which you can find on Oxylabs dashboard. The `8001` port will pick the first IP address from your list for all requests.
{% endhint %}
#### Dedicated ISP Proxies
**IP/host**: `disp.oxylabs.io`
**Port**: `8001`
**Username:** `user-USERNAME`
**Password:** `PASSWORD`
{% hint style="warning" %}
**Note:** don't forget to add the `user-` prefix to your username.
{% endhint %}
{% hint style="info" %}
The port number indicates which IP address from your acquired [proxy list](/products/proxies/dedicated-isp-proxies/self-service/proxy-list.md) will be used. Use port `8000` for automatic [proxy IP rotation](/products/proxies/dedicated-isp-proxies/self-service/proxy-rotation.md).
{% endhint %}
### **Step 7**
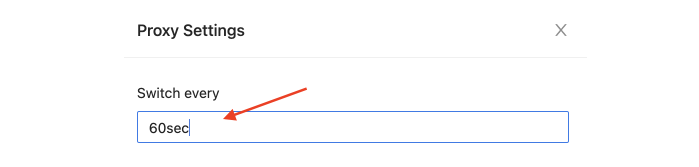
Set up the **Switch** interval depending on whether you use a rotating or sticky session type.
### **Step 8**
Save changes by clicking the **Confirm** button and after that, click **Save**.
Your proxies are now set up!
### How to start scraping using Octoparse
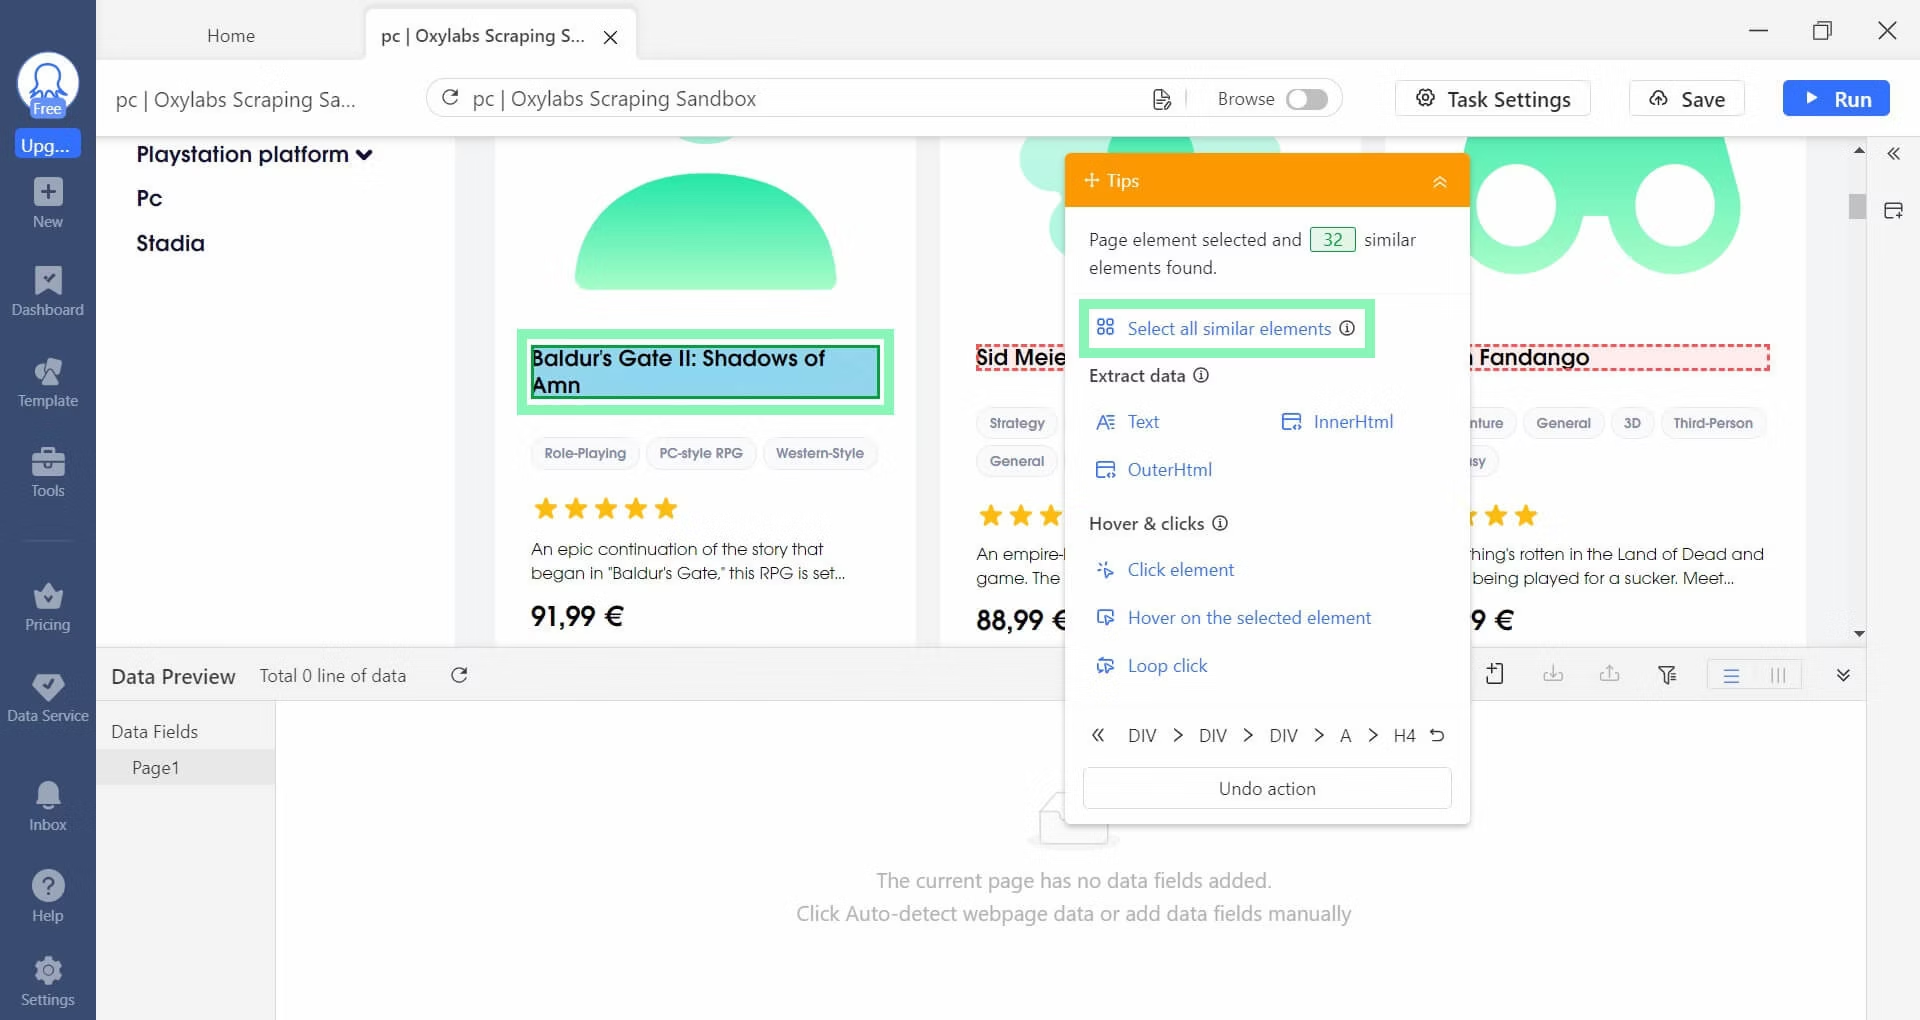
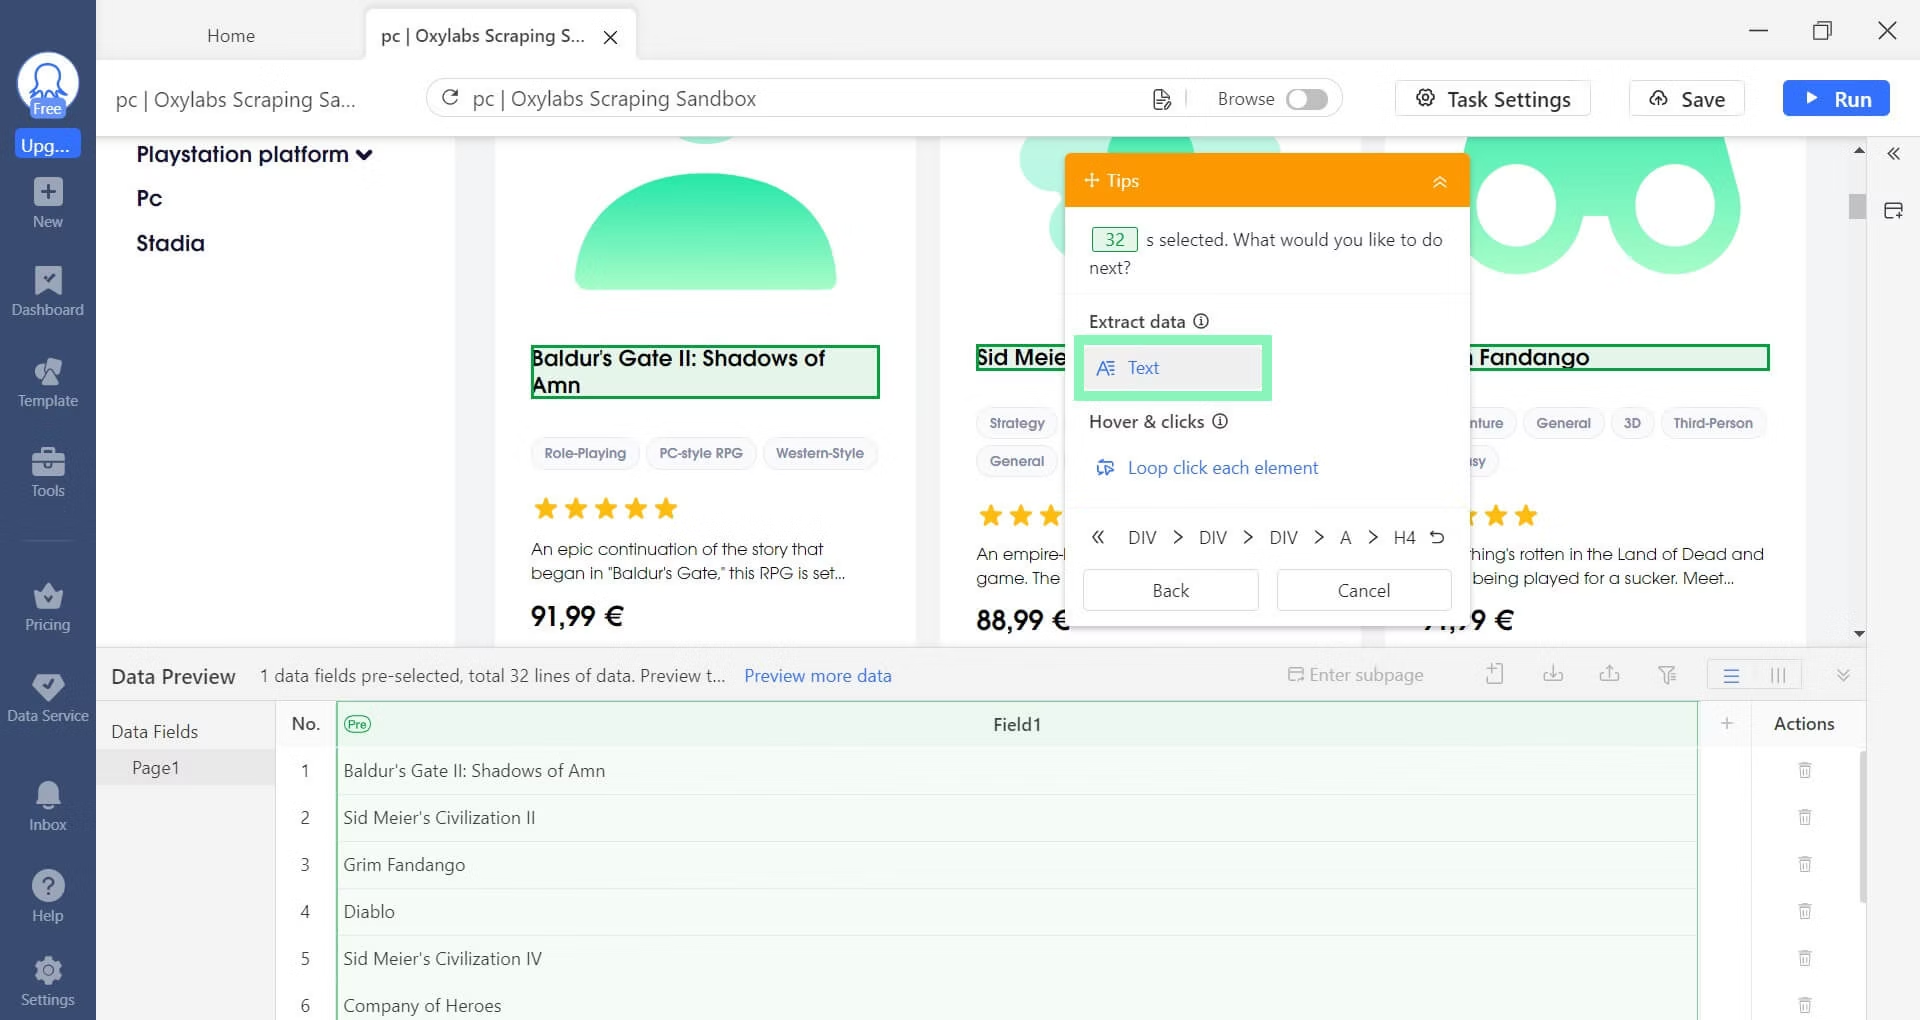
**Step 1.** Select the desirable elements (video game titles) you want to scrape. To extract all elements from the same category, choose **Select all similar elements** and specify **Text**.
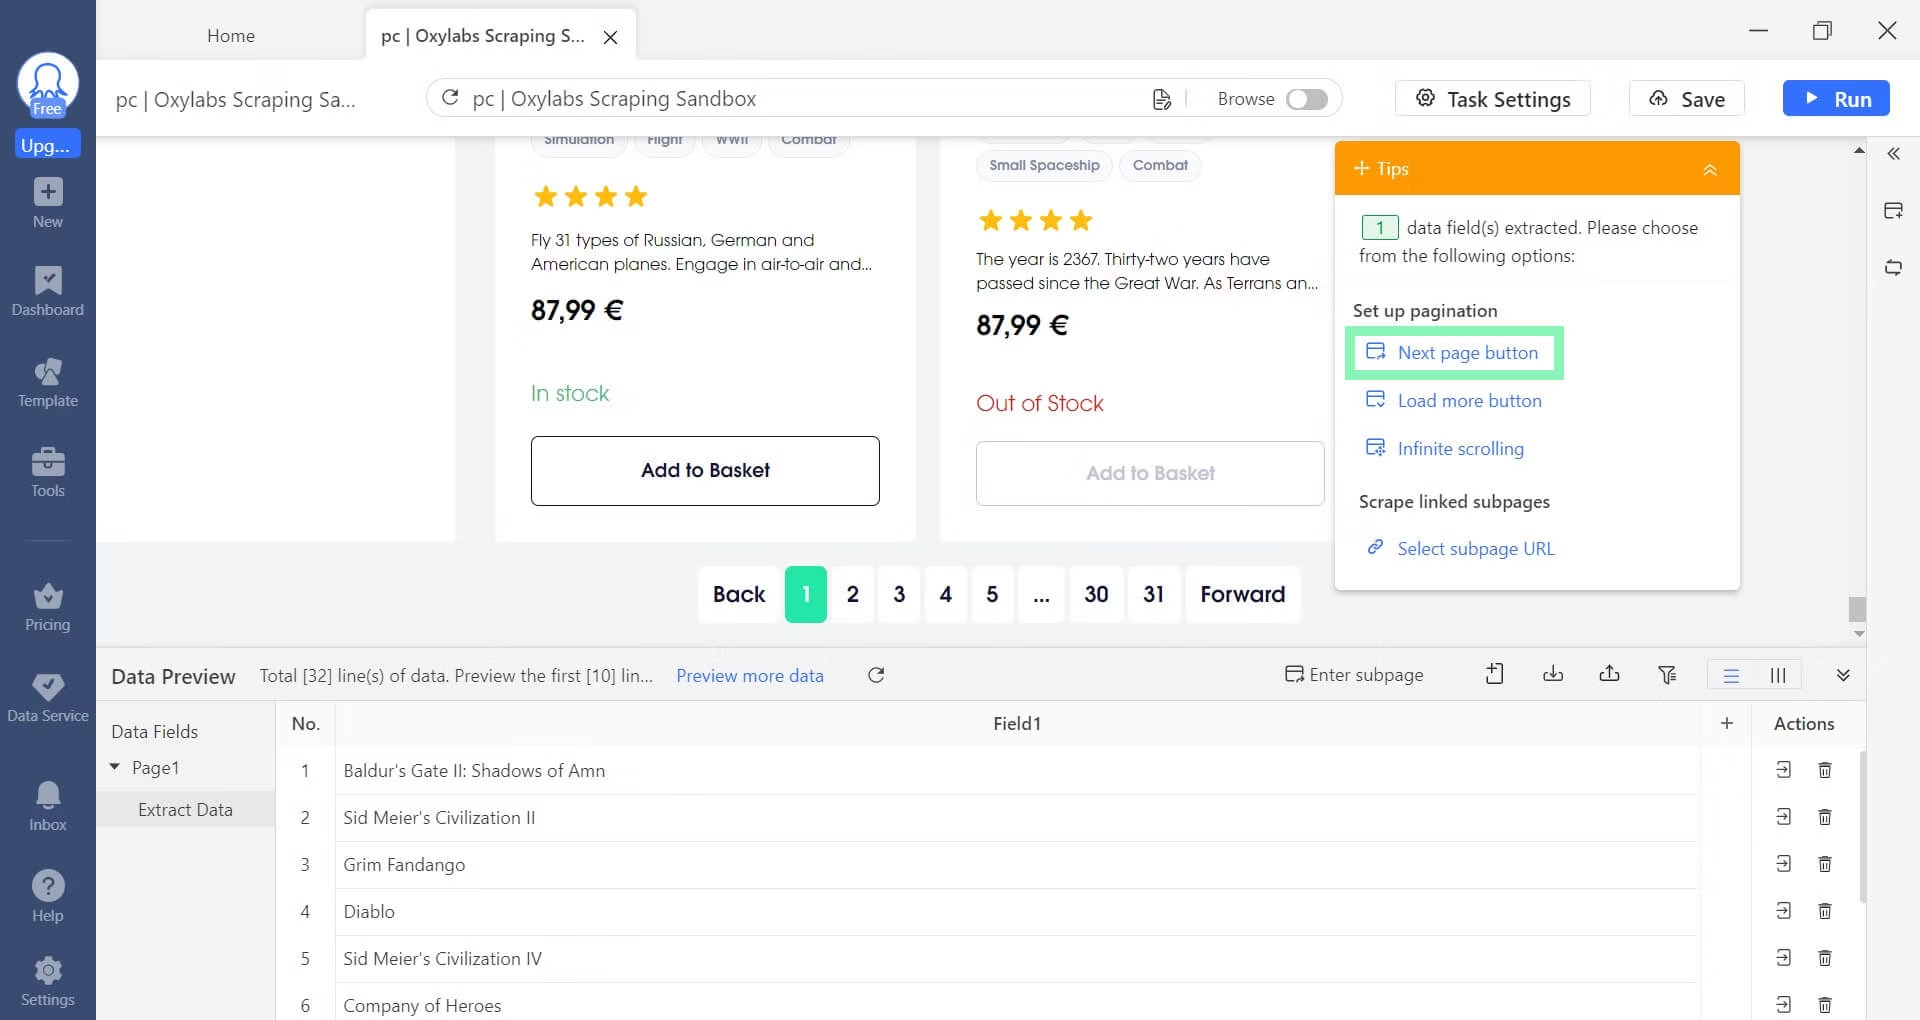
**Step 2.** Set up pagination to scrape multiple pages. This particular website uses numbered pages, prompting you to choose **Next page button**.
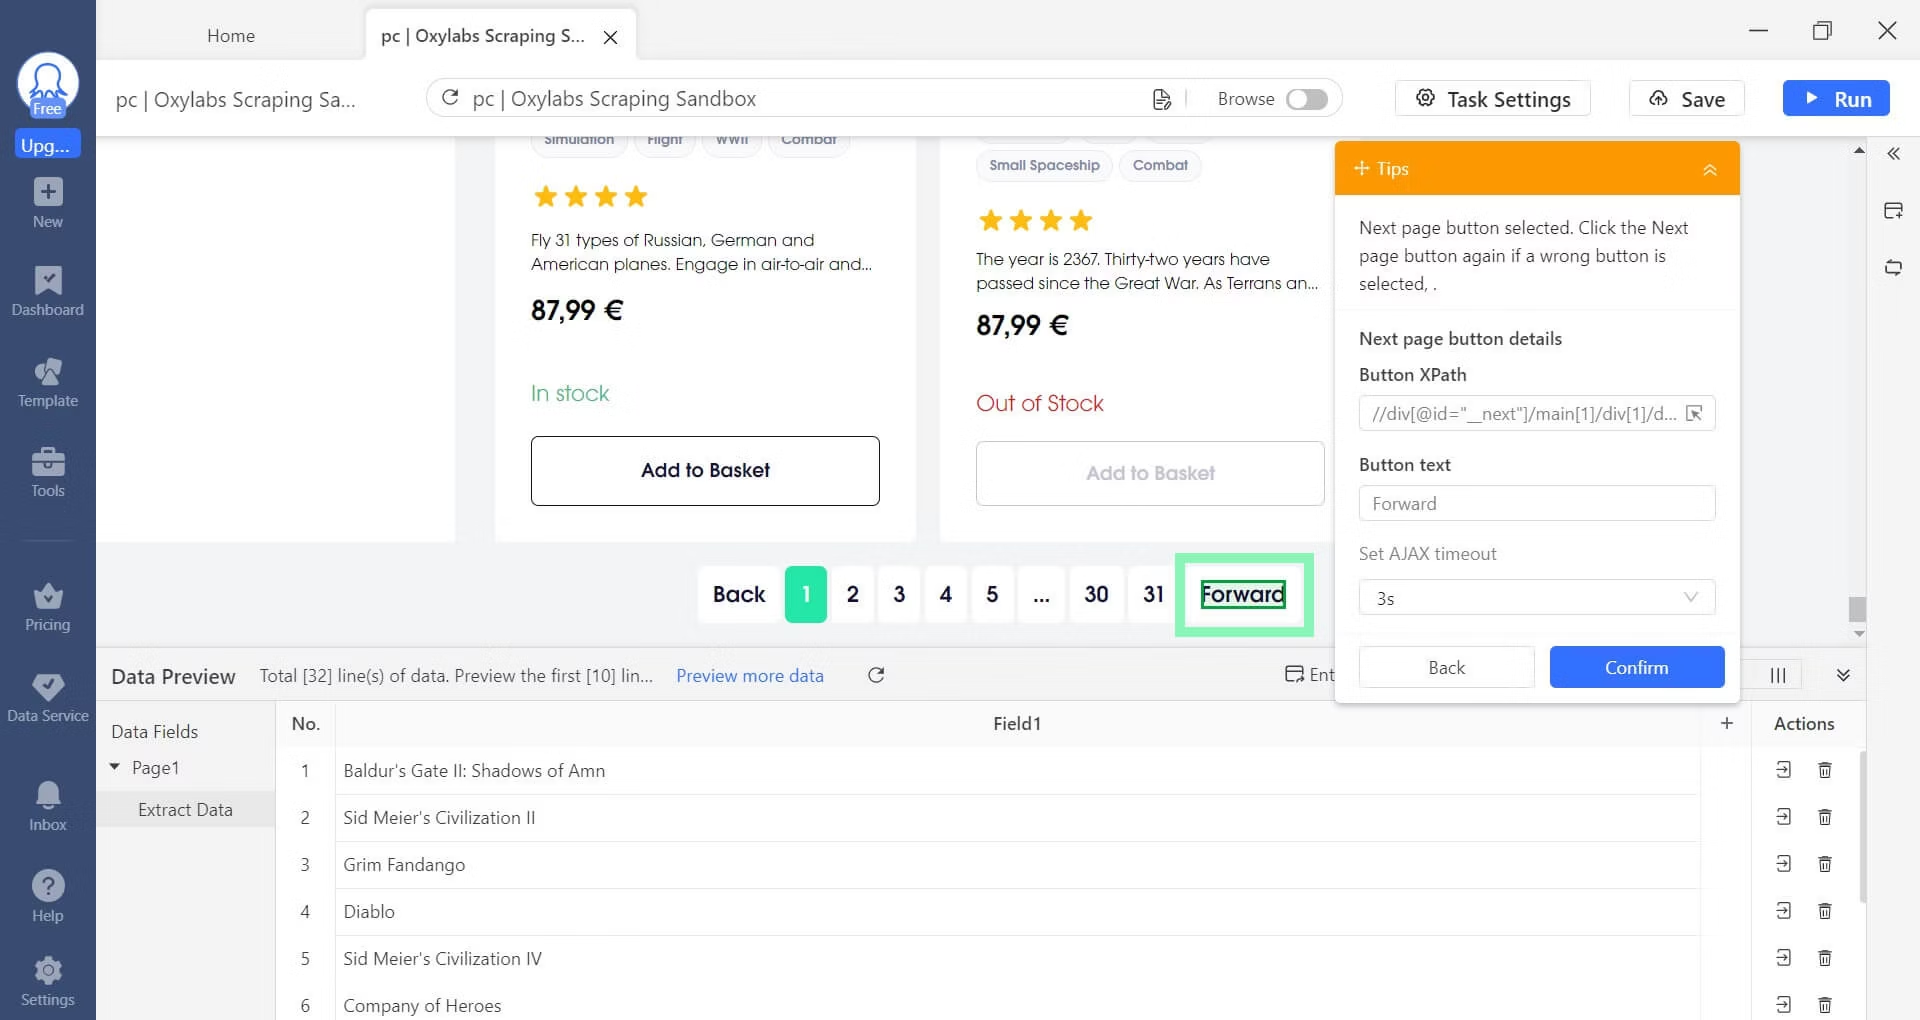
**Step 3.** Choose the exact button in the page layout that opens the following page – **Forward** – to automate pagination.
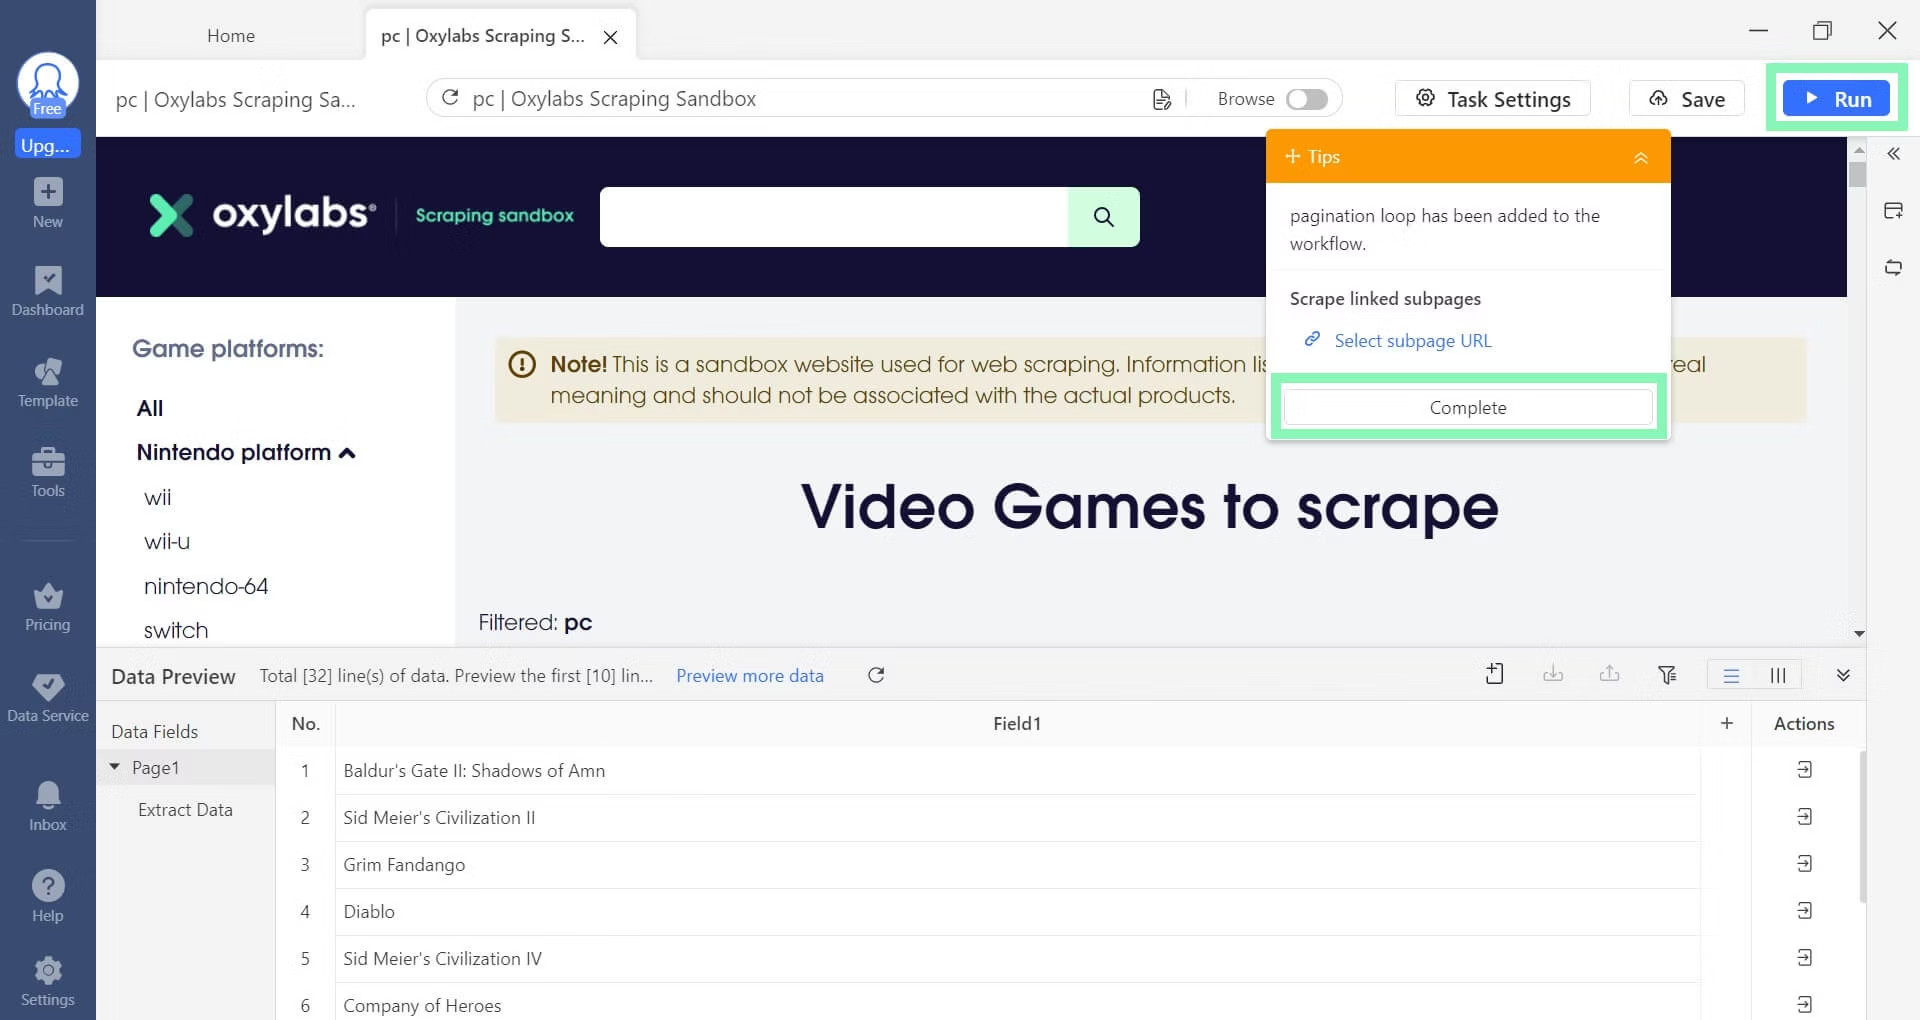
**Step 4.** Complete the scraping setup and press **▶Run**.
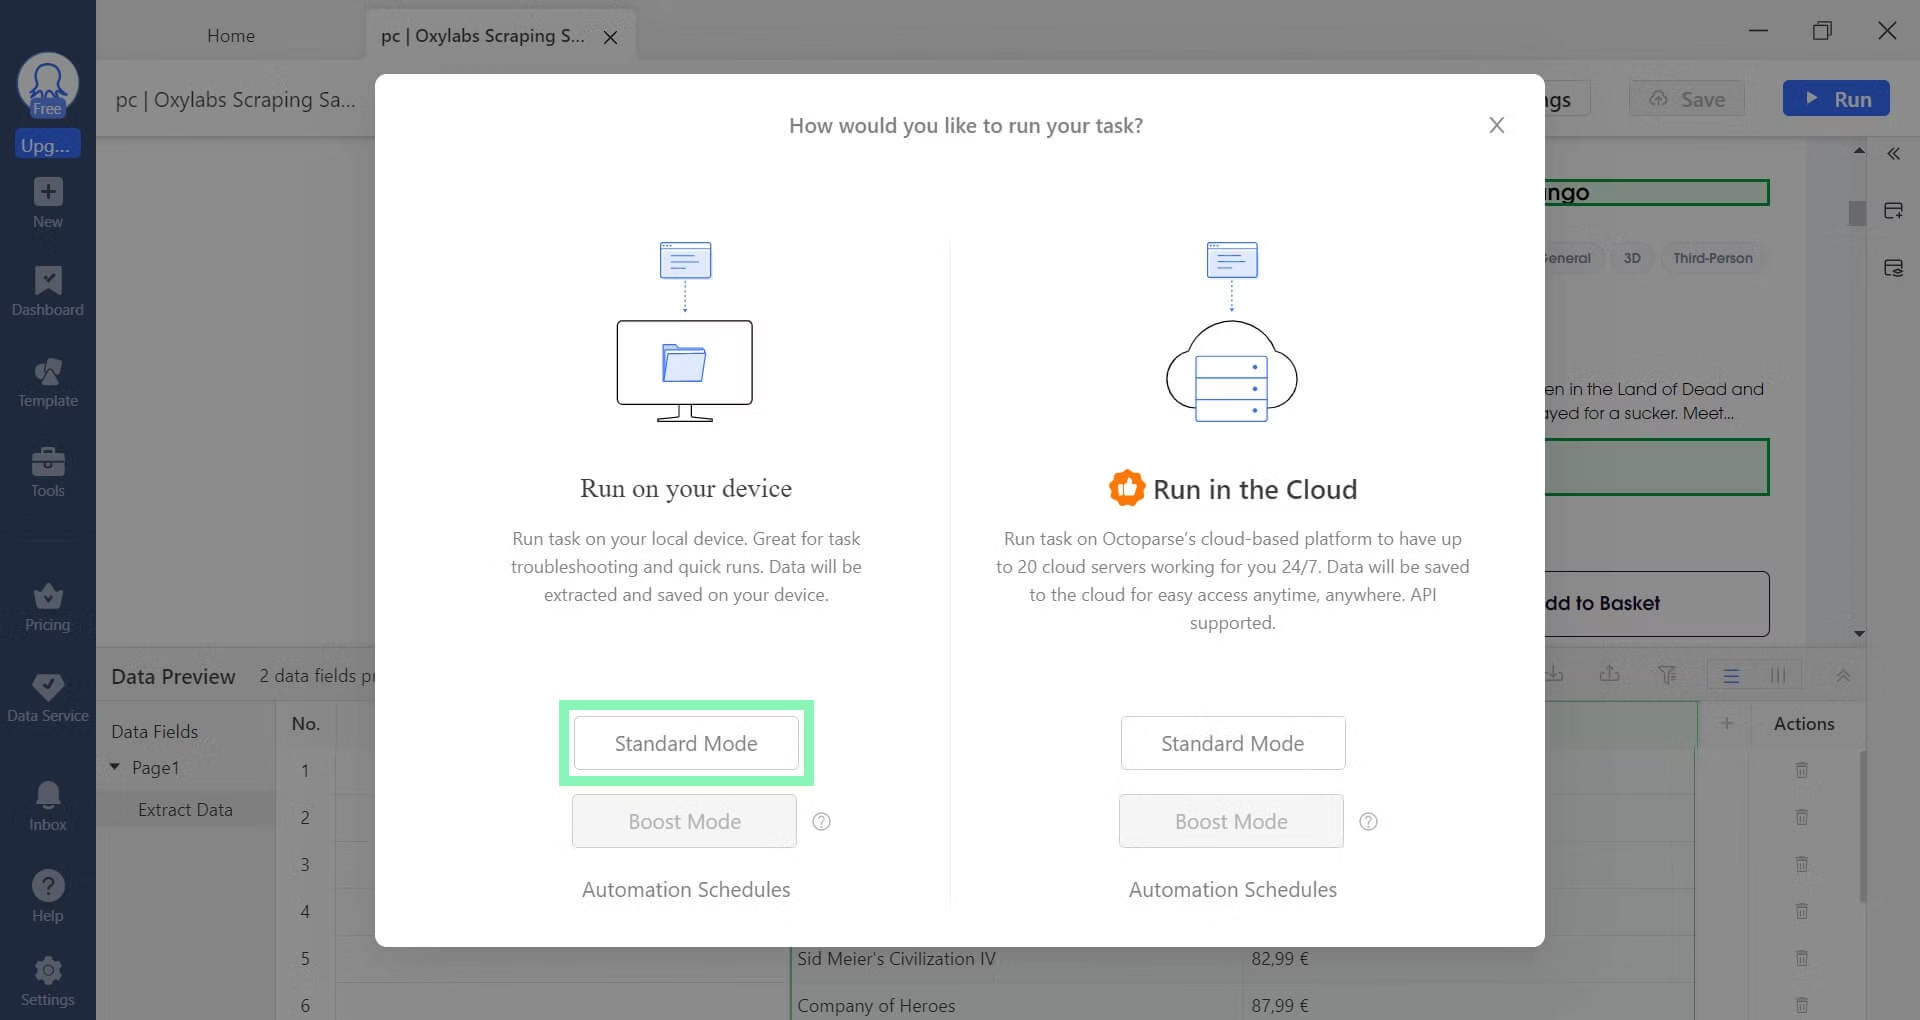
**Step 5.** Choose **Run on your device** with **Standard Mode** to receive data as a file on your PC.
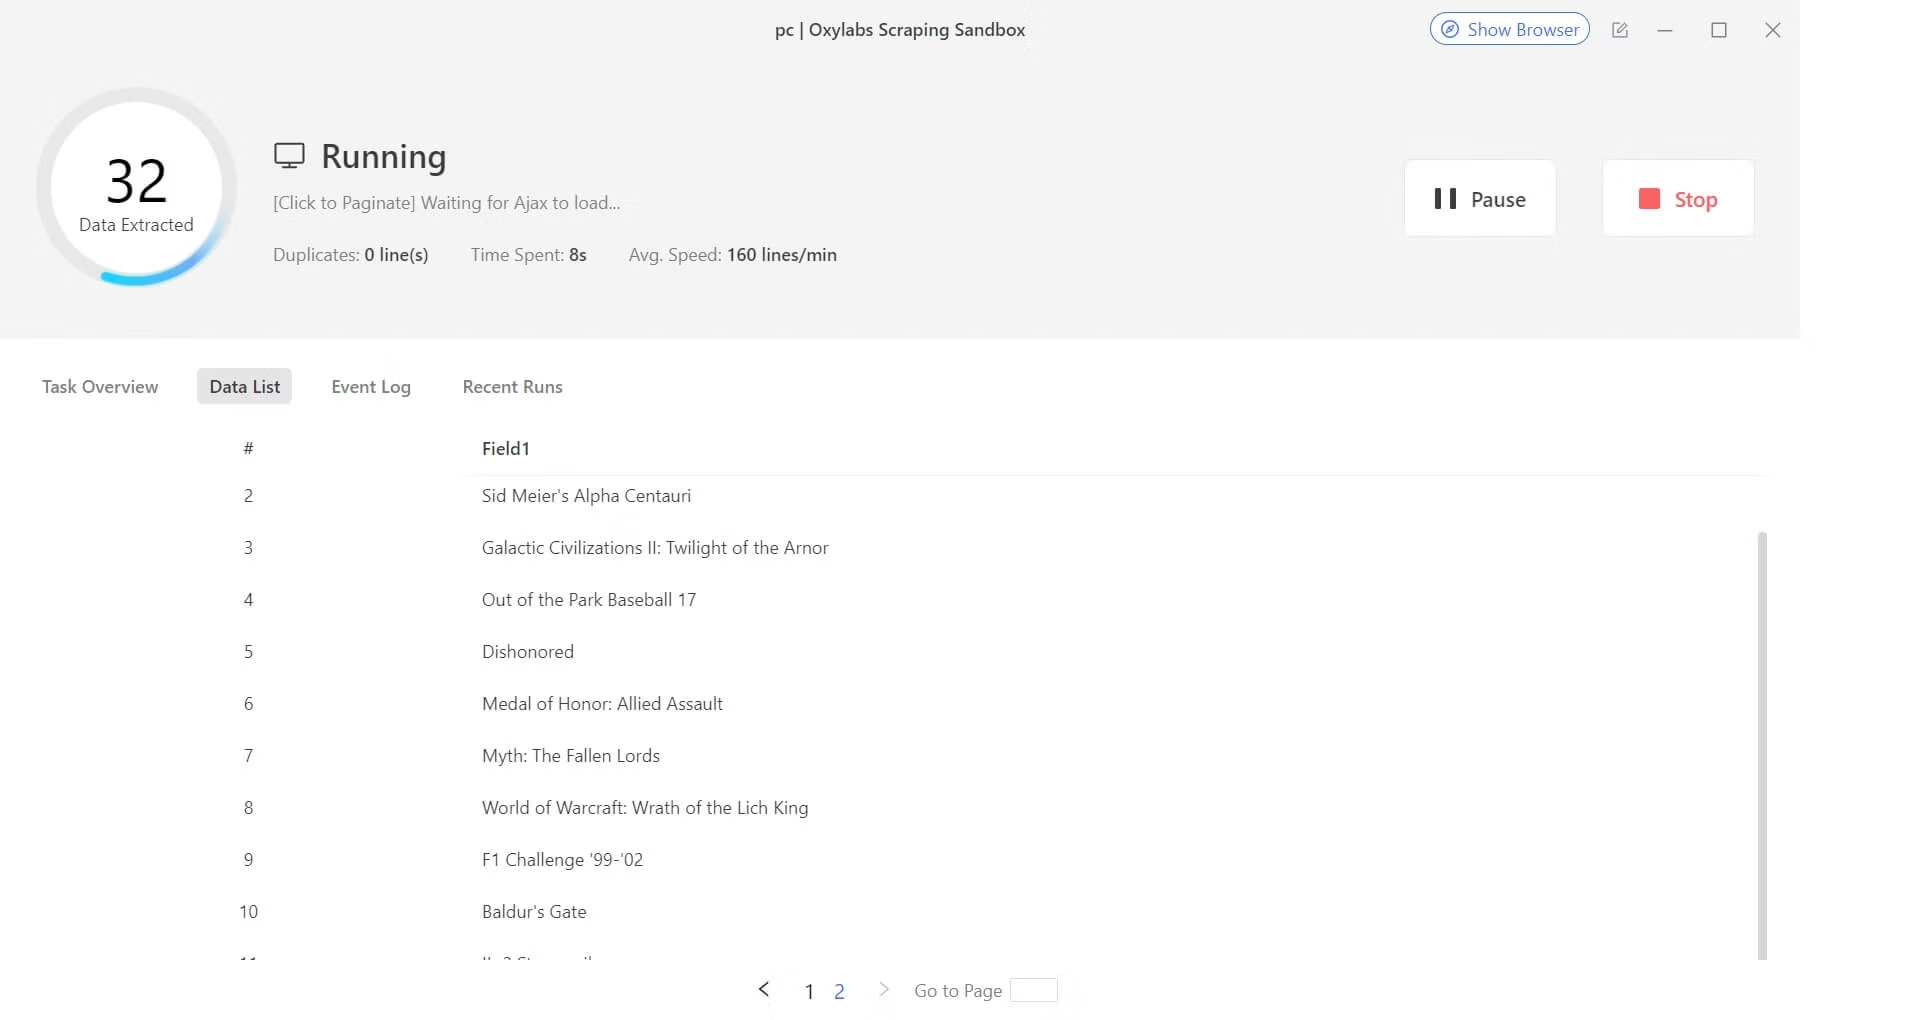
**Step 6.** Let the scraping process run until complete. The process will be over when the final product page is reached or when you stop it manually.
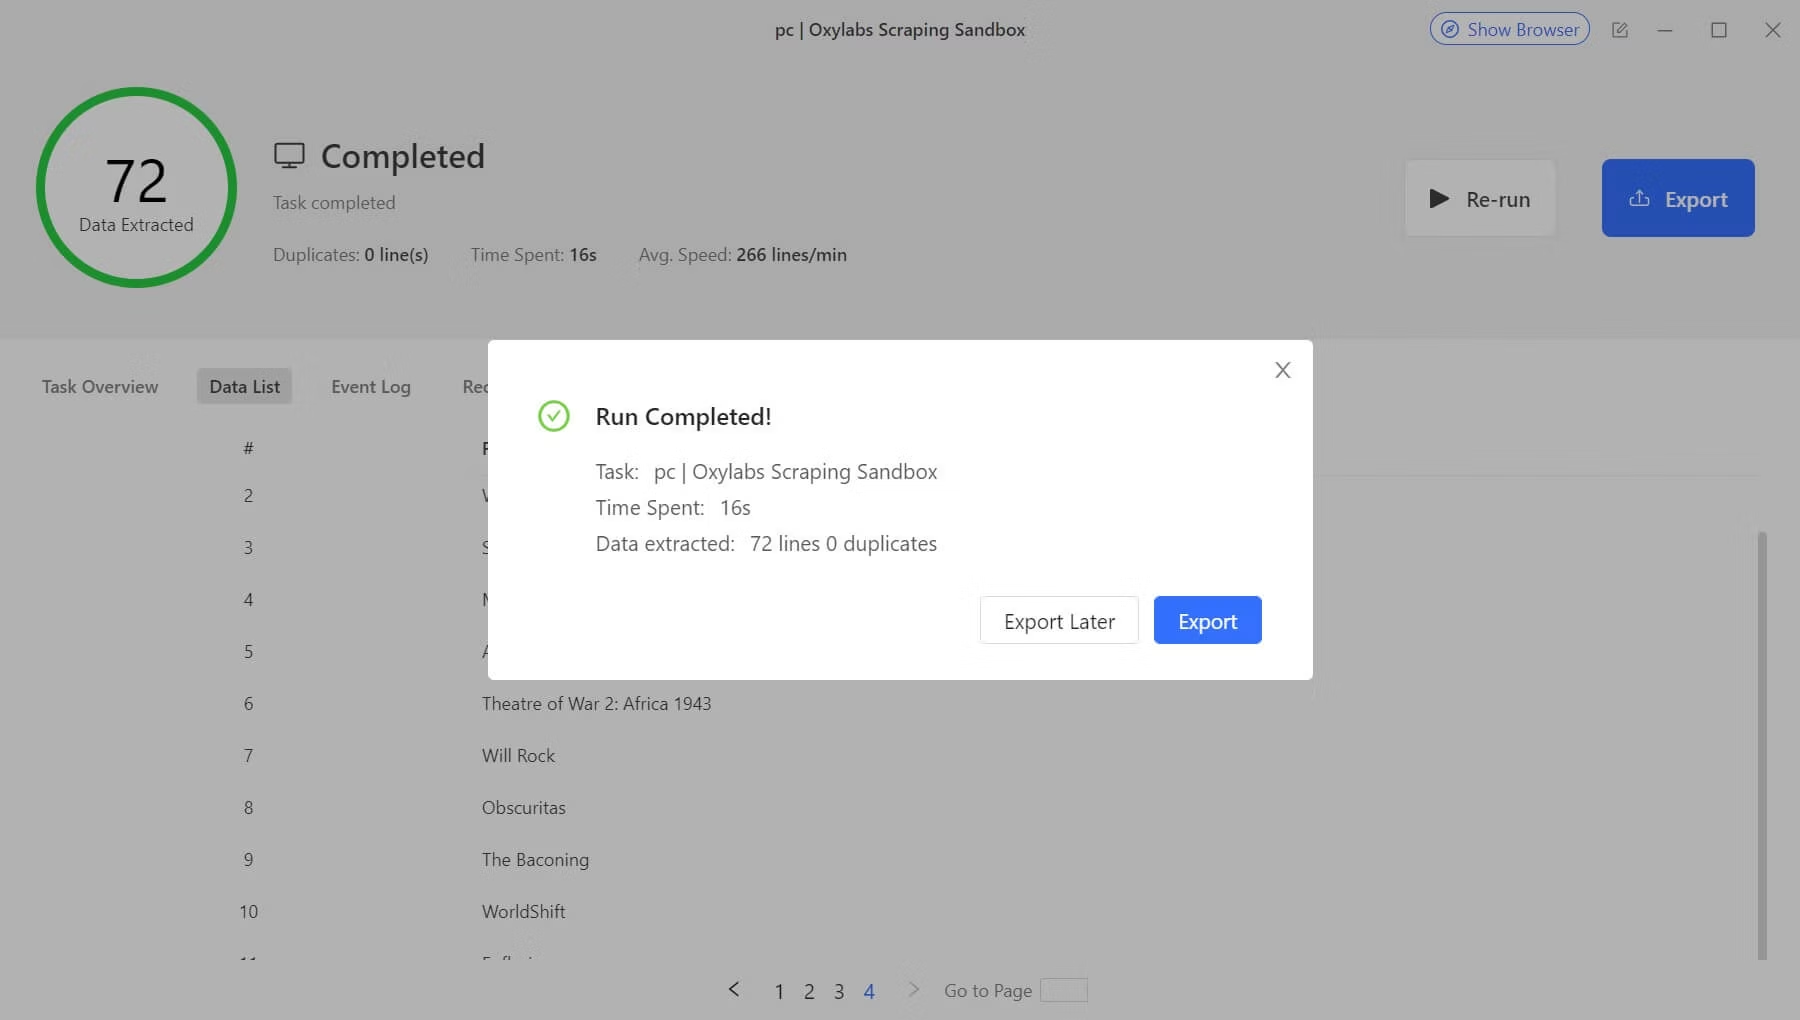
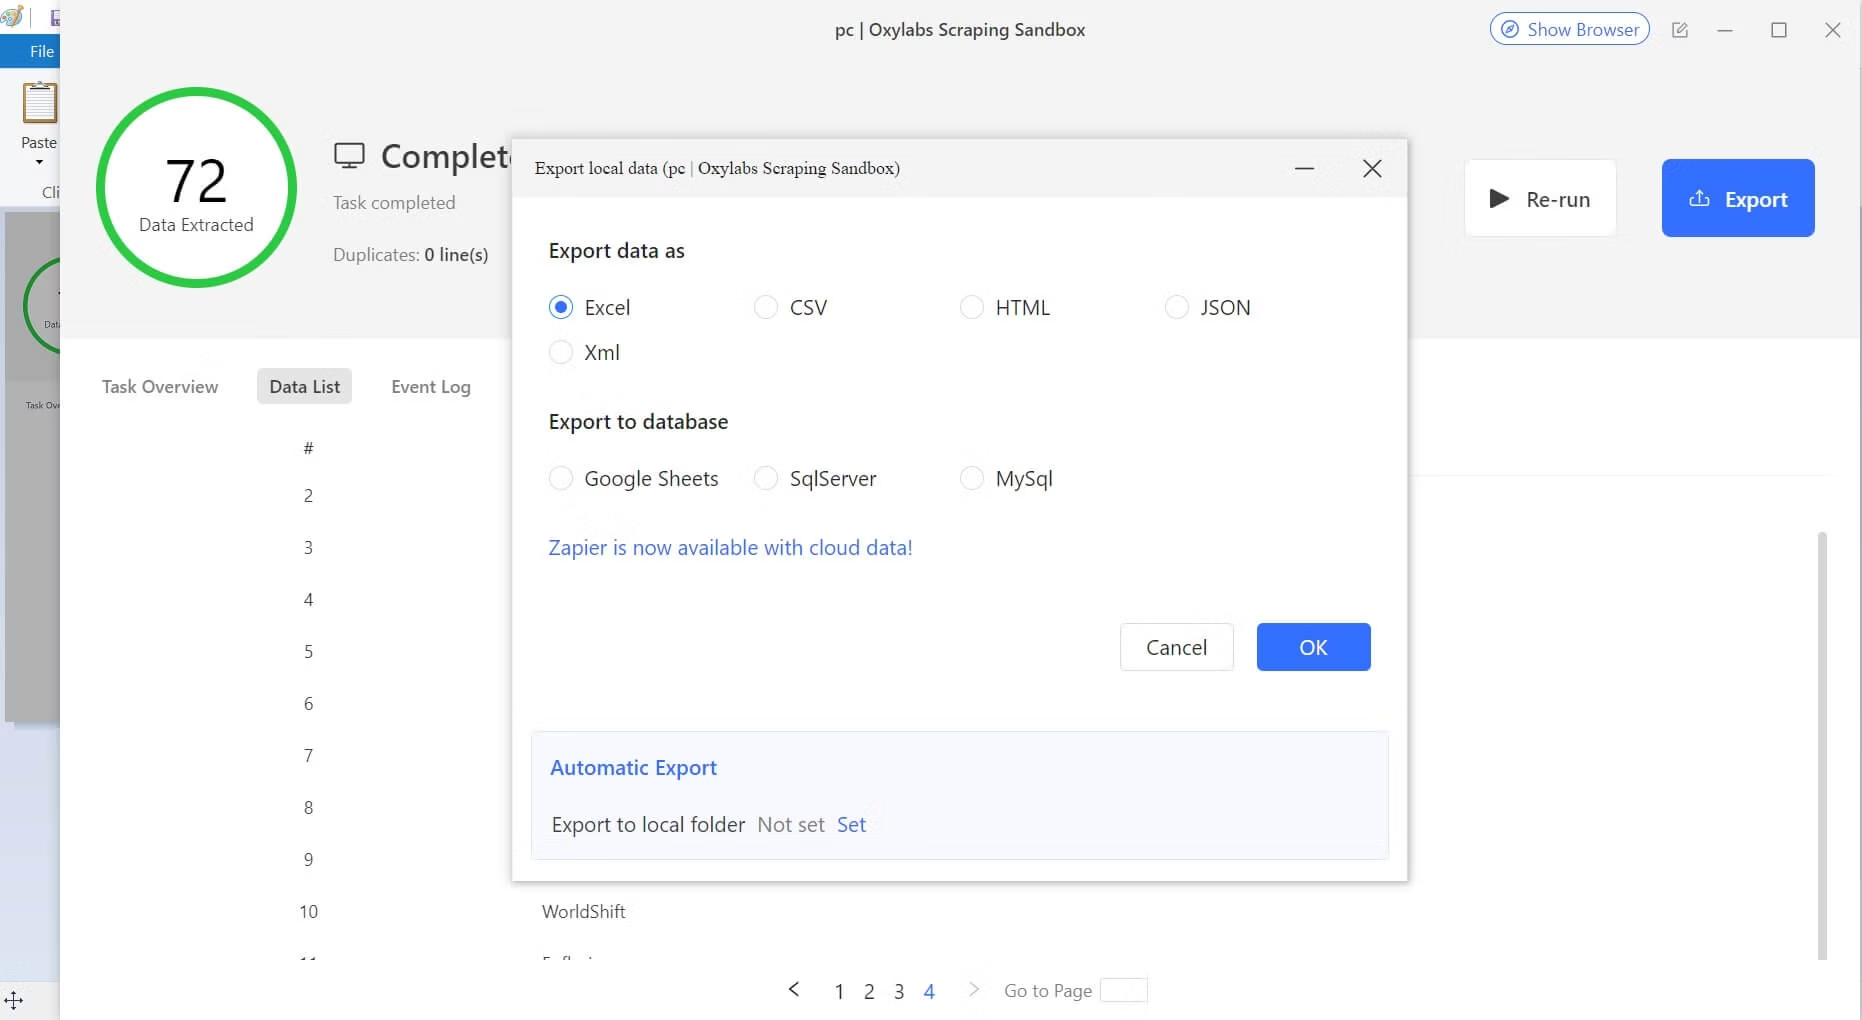
**Step 7.** Extract the collected data and select the file format.
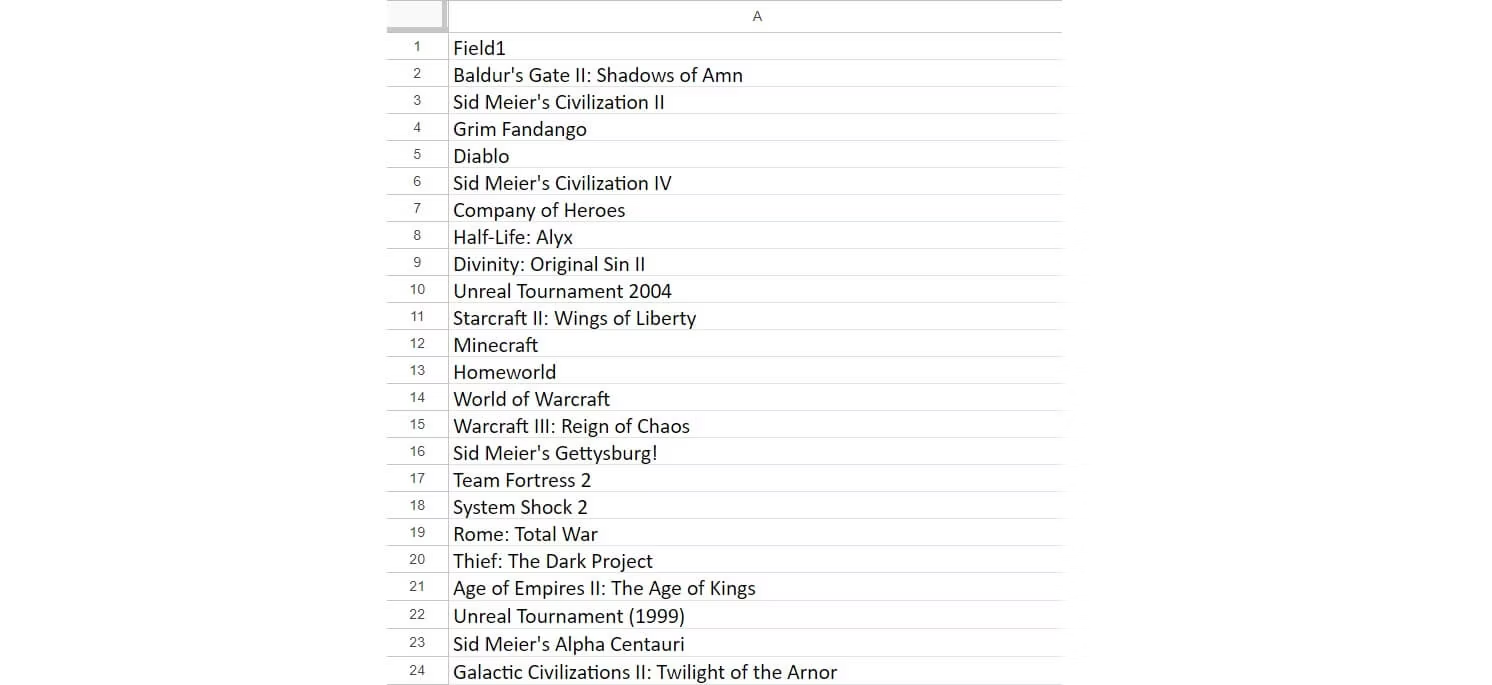
Here's the final result in a spreadsheet.
That’s it – you are all set up and ready to focus on your web scraping tasks with Octoparse.
---
# Agent Instructions
This documentation is published with GitBook. GitBook is the documentation platform designed so that both humans and AI agents can read, navigate, and reason over technical content effectively. Learn more at gitbook.com.
## Querying This Documentation
If you need additional information that is not directly available in this page, you can query the documentation by asking a question.
Perform an HTTP GET request on the following URL with the `ask` and `goal` query parameters:
```
GET https://developers.oxylabs.io/integrations/proxy-integrations/octoparse.md?ask=&goal=
```
`ask` is the immediate question: it should be specific, self-contained, and written in natural language.
`goal` is what the user is ultimately trying to achieve, the reason they need the answer. Sharing it helps GitBook give you a better, more relevant answer. A goal is most helpful when it describes the outcome the user wants rather than restating the question. For example, with `ask=how do I create an API token`, a goal like `automate deployments from our CI pipeline` lets GitBook tailor the answer to that use case.
The response will contain a direct answer to the question and relevant excerpts and sources from the documentation.
Use this mechanism when the answer is not explicitly present in the current page, you need clarification or additional context, or you want to retrieve related documentation sections.