Octo Browser
Octo Browser integration with Oxylabs Proxies: follow this step-by-step guide to configure proxy settings and browse privately.
Octo Browser is an antidetect web browser that prevents online tracking and protects users’ privacy.
Follow the instructions below to integrate the following Oxylabs Proxies:
Set up Octo Browser
Download Octo Browser from the official website, launch the app, and log in.
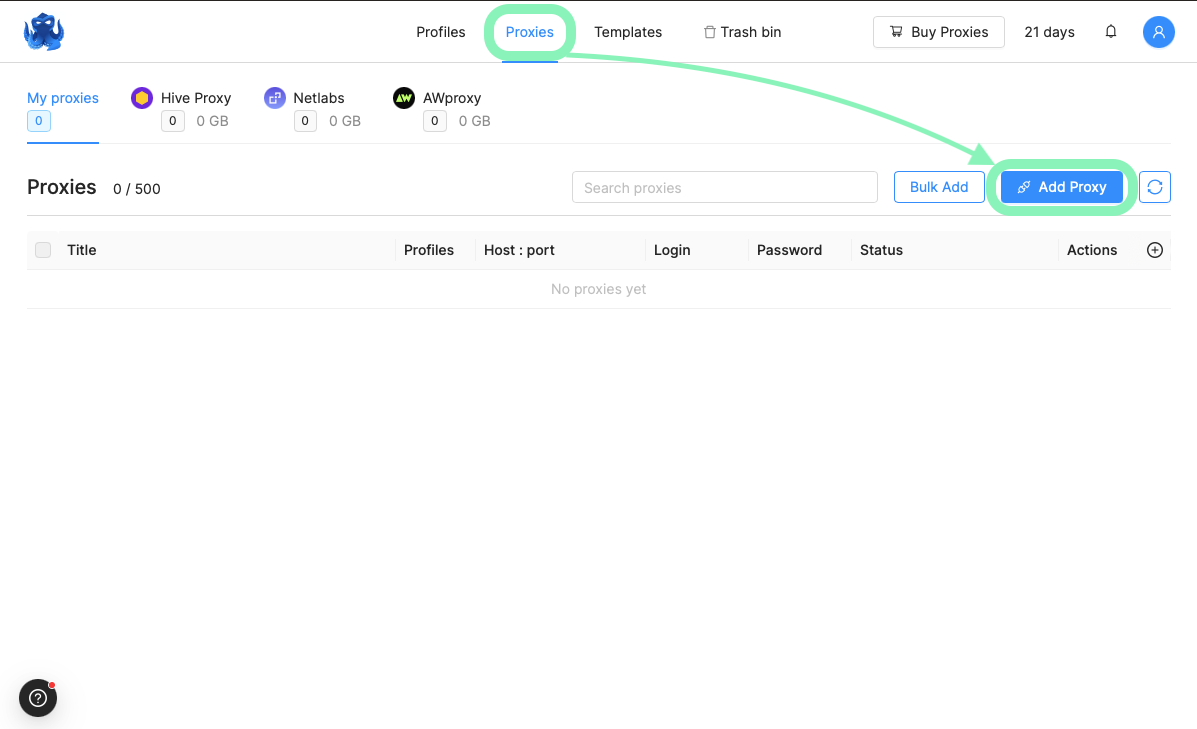
Enter proxy details
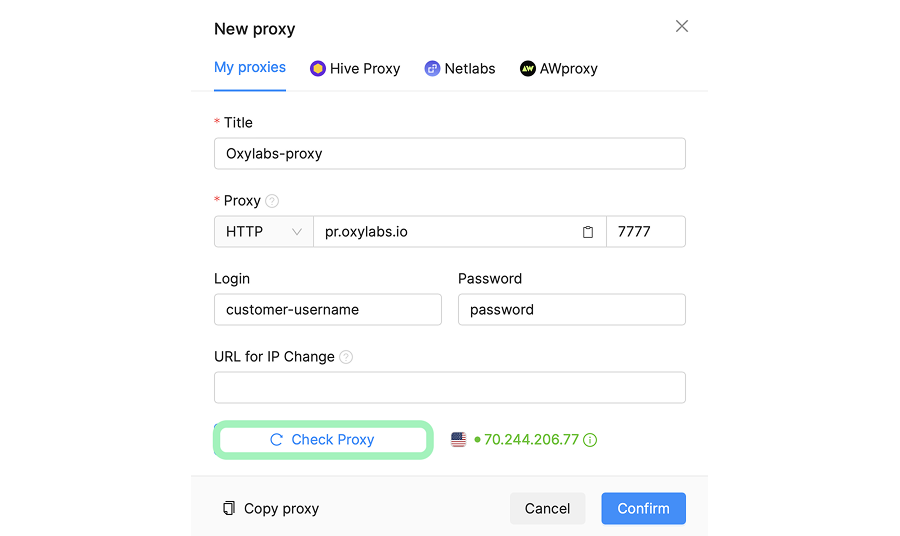
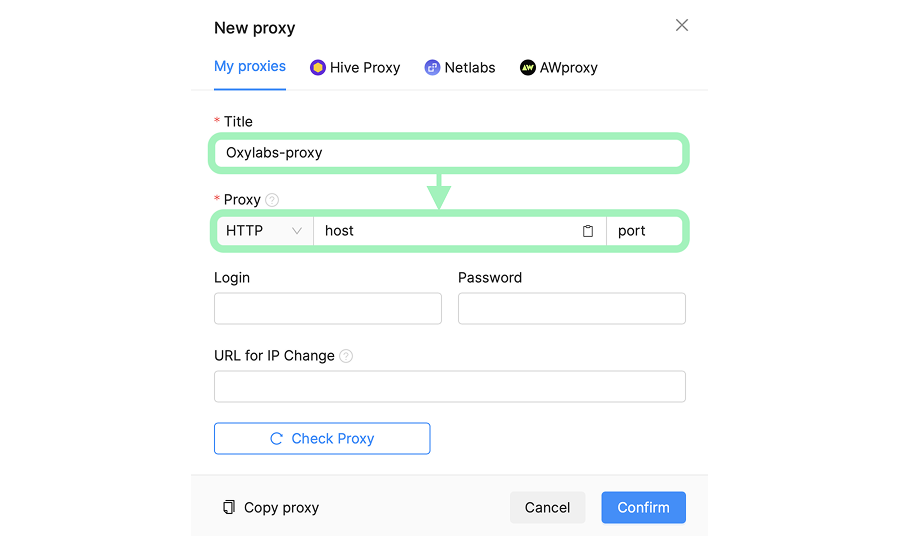
Enter the proxy title and choose a proxy protocol (HTTP, HTTPS, or SOCKS5)

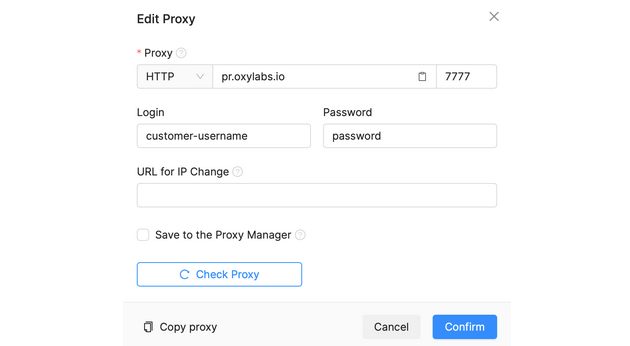
Then enter your proxy details and Oxylabs proxy user’s credentials (created in the Oxylabs dashboard) for your chosen proxy type:
Residential & Mobile Proxies
Host: pr.oxylabs.io
Port: 7777
Login: customer-username
Password: password
Note: Don't forget to add customer- prefix to your username.

You may also use additional parameters with Residential Proxies to set the geo-location (country, state, city, and etc.) and control sessions. Check out the Residential Proxies documentation to learn more. The table below provides an overview of available parameters and their example values.
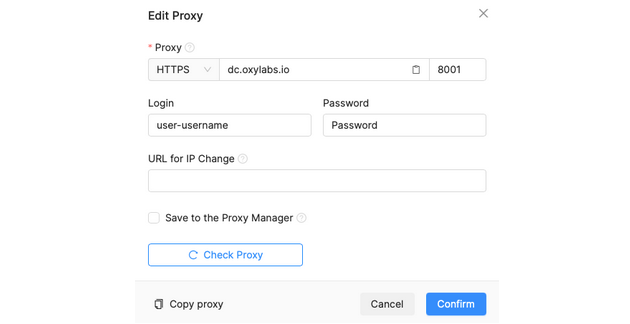
Datacenter Proxies
Host: dc.oxylabs.io
Port: 8001
Login: user-username
Password: password
Note: Don't forget to add user- prefix to your username.

The port is the sequential number assigned to an IP address from the proxy list. Thus, port 8001 uses the first IP address from your list. You may also enable proxy IP rotation by setting the port to 8000.
Furthermore, you can specify the geo-location, for example, the US, by setting the Proxy username to user-USERNAME-country-US.
Port 8001 picks a random IP address but stays consistent during a session. Alternatively, you can rotate proxy IPs with each request by using port 8000.
You can also specify geo-location, for example, the US, by setting the Proxy username to user-USERNAME-country-US.
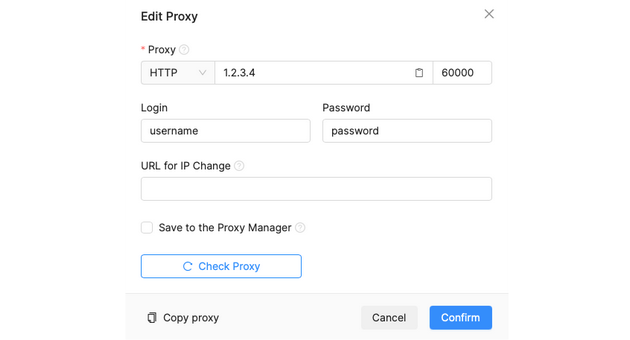
Dedicated Datacenter Proxies (Enterprise)
Host: 1.2.3.4 (IP address from your proxy list)
Port: 60000 (HTTP) or 1180 (SOCKS5)
Login: username
Password: password

For Enterprise Dedicated Datacenter Proxies, you’ll have to choose an IP address from the acquired list.
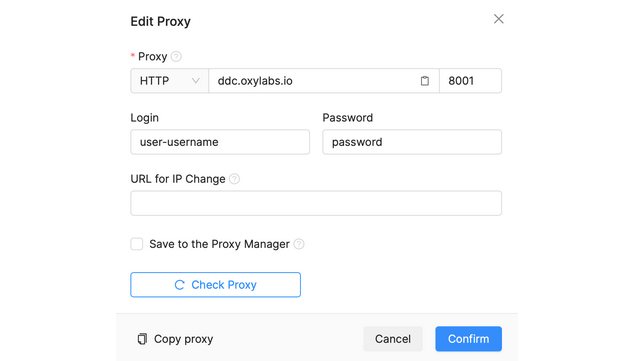
Dedicated Datacenter Proxies (Self-service)
Host: ddc.oxylabs.io
Port: 8001
Login: user-username
Password: password
Don't forget to add user- prefix to your username

For Self-Service Dedicated Datacenter Proxies, the port indicates the sequential number of an IP address from the acquired proxy list.
If you want to get a different IP with each request, change the Port to 8000 to enable proxy rotation.
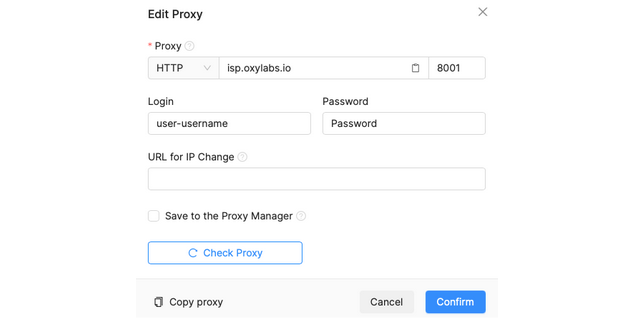
ISP Proxies
Host: isp.oxylabs.io
Port: 8001
Login: user-username
Password: password
Note: Don't forget to add user- prefix to your username.

With ISP Proxies, the port is assigned to a specific IP address and its location. Hence, port 8001 will always pick the first IP from your proxy list.
If you want to get a different IP with each request, change the Port to 8000 to enable proxy rotation.
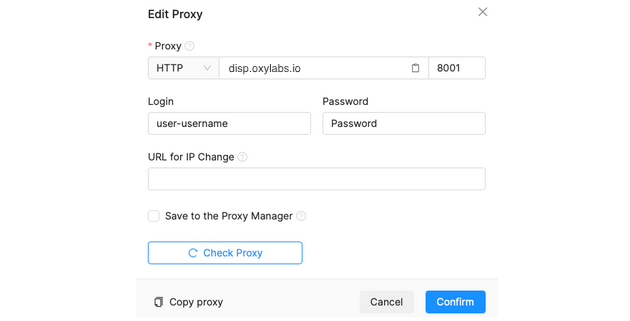
Dedicated ISP Proxies
Host: disp.oxylabs.io
Port: 8001
Login: user-USERNAME
Password: PASSWORD
Note: Don't forget to add user- prefix to your username.

You will need to choose the port assigned to an IP address from the purchased proxy list, which you can find on the Oxylabs dashboard. The 8001 port will pick the first IP address from your list for all requests. Use port 8000 for automatic proxy IP rotation.
Create a browser profile
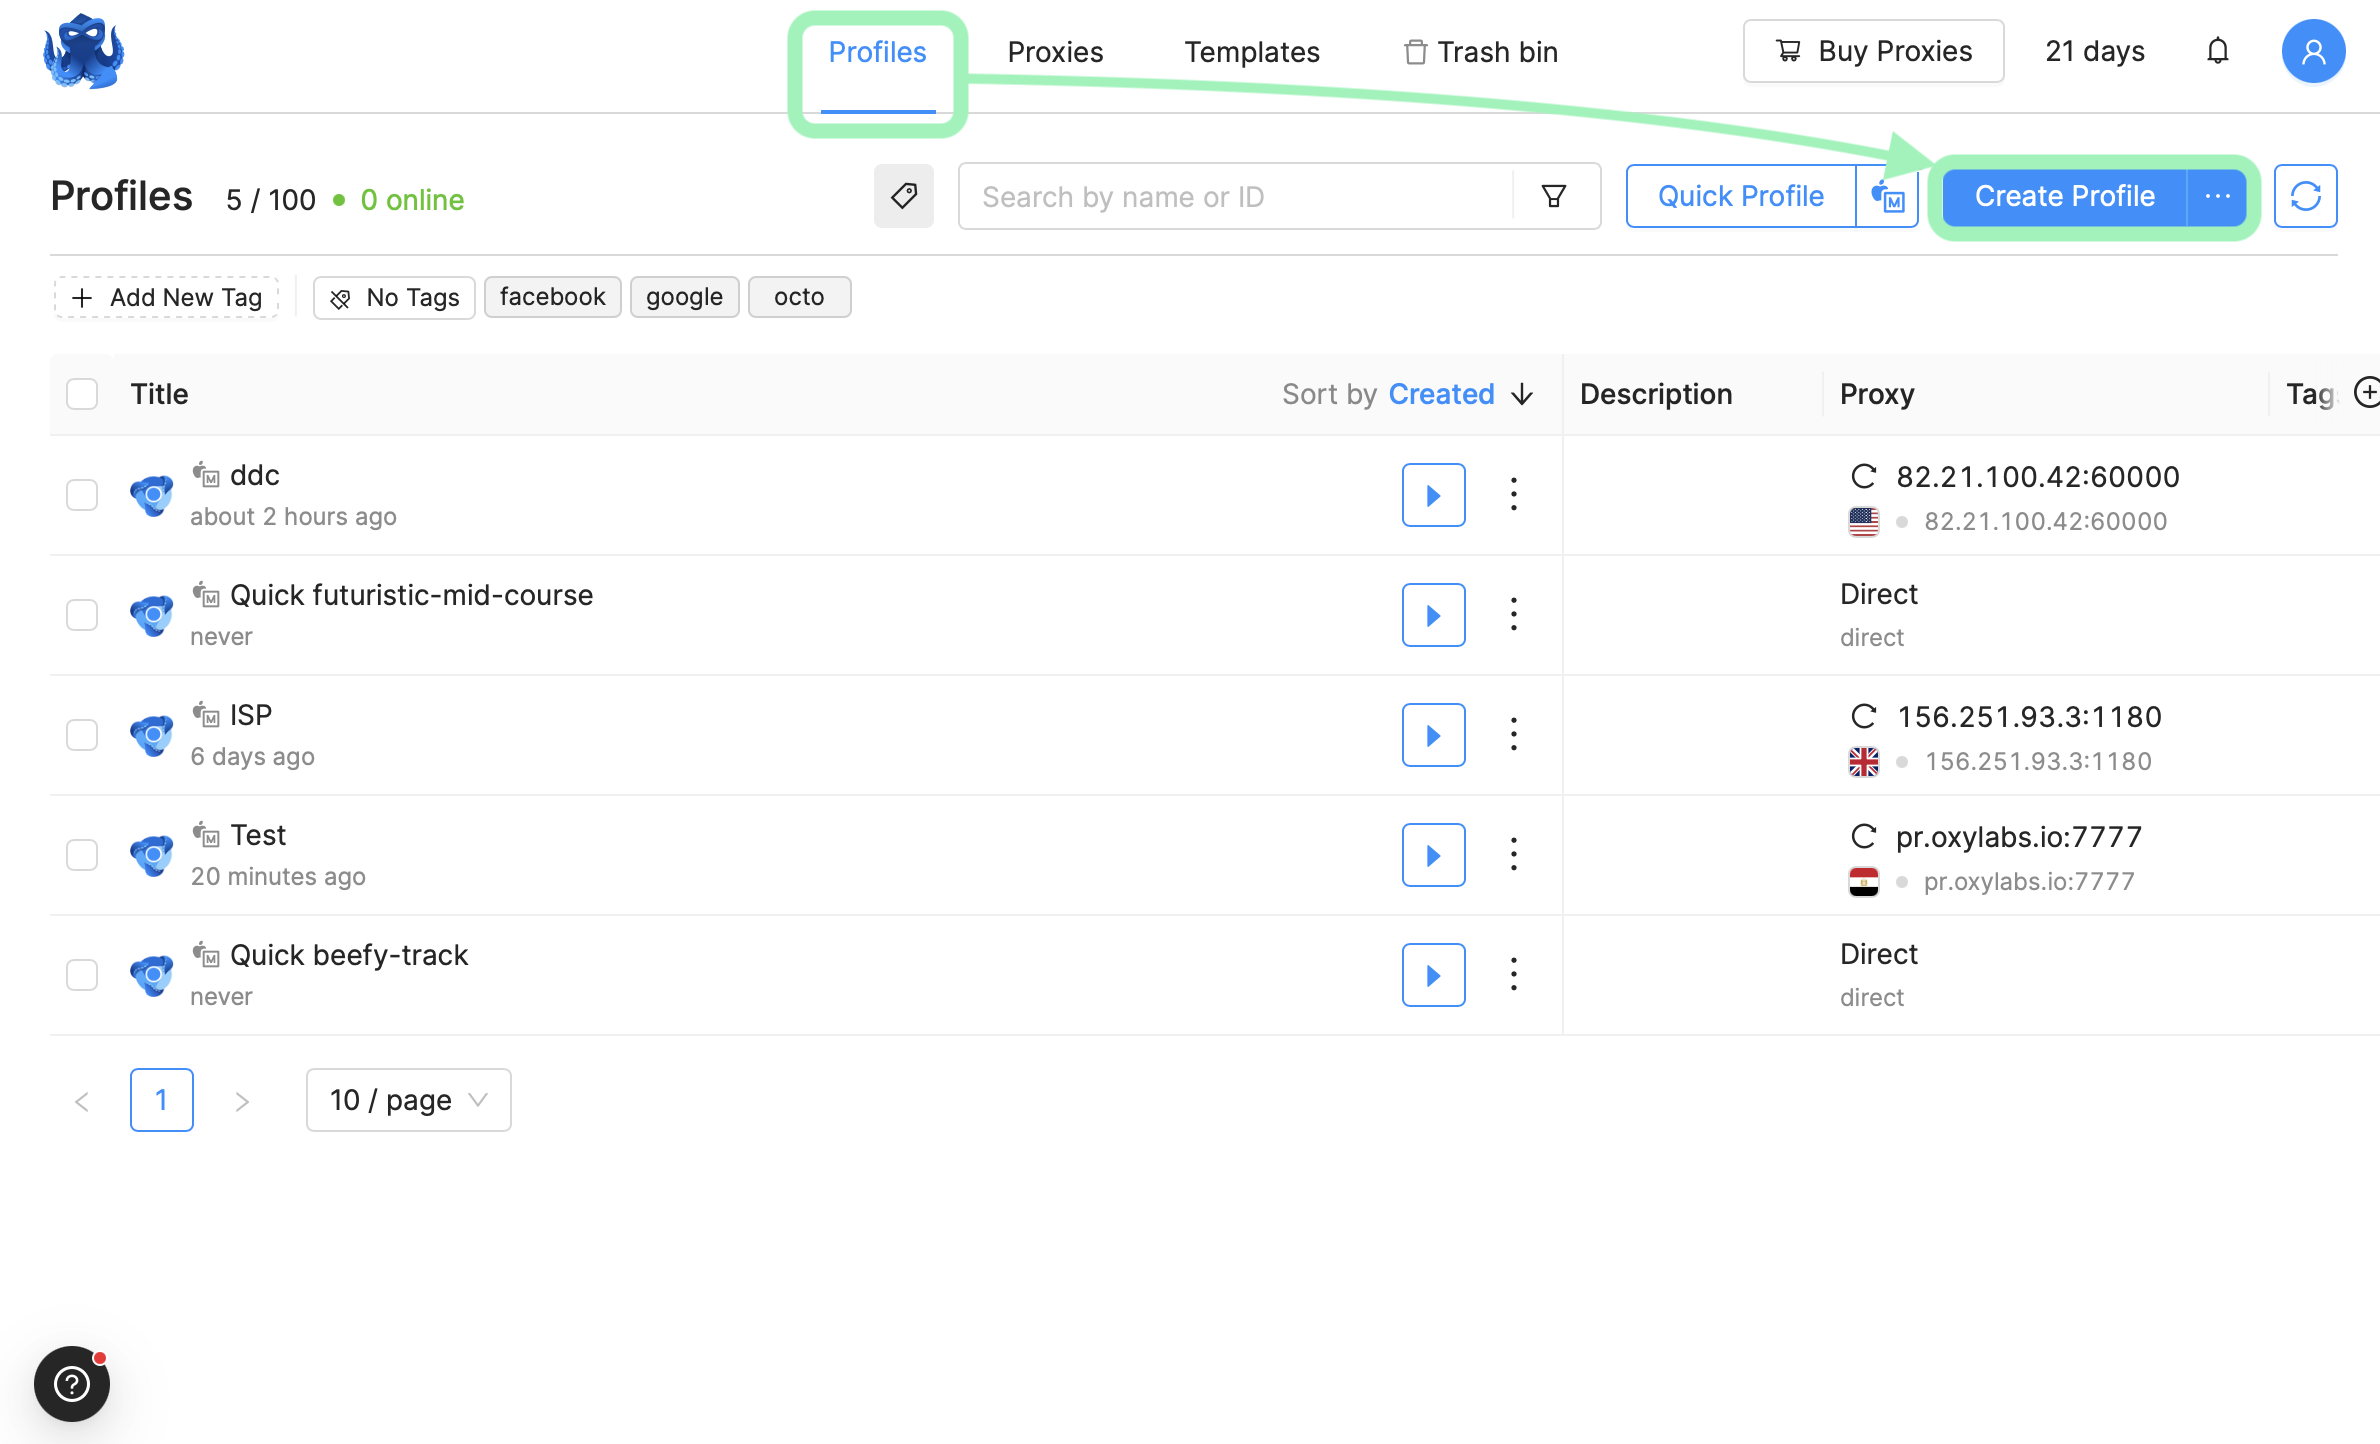
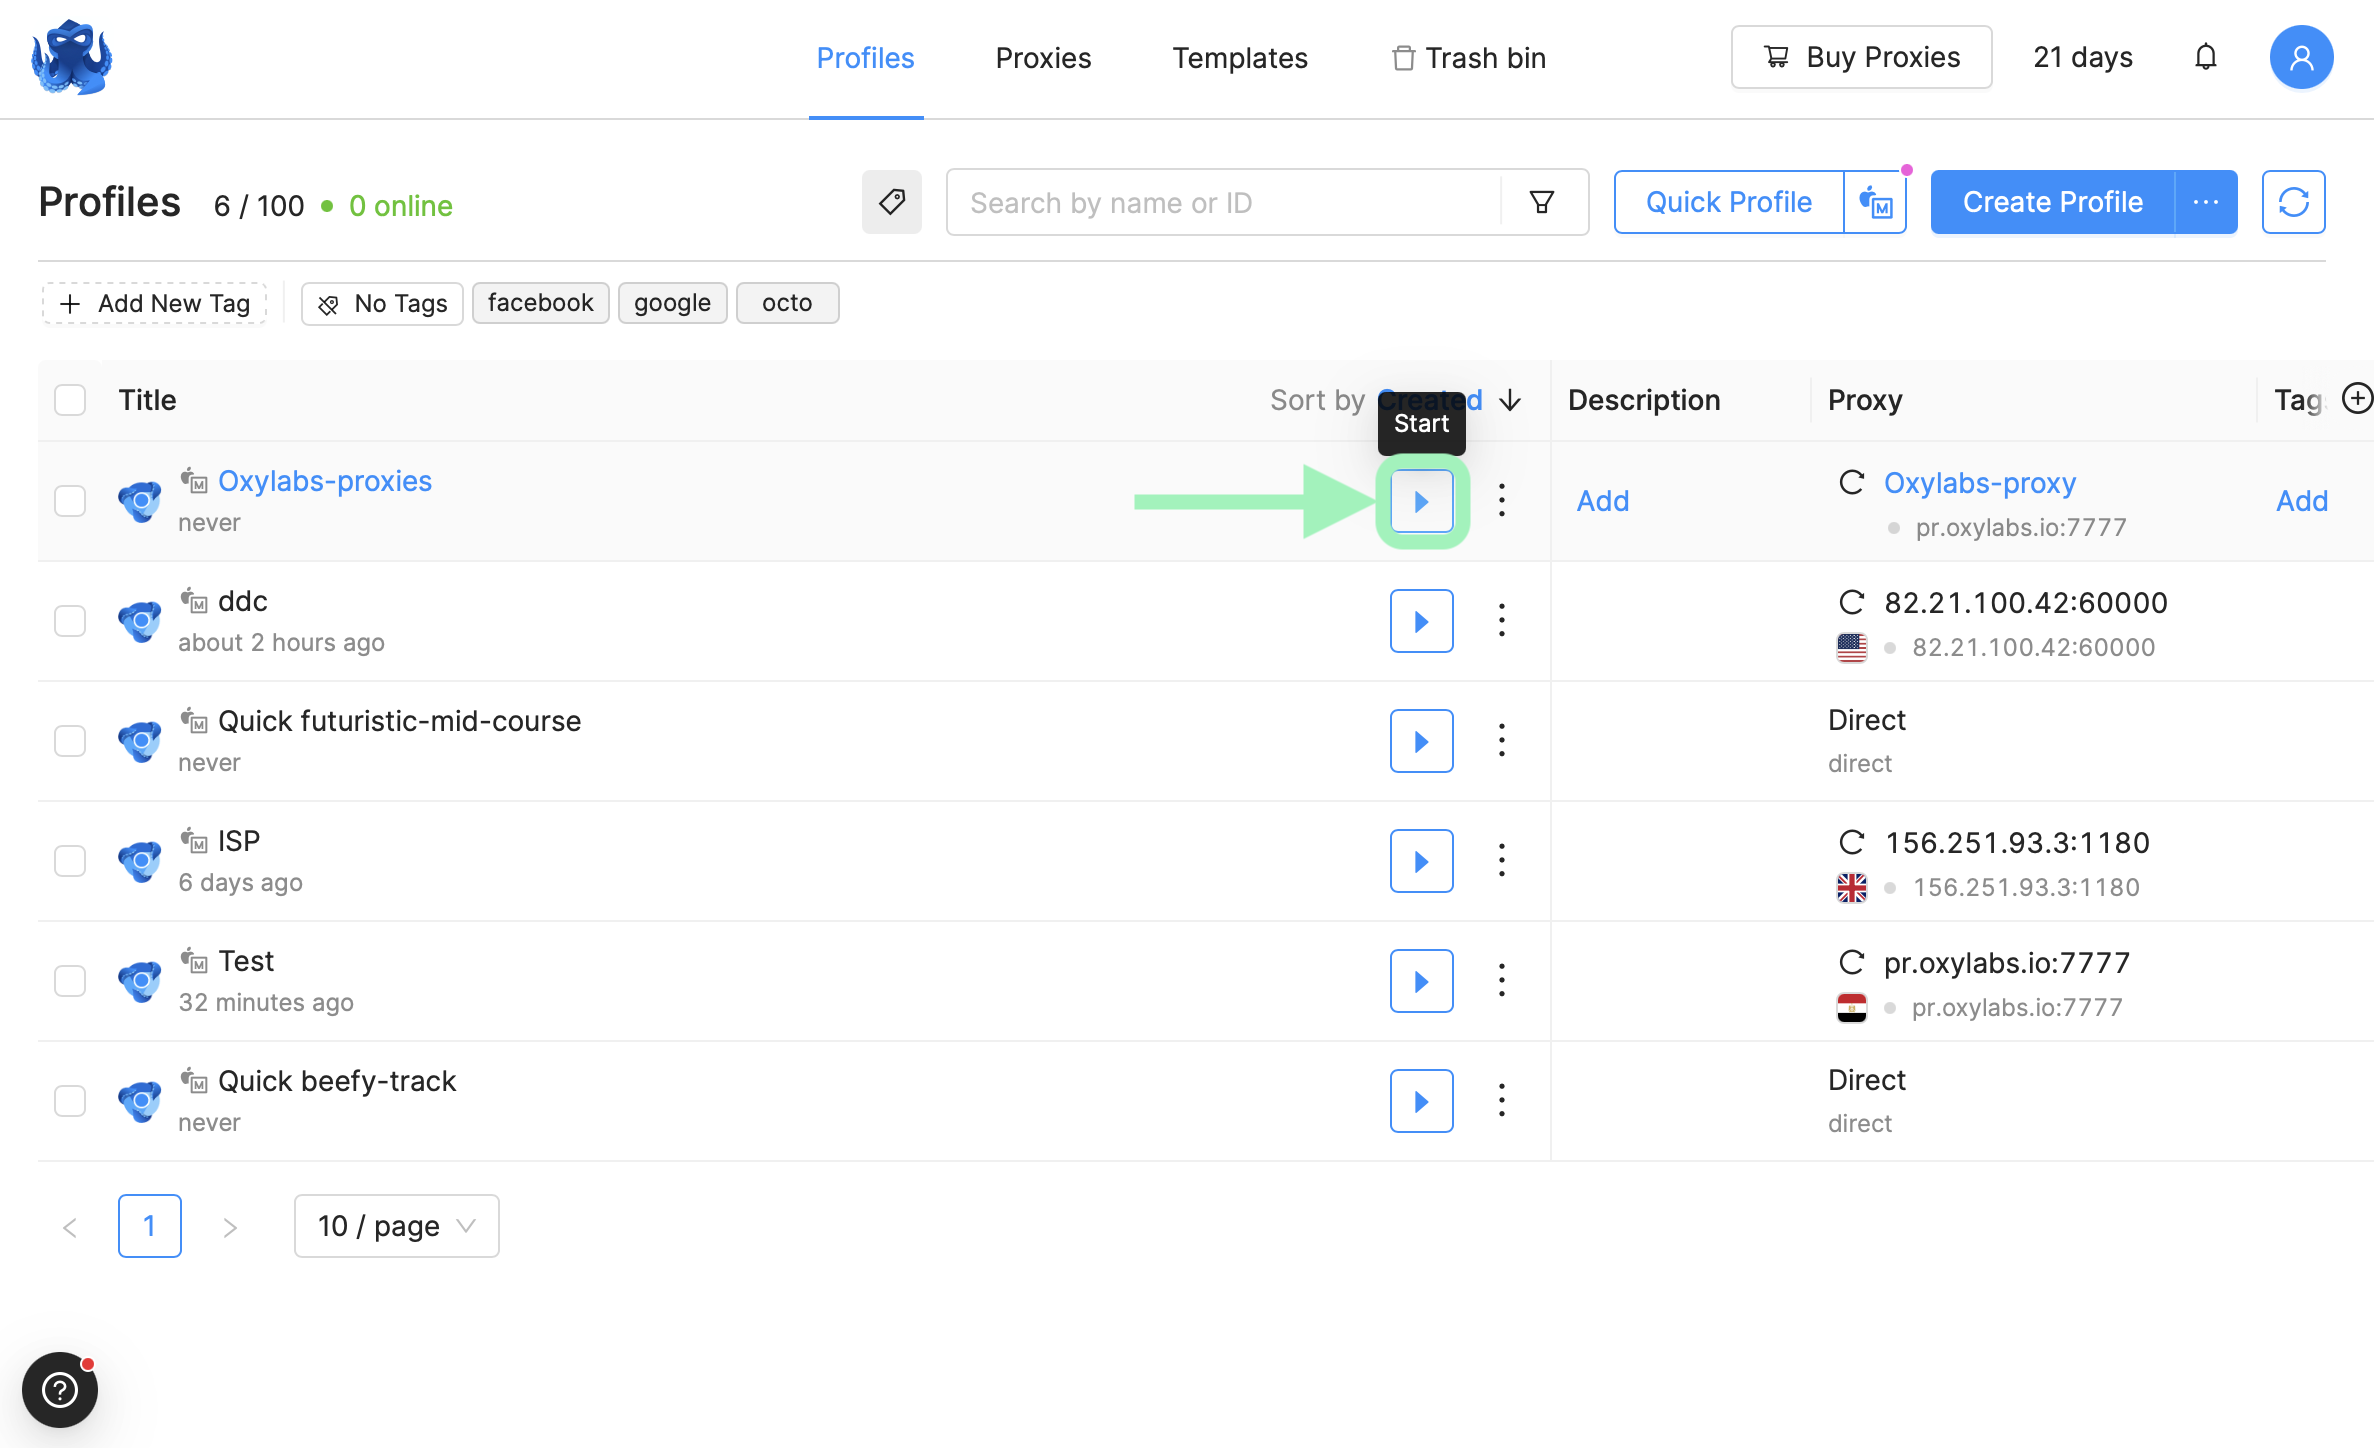
Go to the Profiles tab and select Create Profile.

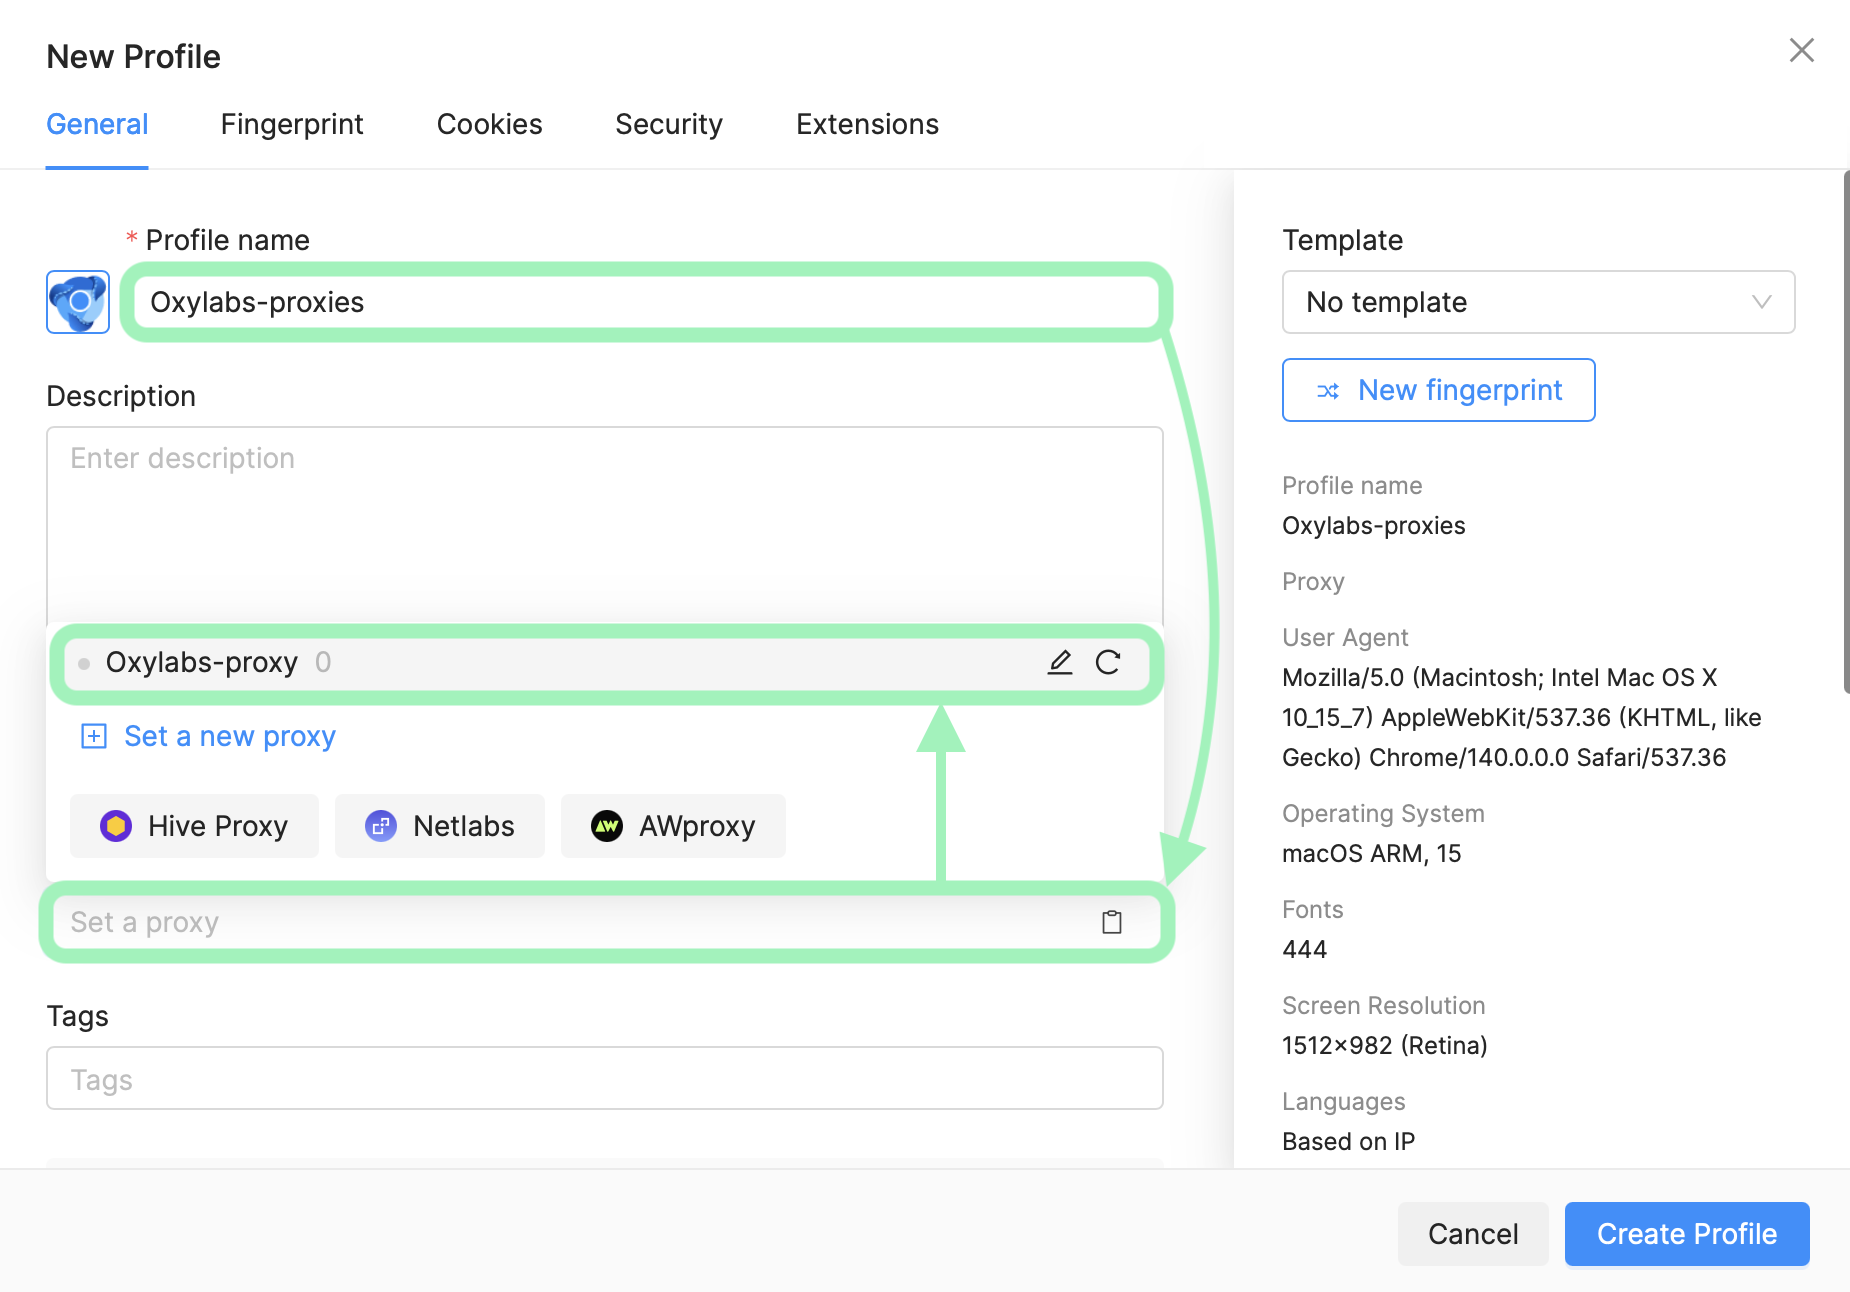
There, enter your Profile name, and select a proxy you just added.

If required, adjust your profile with a custom browser fingerprint, including user agents, cookies, and hardware and software parameters.
To finish the profile, click Create Profile at the bottom right corner of the screen.
And that’s it. You’ve successfully integrated your Oxylabs proxies with Octo Browser. You can find the original Octo Browser integration blog post here.
If you have any questions or concerns regarding our solutions or the process above, please contact us via the live chat on our homepage or email us at hello@oxylabs.io.
Last updated
Was this helpful?