> For the complete documentation index, see [llms.txt](https://developers.oxylabs.io/llms.txt). Markdown versions of documentation pages are available by appending `.md` to page URLs; this page is available as [Markdown](https://developers.oxylabs.io/integrations/proxy-integrations/nstbrowser.md).
# Nstbrowser
Set up Nstbrowser with Oxylabs Proxies. Configure antidetect browser profiles with custom fingerprints.
[**Nstbrowser**](https://www.nstbrowser.io/en) is an anti-detect browser designed for professionals working with multiple accounts, providing web scraping, automation, team collaboration, and profile management capabilities.
Follow these steps to integrate the following Oxylabs Proxies:
* [**Residential & Mobile Proxies**](#residential-and-mobile-proxies)
* [**Datacenter Proxies**](#datacenter-proxies)
* [**Dedicated Datacenter Proxies (Enterprise)**](#dedicated-datacenter-proxies-enterprise)
* [**Dedicated Datacenter Proxies (Self-service)**](#dedicated-datacenter-proxies-self-service)
* [**ISP Proxies**](#isp-proxies)
* [**Dedicated ISP Proxies**](#dedicated-isp-proxies)
{% stepper %}
{% step %}
### Create an account & install
[**Create an account**](https://app.nstbrowser.io/r/PI4Uw7) and login**.** After login, a window will pop-up to download the client for Windows or macOS.
{% endstep %}
{% step %}
### Create a profile
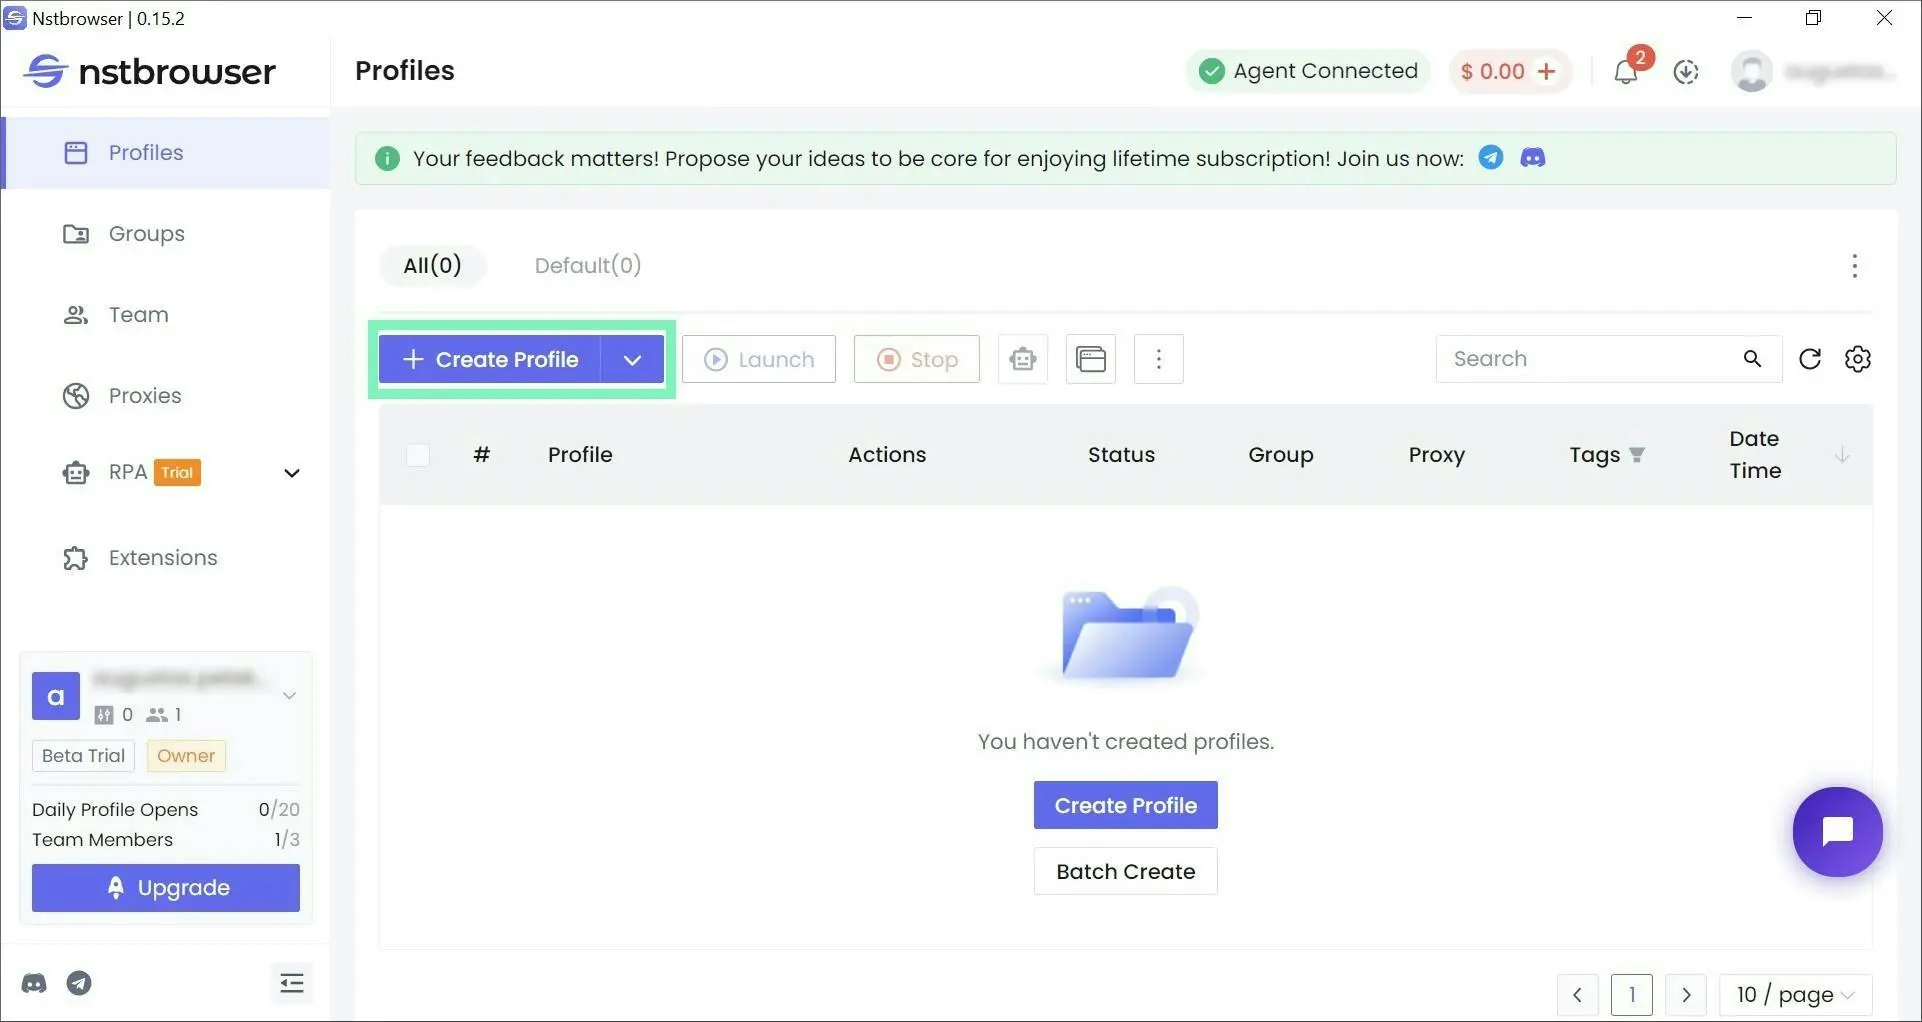
On the home screen, select **+ Create Profile**.
Creating a new browser profile
{% endstep %}
{% step %}
### Customize your fingerprint
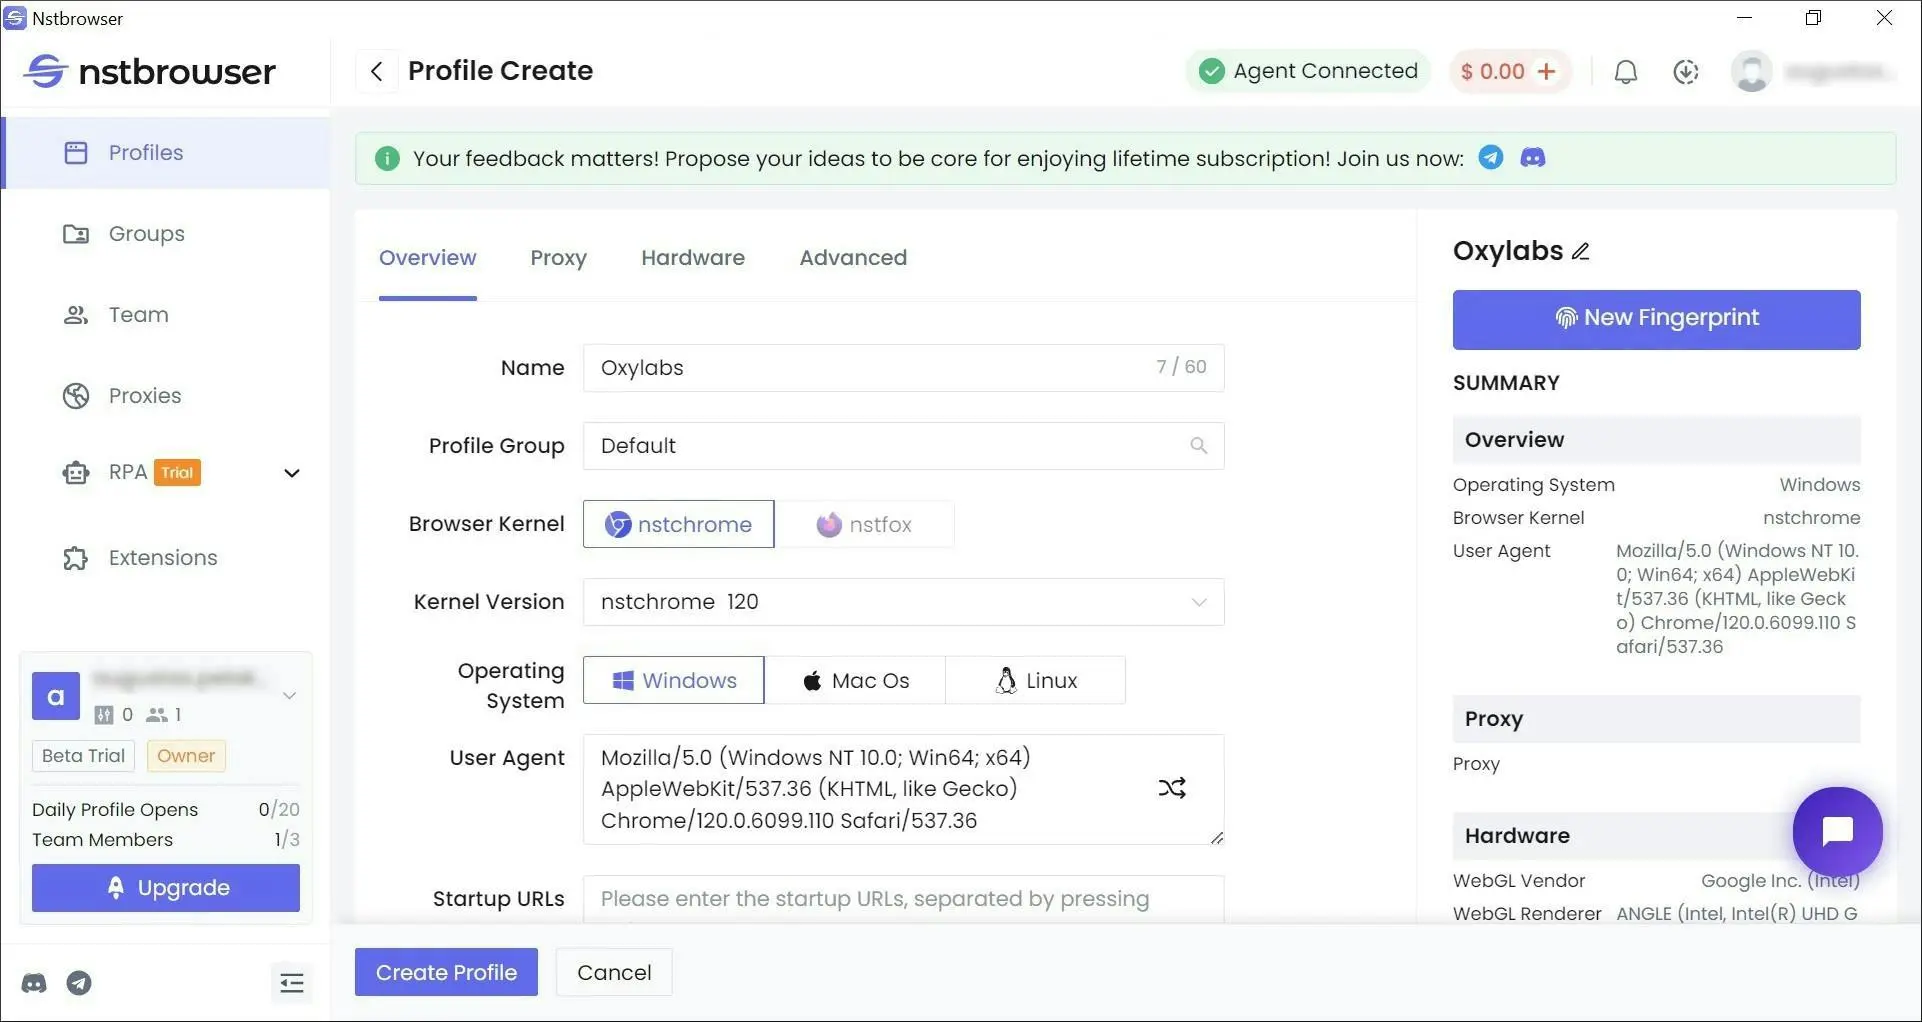
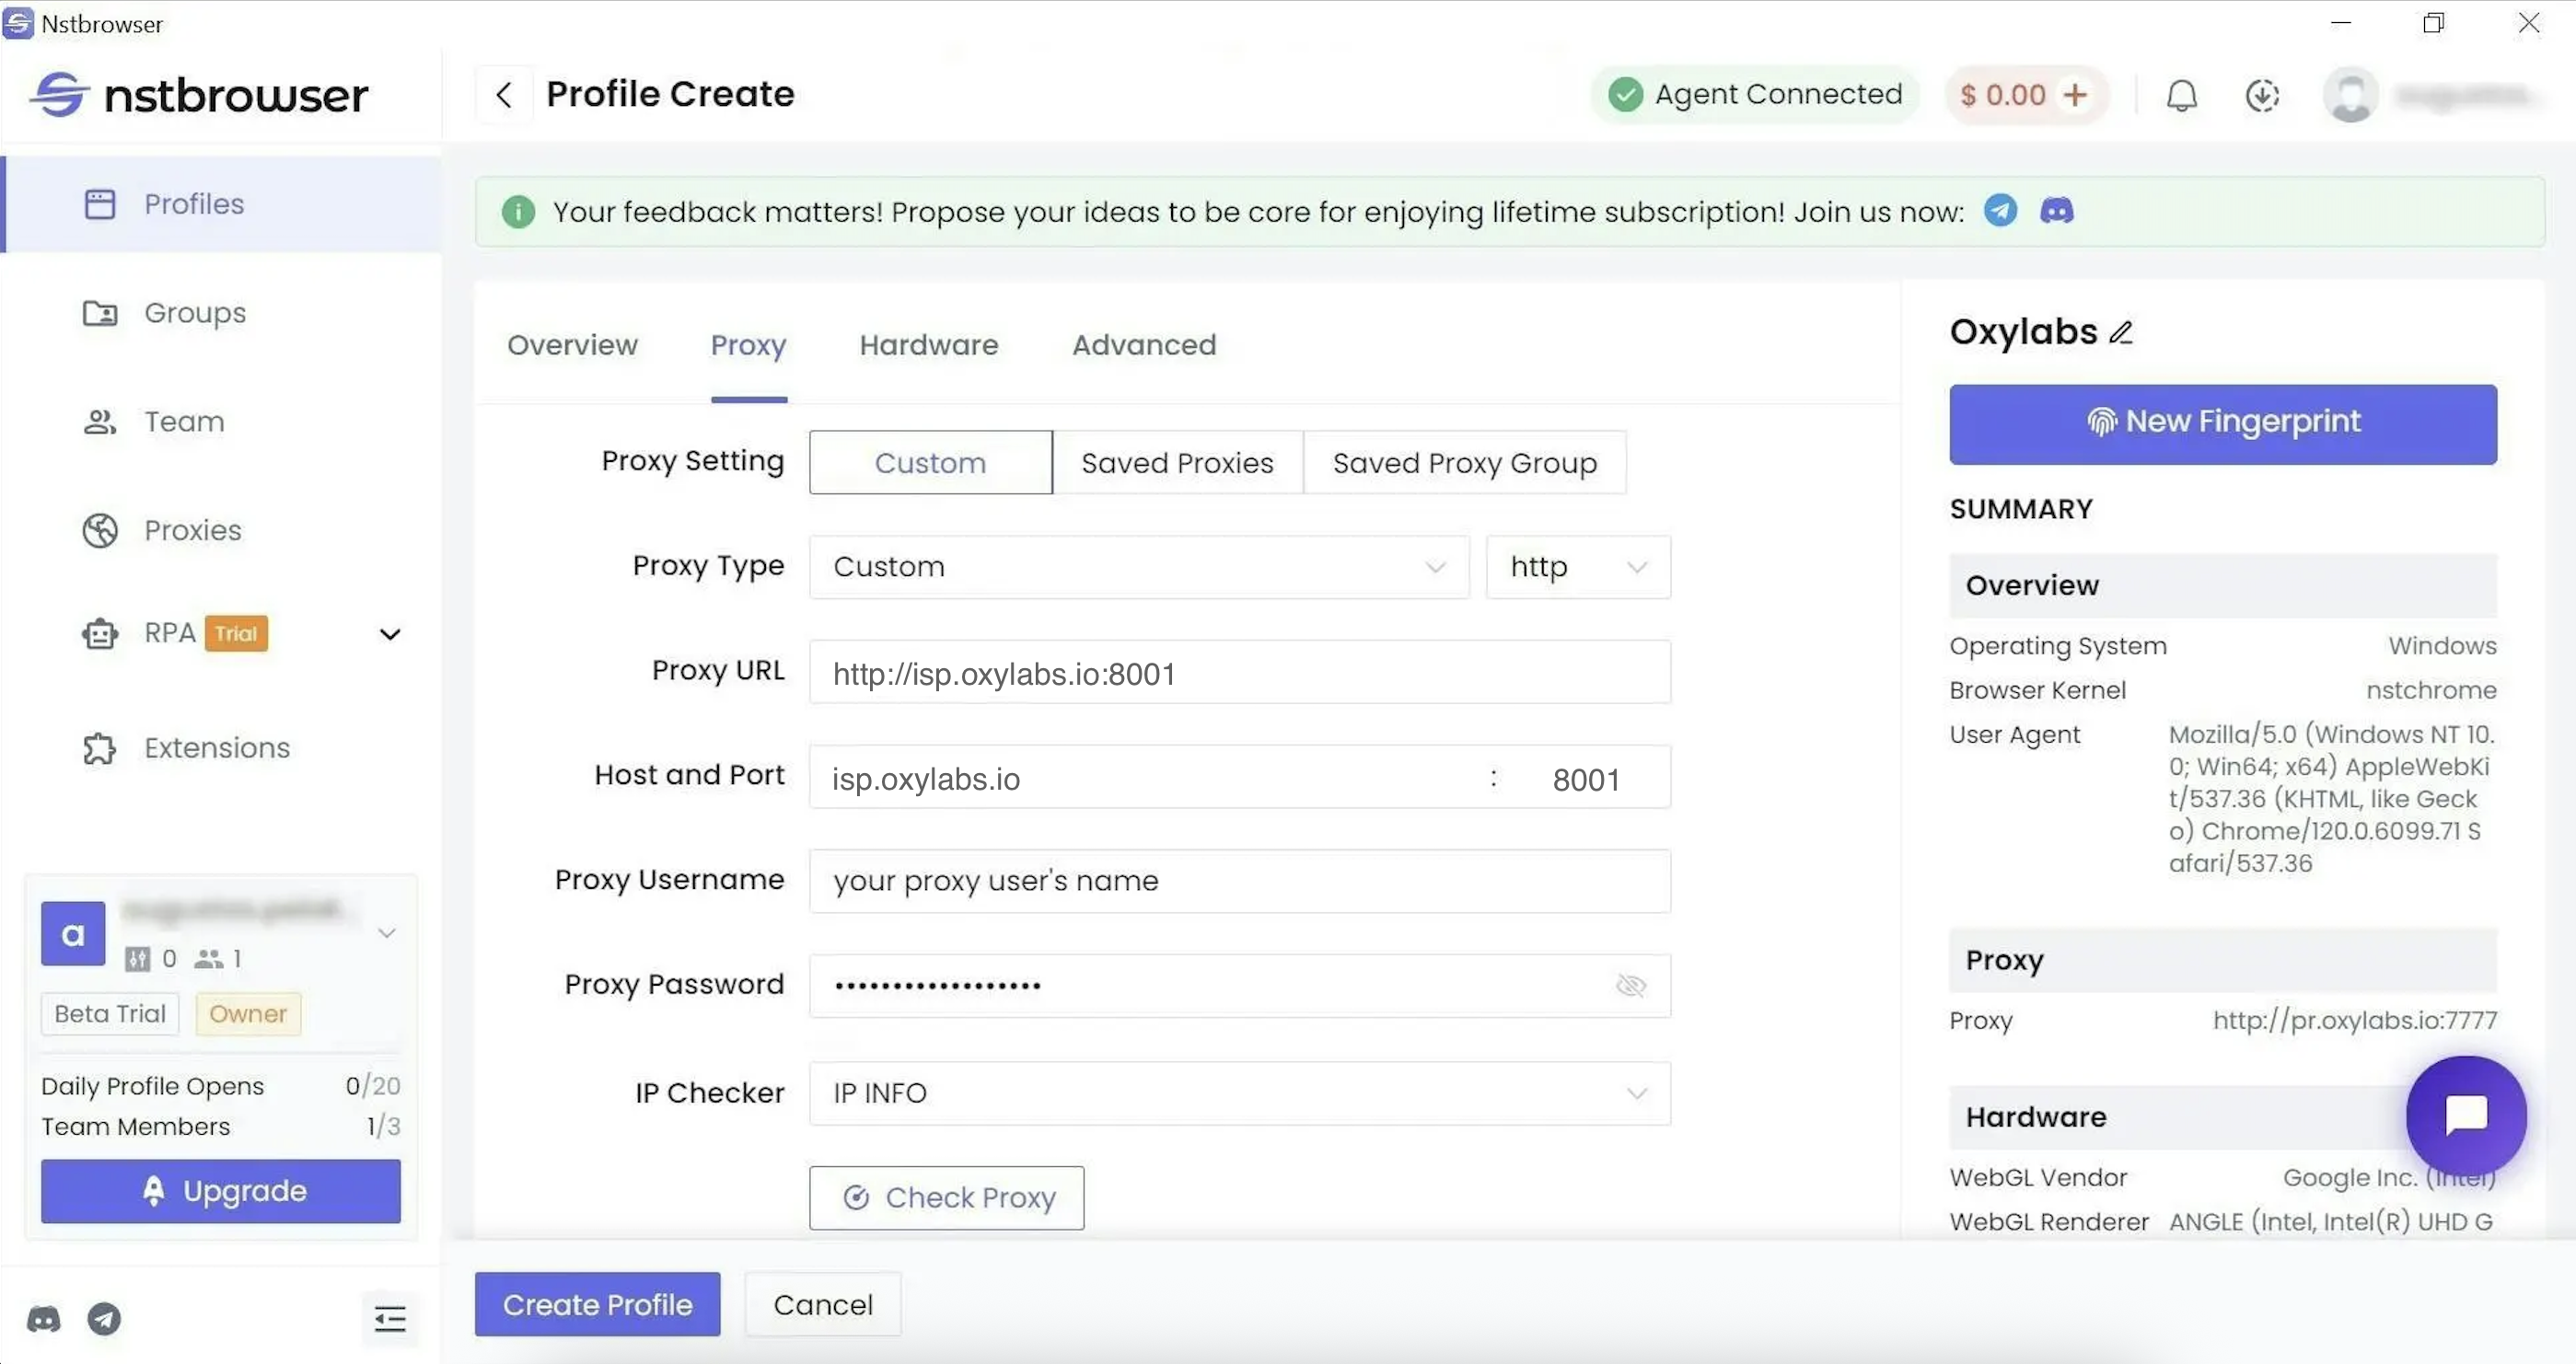
Customize your digital fingerprint, including the **Proxy** settings.
Customizing a new fingerprint
{% endstep %}
{% step %}
### Add your proxies
Configure the connection details and user credentials (created in the [Oxylabs dashboard](https://dashboard.oxylabs.io/en/)) for your chosen proxy type:
* [Residential & Mobile Proxies](#residential-and-mobile-proxies)
* [Datacenter Proxies](#datacenter-proxies)
* [Dedicated Datacenter Proxies (Enterprise)](#dedicated-datacenter-proxies-enterprise)
* [Dedicated Datacenter Proxies (Self-service)](#dedicated-datacenter-proxies-self-service)
* [ISP Proxies](#isp-proxies)
* [Dedicated ISP Proxies](#dedicated-isp-proxies)
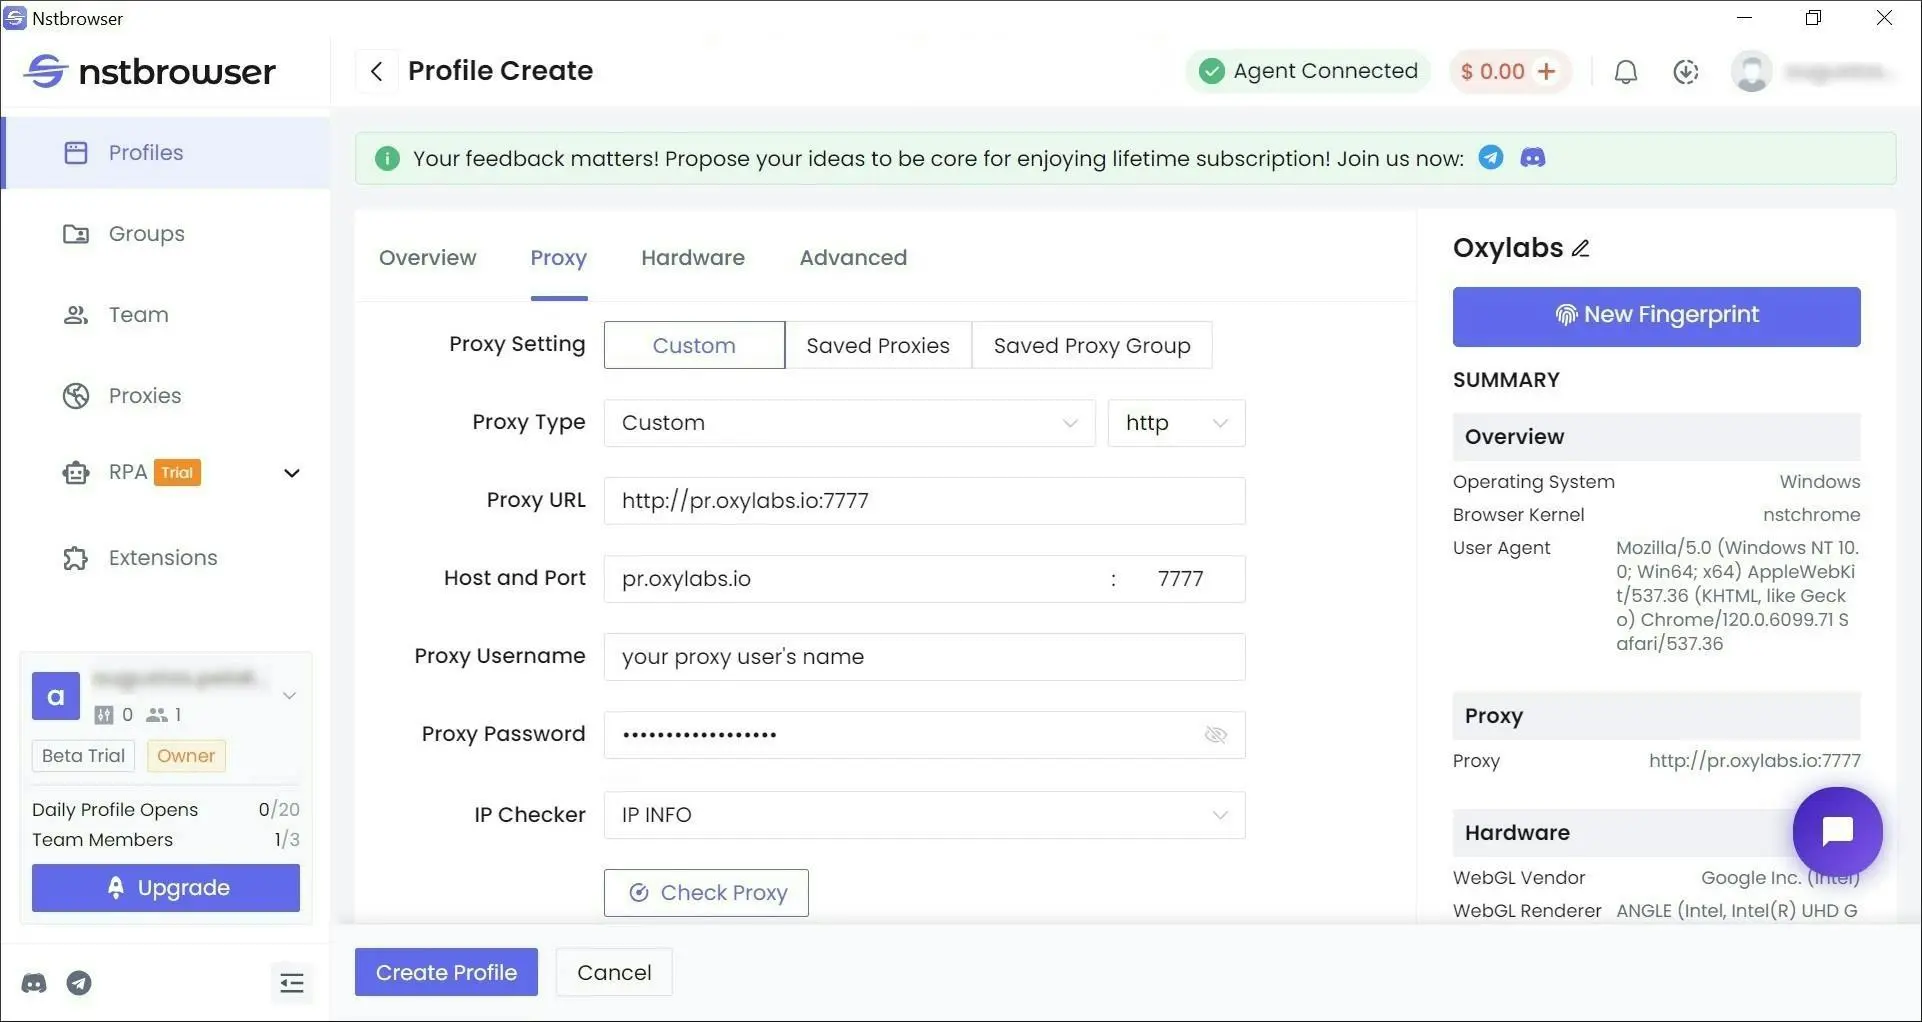
#### Residential & Mobile Proxies
**Type:** `HTTP`, `HTTPS`, or `SOCKS5`
**Host:** `pr.oxylabs.io`
**Port:** `7777`
**Proxy Username:** `customer-USERNAME`
**Proxy Password:** `PASSWORD`
{% hint style="warning" %}
**Note:** Don't forget to add `customer-` prefix to your username.
{% endhint %}
{% hint style="info" %}
You can also use country-specific entries to acquire a desired country exit node with a sticky session. For example, to use a US exit node, enter `us-pr.oxylabs.io` next to **Host or IP Address** and `10001` next to **Port**. You can find a complete list of location-specific information in our [documentation](/products/proxies/residential-proxies/location-settings.md).
{% endhint %}
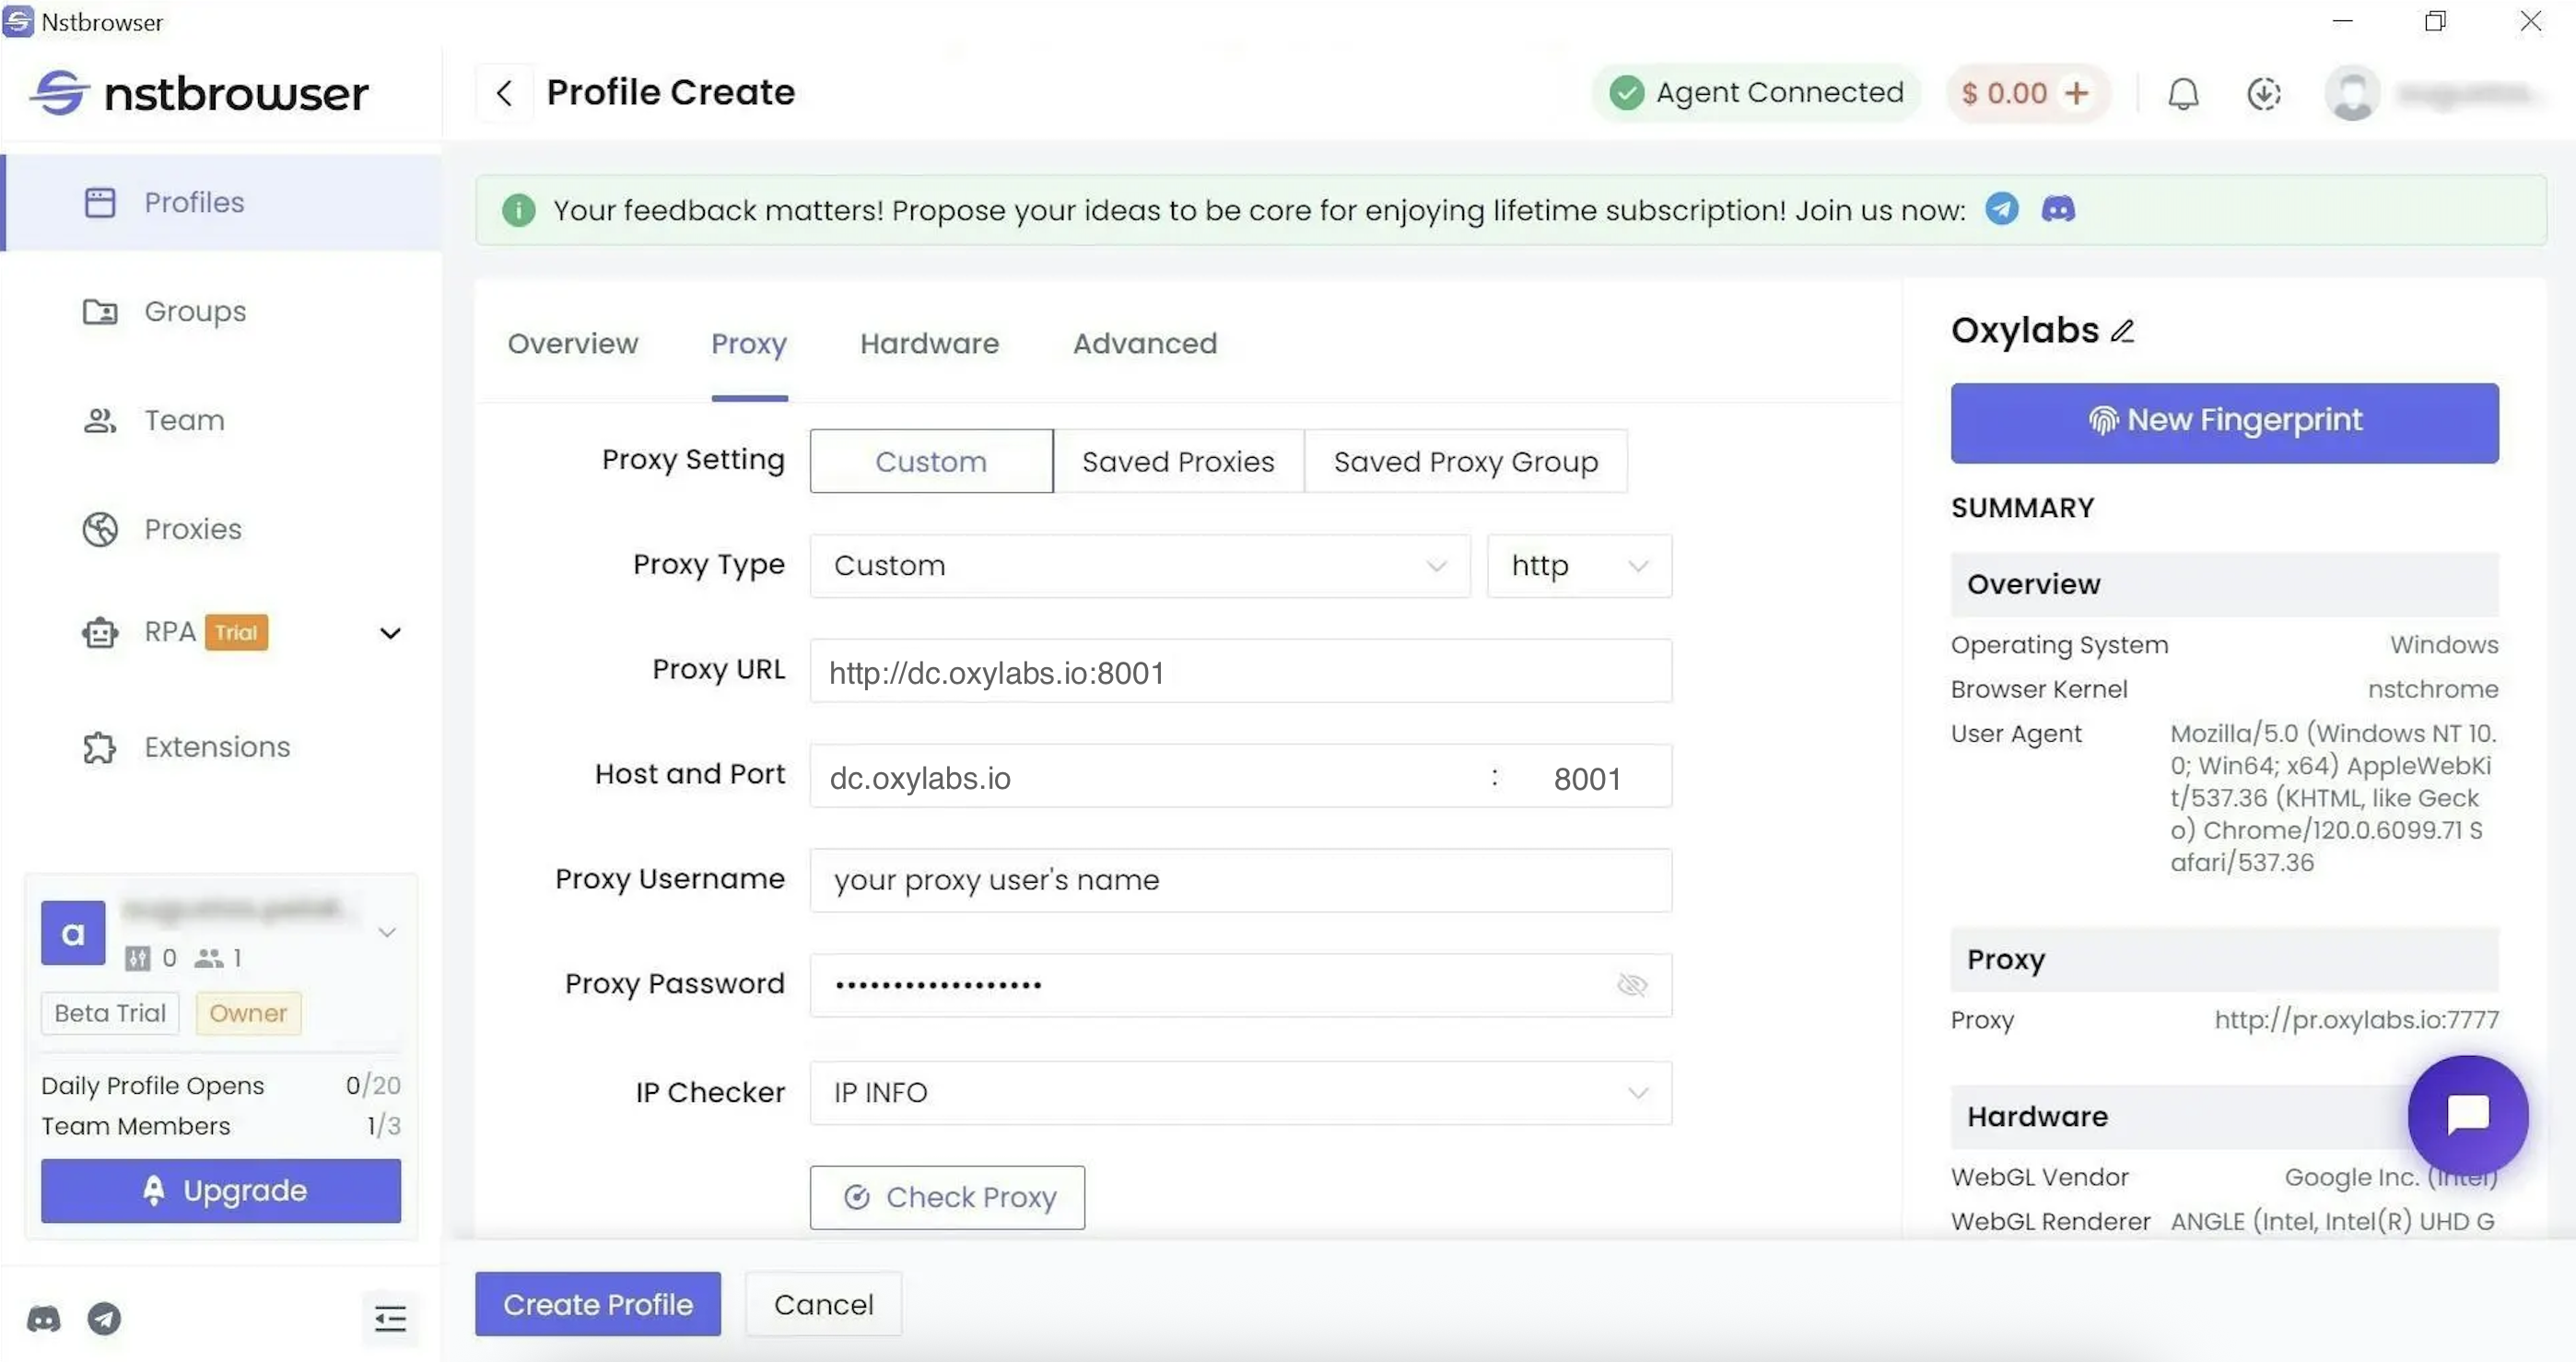
#### Datacenter Proxies
**Type:** `HTTP`, `HTTPS` or `SOCKS5`
**Host:** `dc.oxylabs.io`
**Port:** `8001`
**Proxy Username:** `user-USERNAME`
**Proxy Password:** `PASSWORD`
{% hint style="warning" %}
**Note:** Don't forget to add `user-` prefix to your username.
{% endhint %}
{% tabs %}
{% tab title="Pay-per-IP subscription" %}
The port corresponds to the sequential number assigned to an IP address from the provided list. Hence, port `8001`uses the first IP address on your list. See your acquired [**proxy list**](/products/proxies/datacenter-proxies/proxy-list.md)**.**
{% endtab %}
{% tab title="Pay-per-traffic subscription" %}
For the **Pay-per-traffic** subscription, port `8001`randomly selects an IP address but remains consistent throughout a session. You can also specify geo-location, such as the US, in the user authentication string: `user-USERNAME-country-US:PASSWORD`. For more details, visit [**IP control**](/products/proxies/datacenter-proxies/ip-control.md)**.**
{% endtab %}
{% endtabs %}
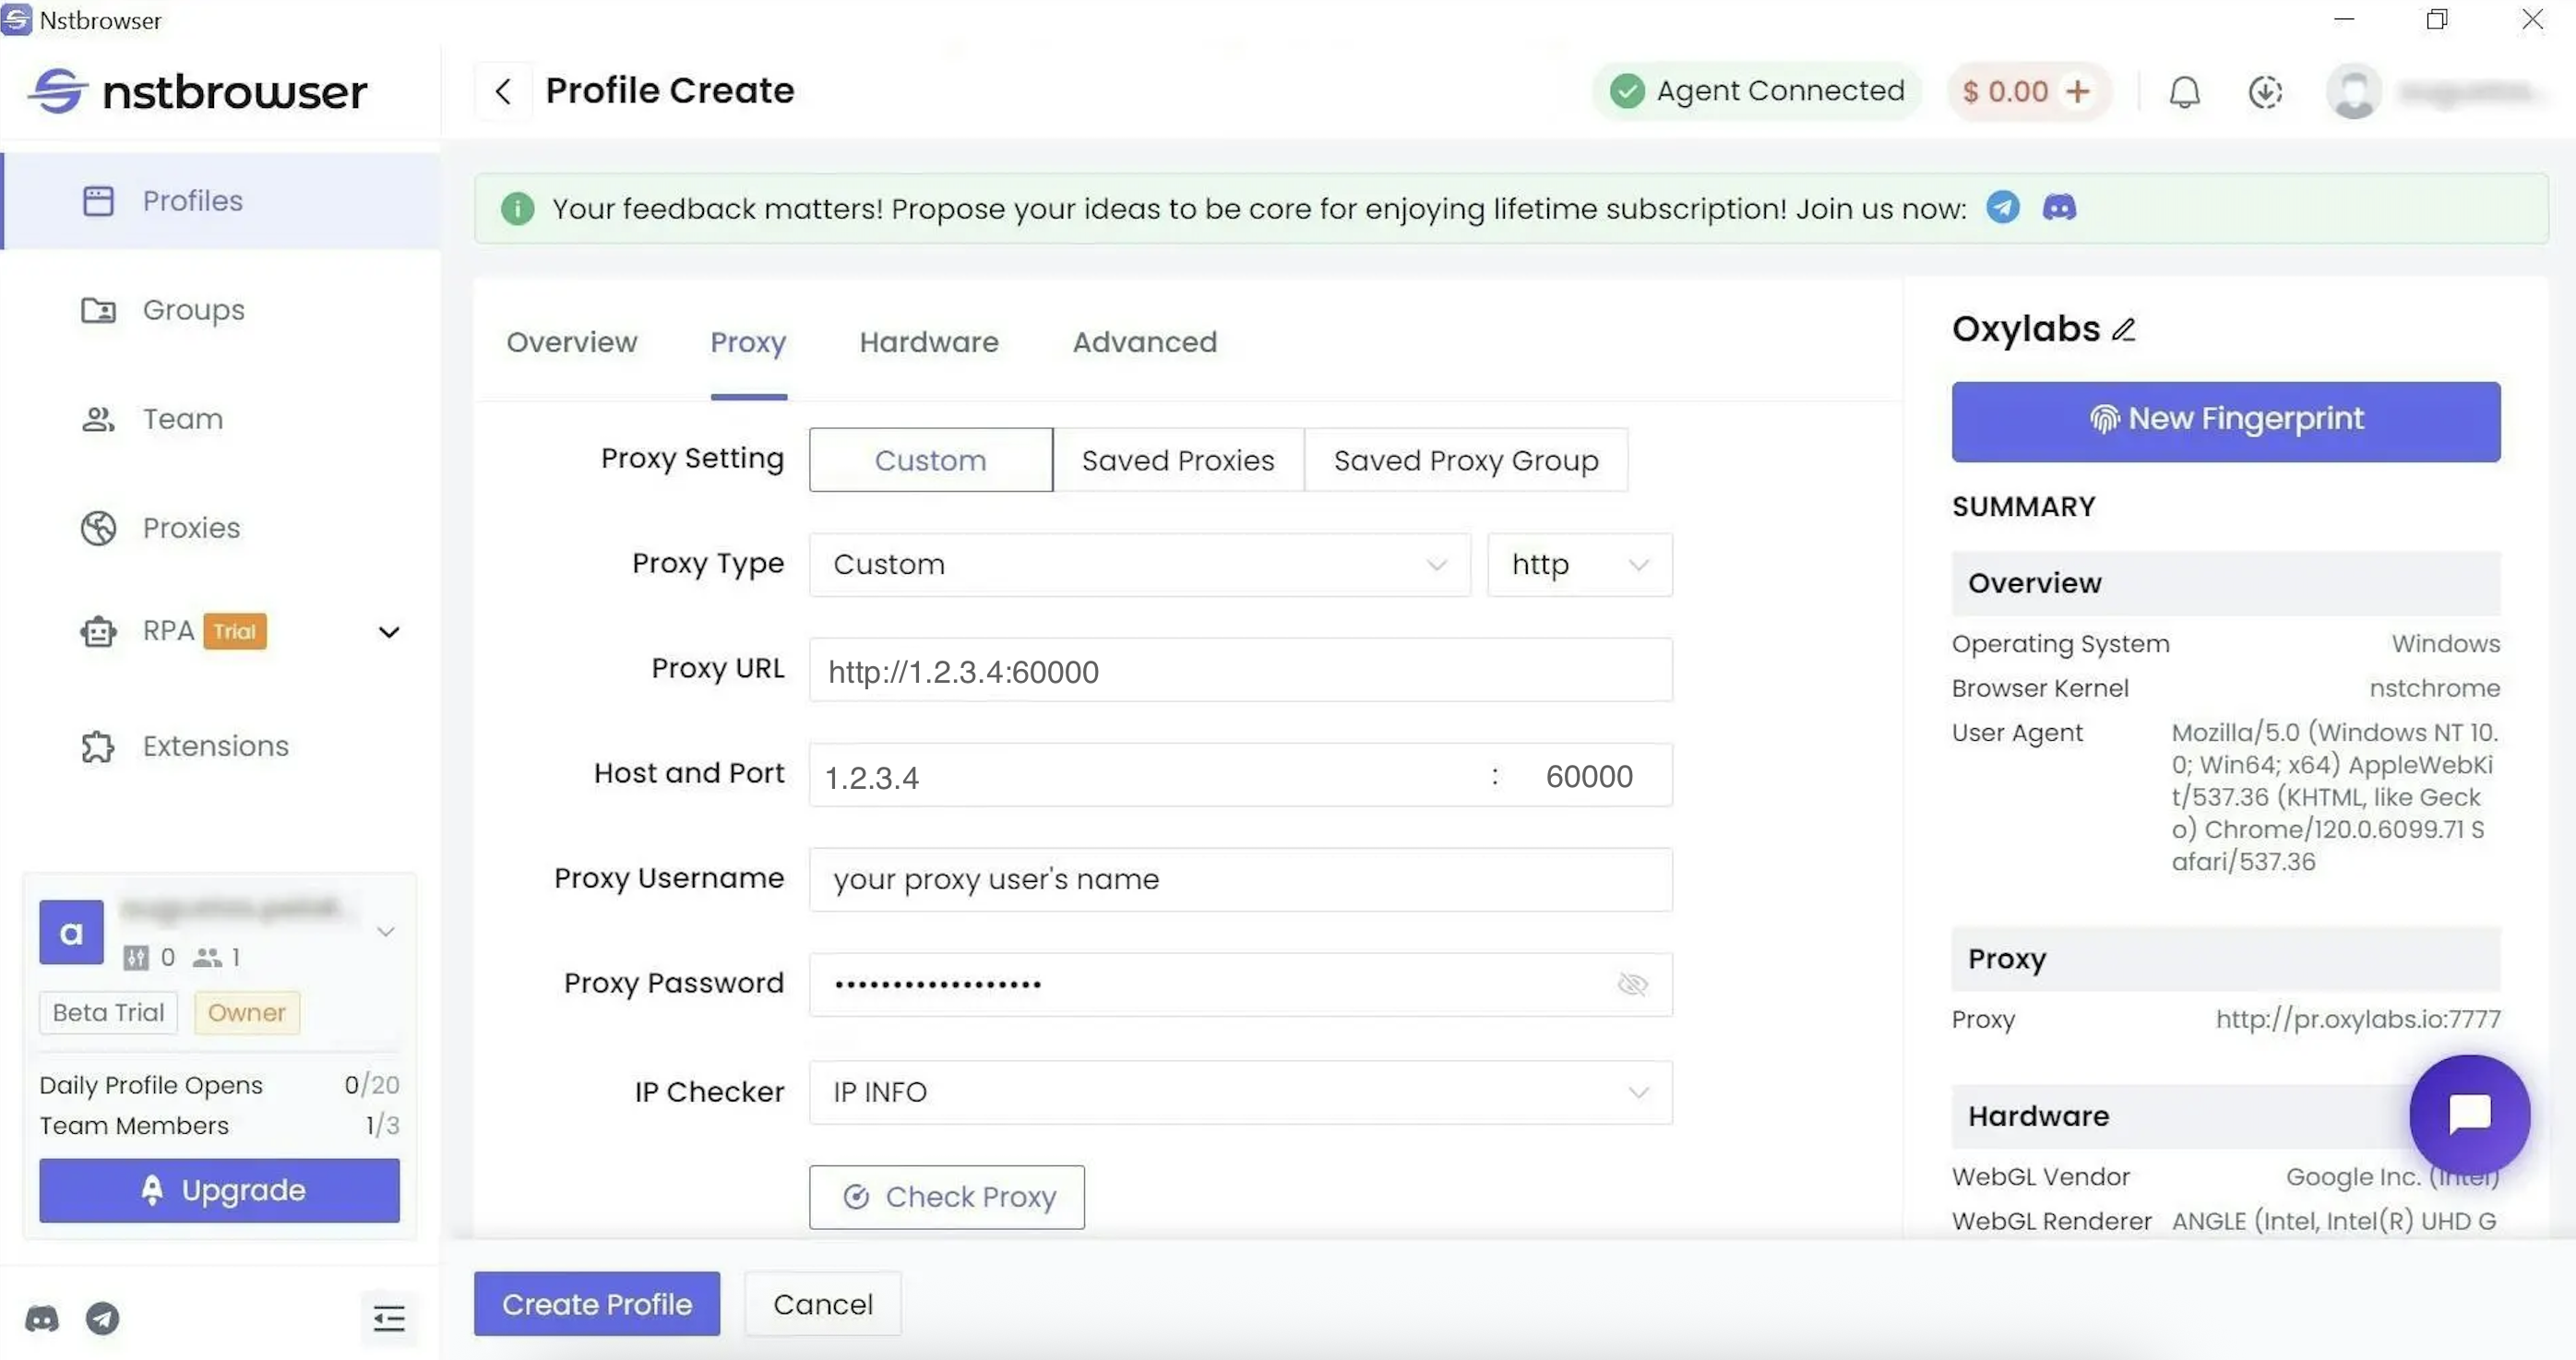
#### Dedicated Datacenter Proxies (Enterprise)
**Type:** `HTTP`or `SOCKS5`
**Host:** `1.2.3.4` (a specific IP address)
**Port:** `60000`
**Proxy Username:** `USERNAME`
**Proxy Password:** `PASSWORD`
{% hint style="info" %}
For Enterprise Dedicated Datacenter Proxies, you’ll have to choose an IP address from the [**acquired list**](/products/proxies/dedicated-datacenter-proxies/enterprise/proxy-lists.md)**.**
{% endhint %}
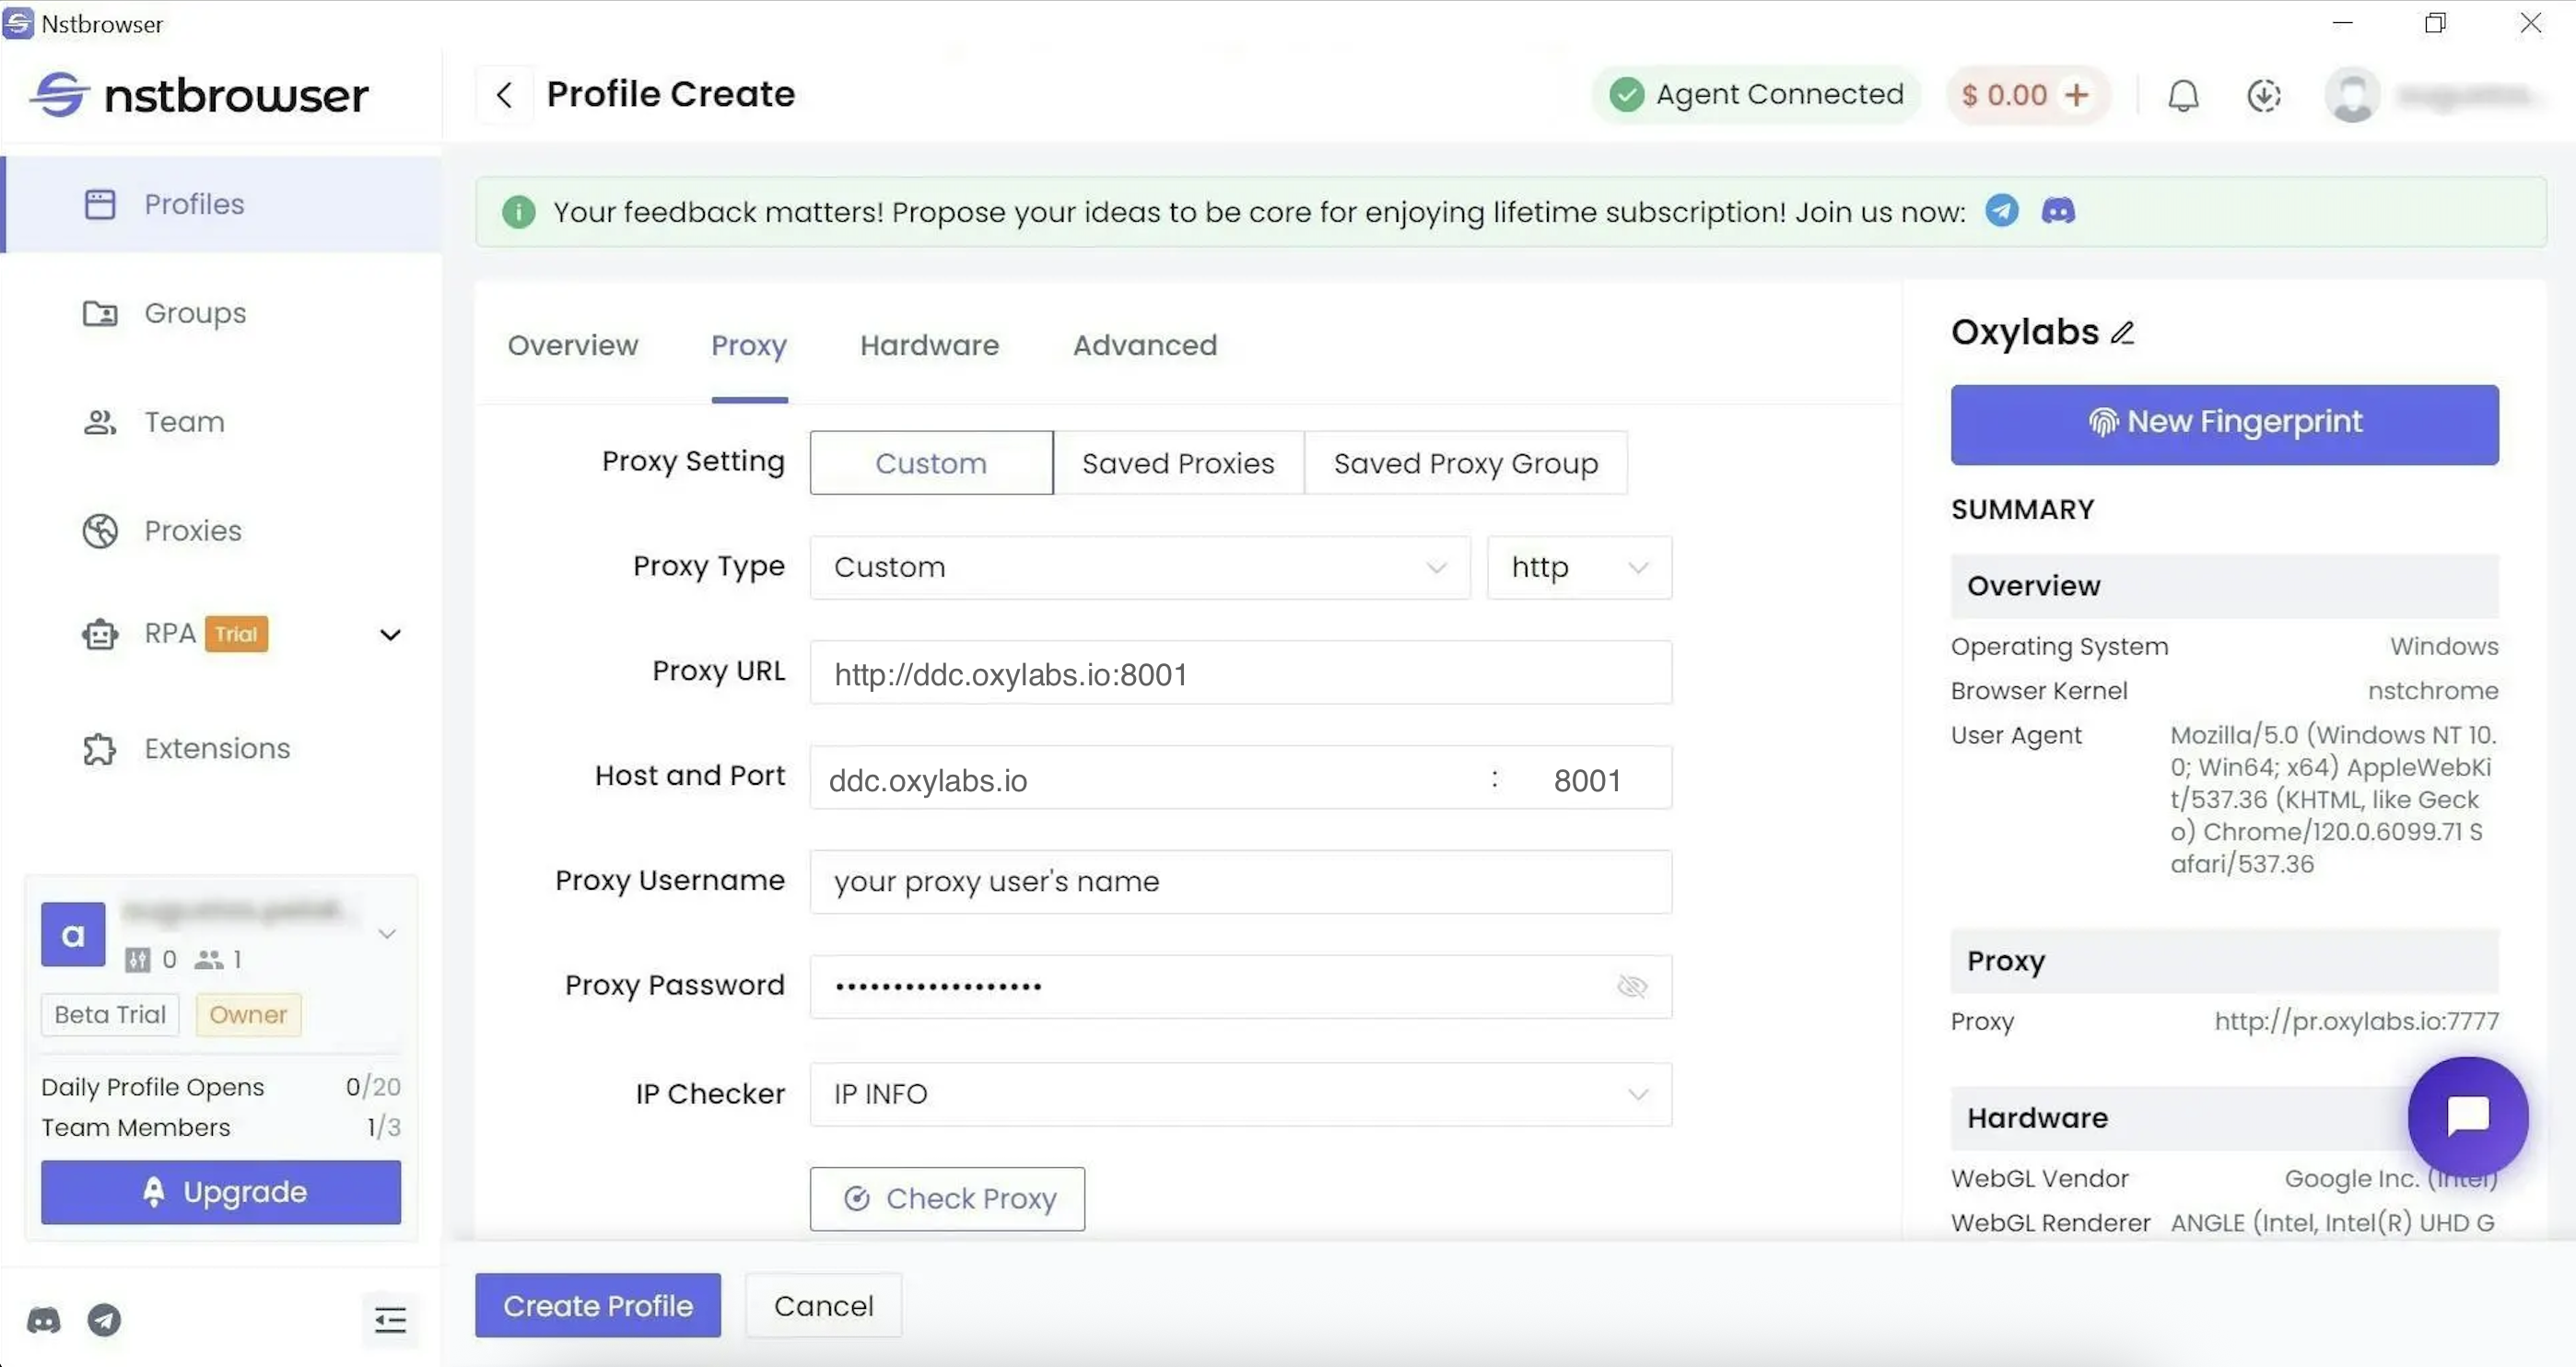
#### Dedicated Datacenter Proxies (Self-service)
**Type:** `HTTP`, `HTTPS` or `SOCKS5`
**Host:** `ddc.oxylabs.io`
**Port:** `8001`
**Proxy Username:** `user-USERNAME`
**Proxy Password:** `PASSWORD`
{% hint style="warning" %}
**Note:** Don't forget to add `user-` prefix to your username.
{% endhint %}
{% hint style="info" %}
For Self-Service Dedicated Datacenter Proxies, the port indicates the sequential number of an IP address from the [**acquired list**](/products/proxies/dedicated-datacenter-proxies/self-service/proxy-list.md).
{% endhint %}
#### ISP Proxies
**Type:** `HTTP`, `HTTPS`, or `SOCKS5`
**Host:** `isp.oxylabs.io`
**Port:** `8001`
**Proxy Username:** `user-USERNAME`
**Proxy Password:** `PASSWORD`
{% hint style="warning" %}
**Note:** Don't forget to add `user-` prefix to your username.
{% endhint %}
{% hint style="info" %}
Find the complete list of your purchased proxies under My Products -> ISP Proxies -> Proxy list menu in the [**dashboard**](https://dashboard.oxylabs.io/?route=/overview/isp/buy-now). Entry point value is always `isp.oxylabs.io`. Port number always starts from `8001` and goes up.
{% endhint %}
#### Dedicated ISP Proxies
**Proxy type**: `HTTP`, `HTTPS`, or `SOCKS5`
**Host**: `disp.oxylabs.io`
**Port**: `8001`
**Proxy Username:** `user-USERNAME`
**Proxy Password:** `PASSWORD`
{% hint style="warning" %}
Make sure to add the `user-` part to your username.
{% endhint %}
{% hint style="info" %}
The port number indicates which IP address from your acquired [proxy list](/products/proxies/dedicated-isp-proxies/self-service/proxy-list.md) will be used. Use port `8000` for automatic [proxy IP rotation](/products/proxies/dedicated-isp-proxies/self-service/proxy-rotation.md).
{% endhint %}
{% endstep %}
{% step %}
### Check your connection
**Check Proxy** to test the connection and **Create Profile** to finish the setup.
{% endstep %}
{% step %}
### Launch the profile
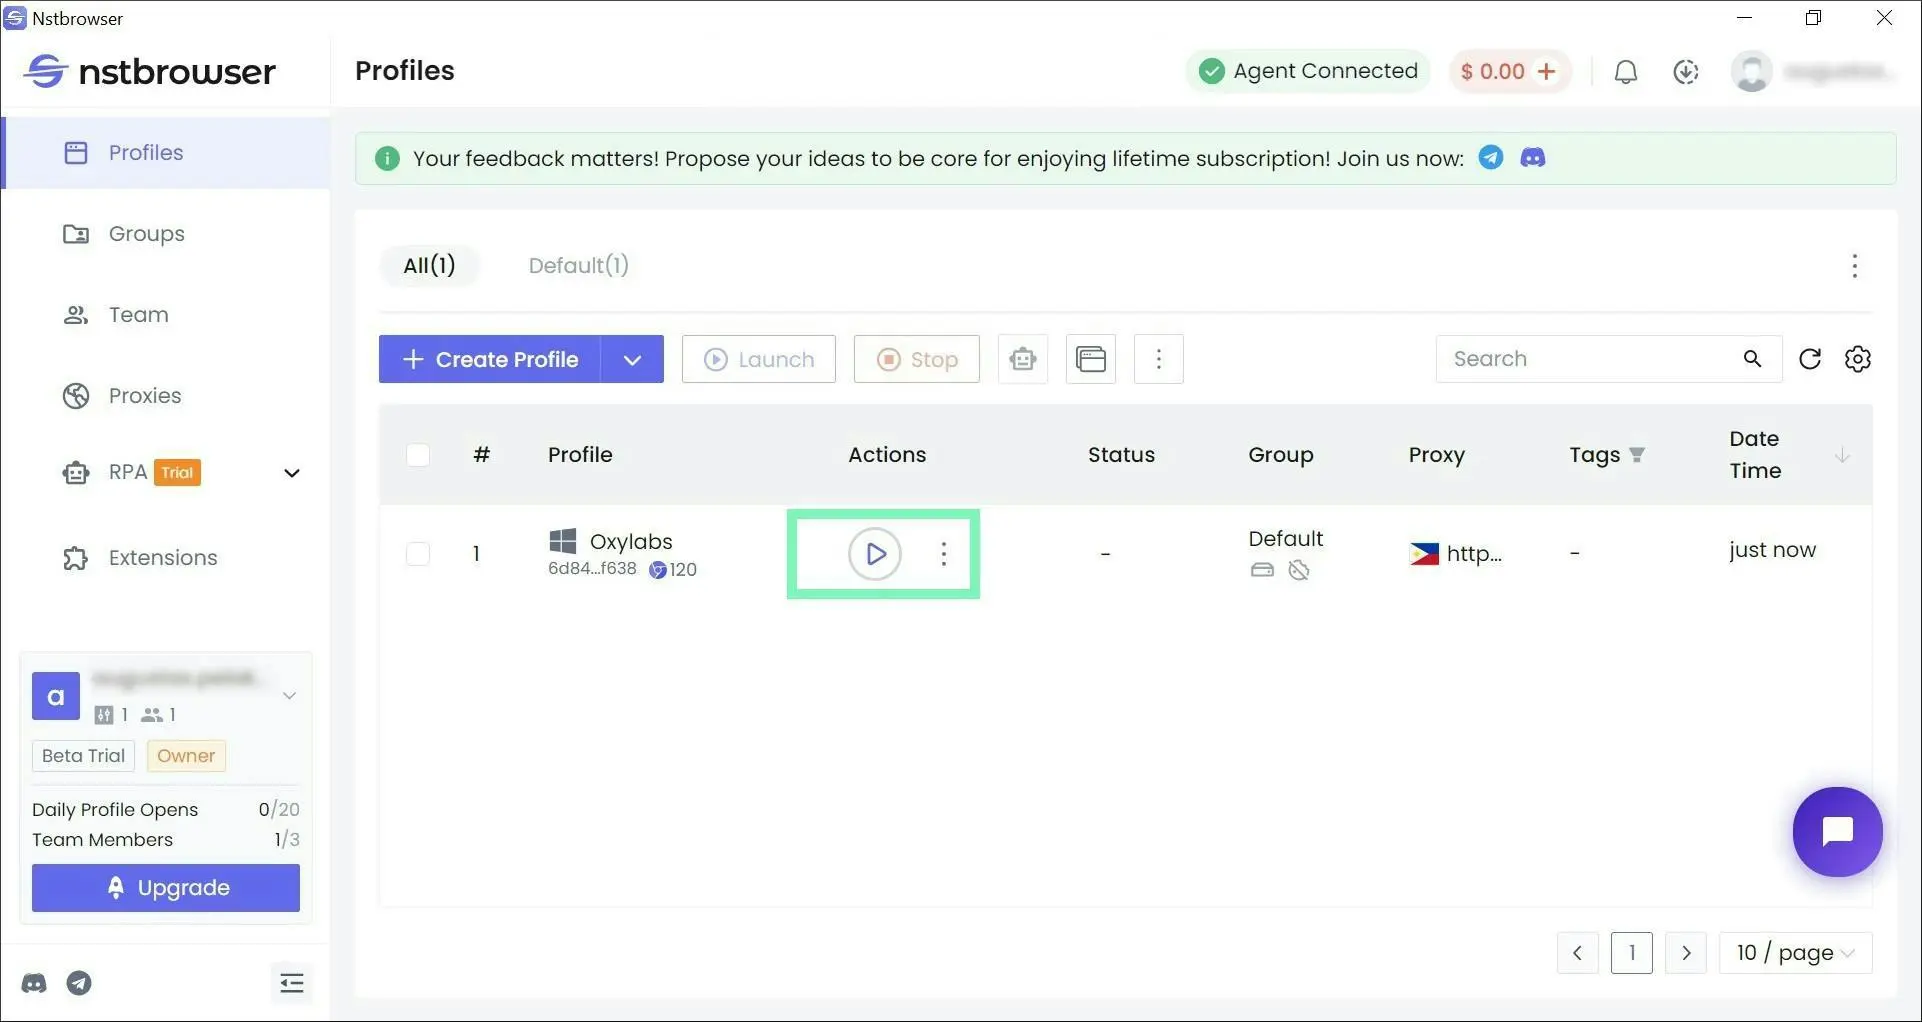
Finally, start ▶ the newly created profile to launch a Chromium browser window.
Launching a browser profile
{% hint style="info" %}
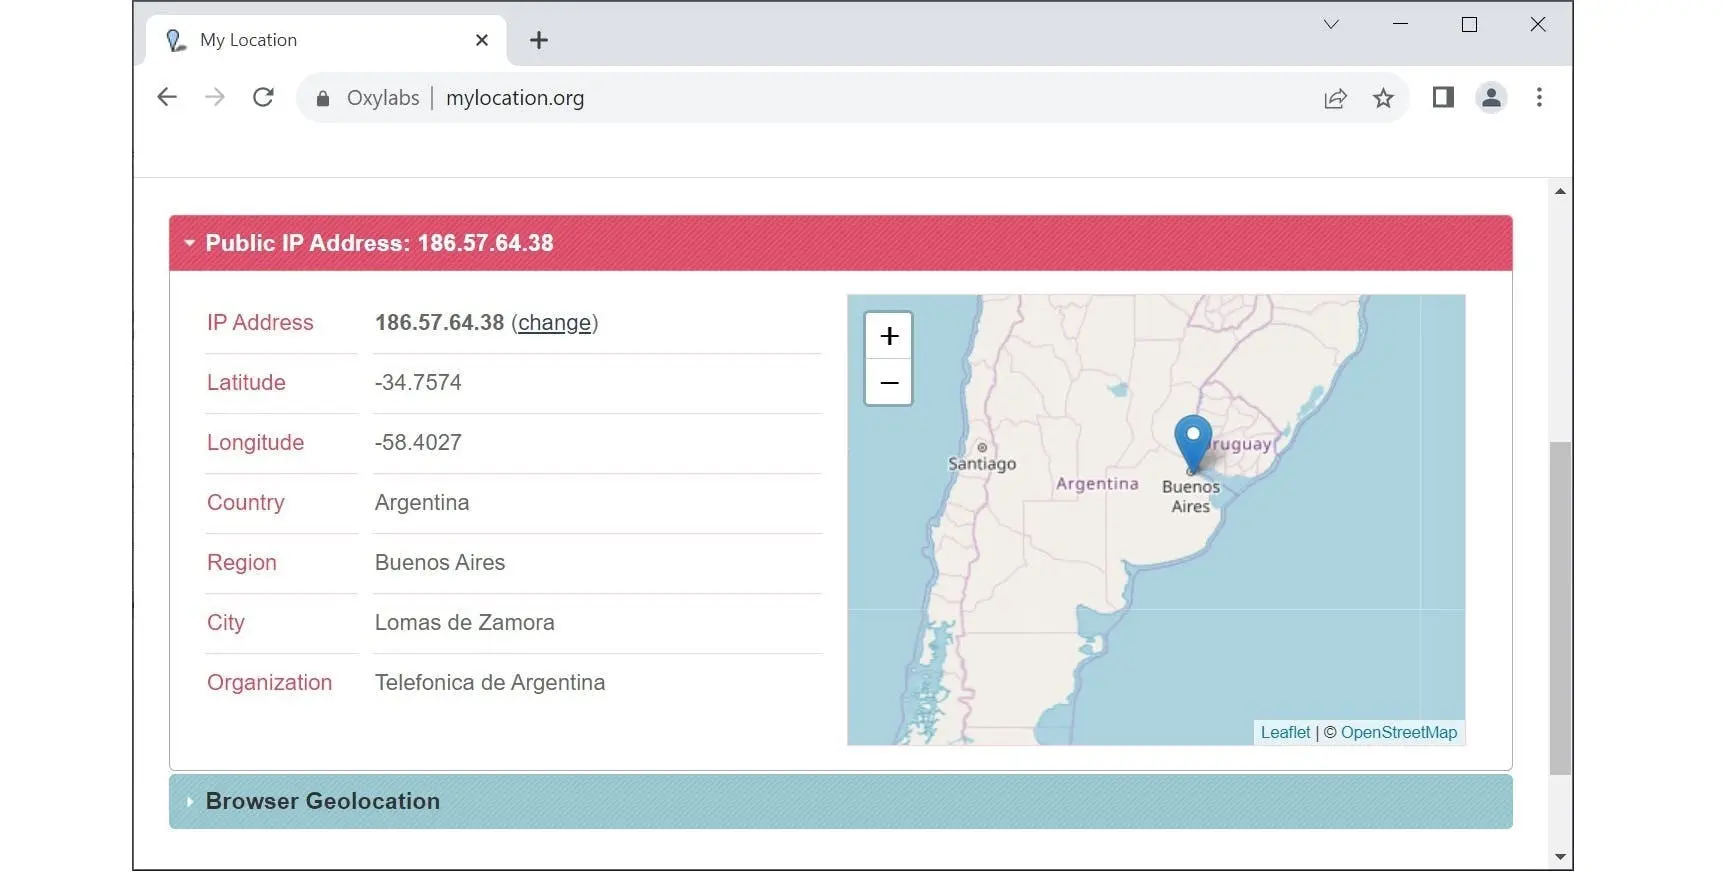
Optionally, using an in-app browser, you can navigate to a location detection website and see if the location and IP align with your expectations.
{% endhint %}
Confirming location preferences
{% endstep %}
{% endstepper %}
You’re all set!
---
# Agent Instructions
This documentation is published with GitBook. GitBook is the documentation platform designed so that both humans and AI agents can read, navigate, and reason over technical content effectively. Learn more at gitbook.com.
## Querying This Documentation
If you need additional information that is not directly available in this page, you can query the documentation by asking a question.
Perform an HTTP GET request on the following URL with the `ask` and `goal` query parameters:
```
GET https://developers.oxylabs.io/integrations/proxy-integrations/nstbrowser.md?ask=&goal=
```
`ask` is the immediate question: it should be specific, self-contained, and written in natural language.
`goal` is what the user is ultimately trying to achieve, the reason they need the answer. Sharing it helps GitBook give you a better, more relevant answer. A goal is most helpful when it describes the outcome the user wants rather than restating the question. For example, with `ask=how do I create an API token`, a goal like `automate deployments from our CI pipeline` lets GitBook tailor the answer to that use case.
The response will contain a direct answer to the question and relevant excerpts and sources from the documentation.
Use this mechanism when the answer is not explicitly present in the current page, you need clarification or additional context, or you want to retrieve related documentation sections.
.png?alt=media)