For the complete documentation index, see llms.txt. This page is also available as Markdown.

Multilogin

Integrate Multilogin with Oxylabs Proxies to create virtual browser profiles. Step-by-step guide for the antidetect browser.

Multilogin is a reliable, market-leading solution designed to build virtual browser profiles hassle-free.

Follow the instructions below to integrate the following Oxylabs Proxies:

1

Log in to Multilogin and create a profile

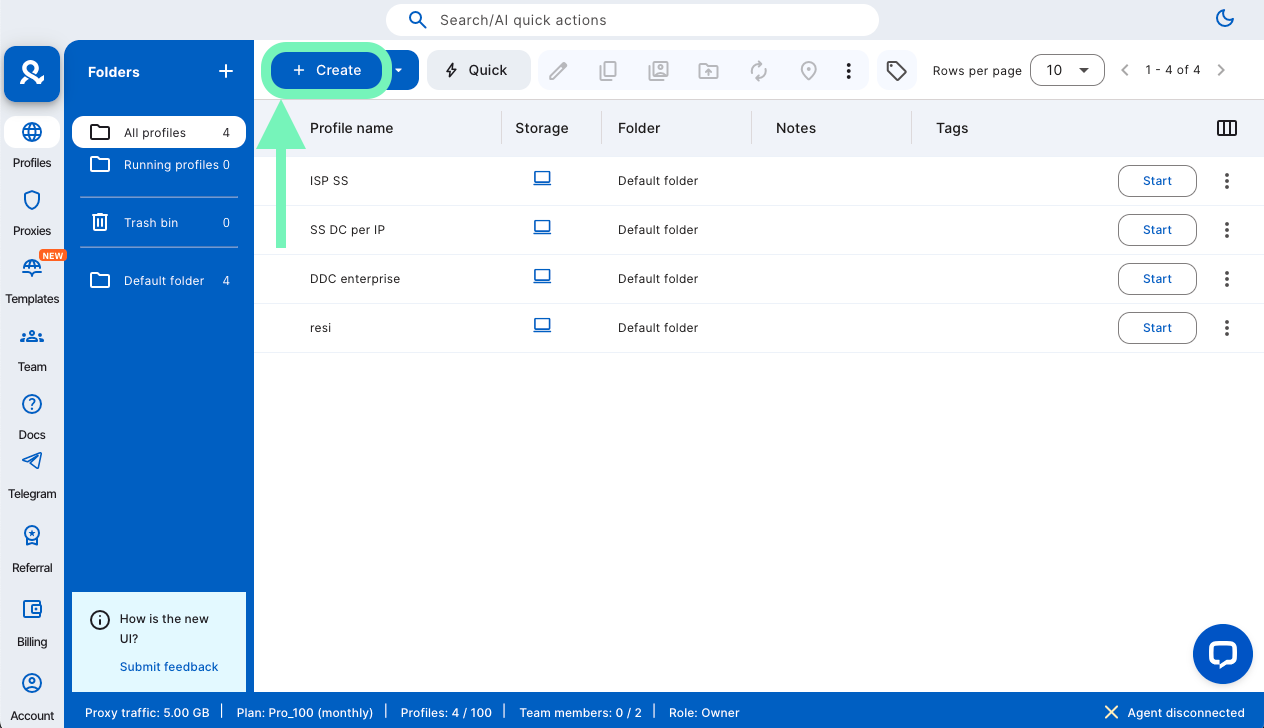
Go to the Multilogin official website, log in, and look for the +Create button to create a new profile

2

Add a new proxy

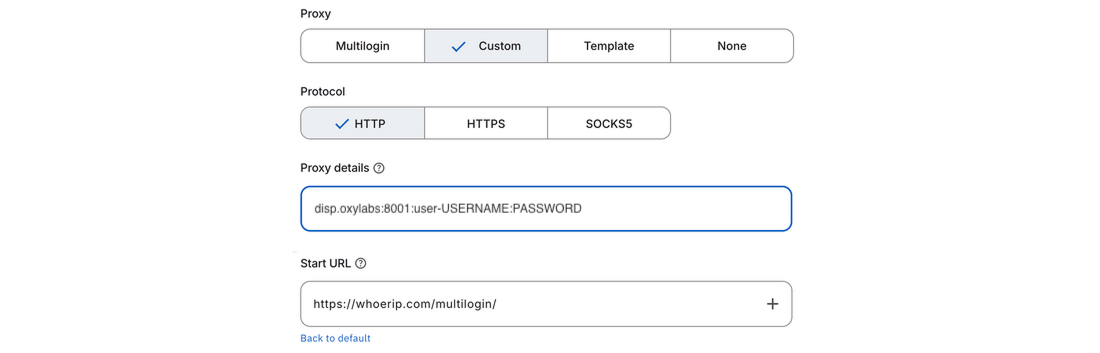
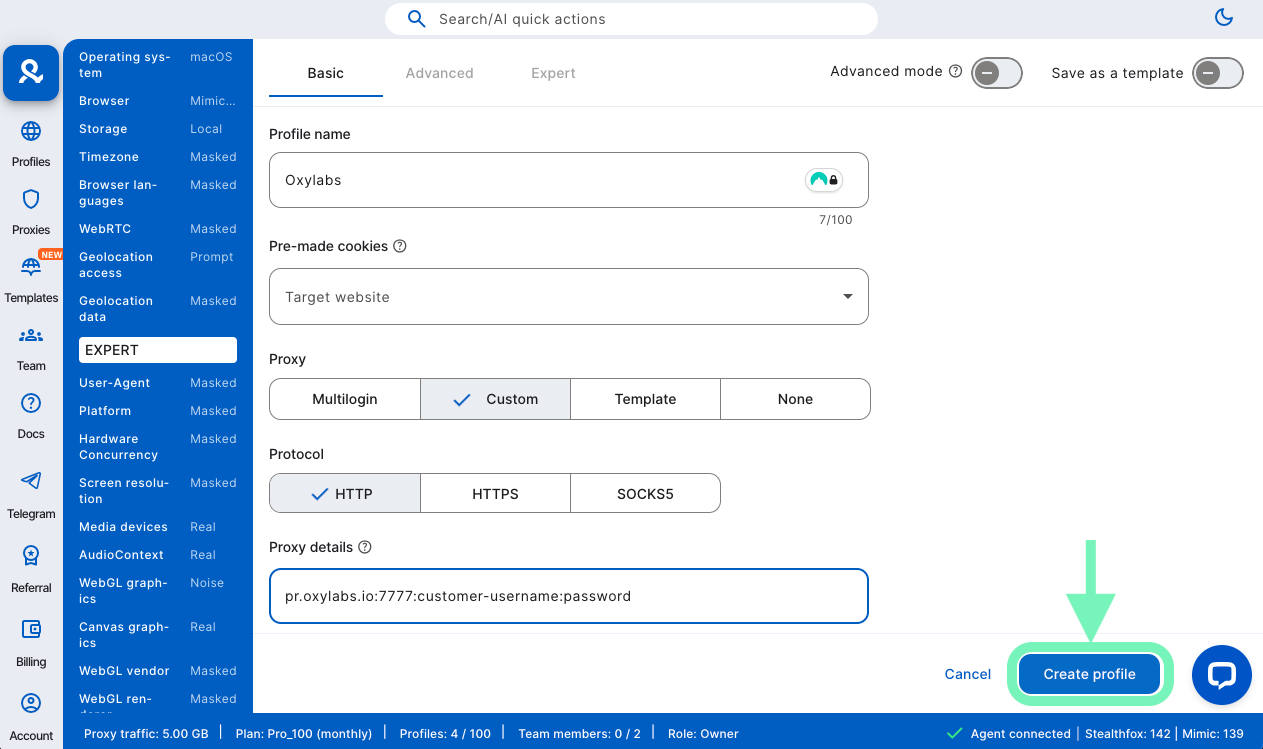
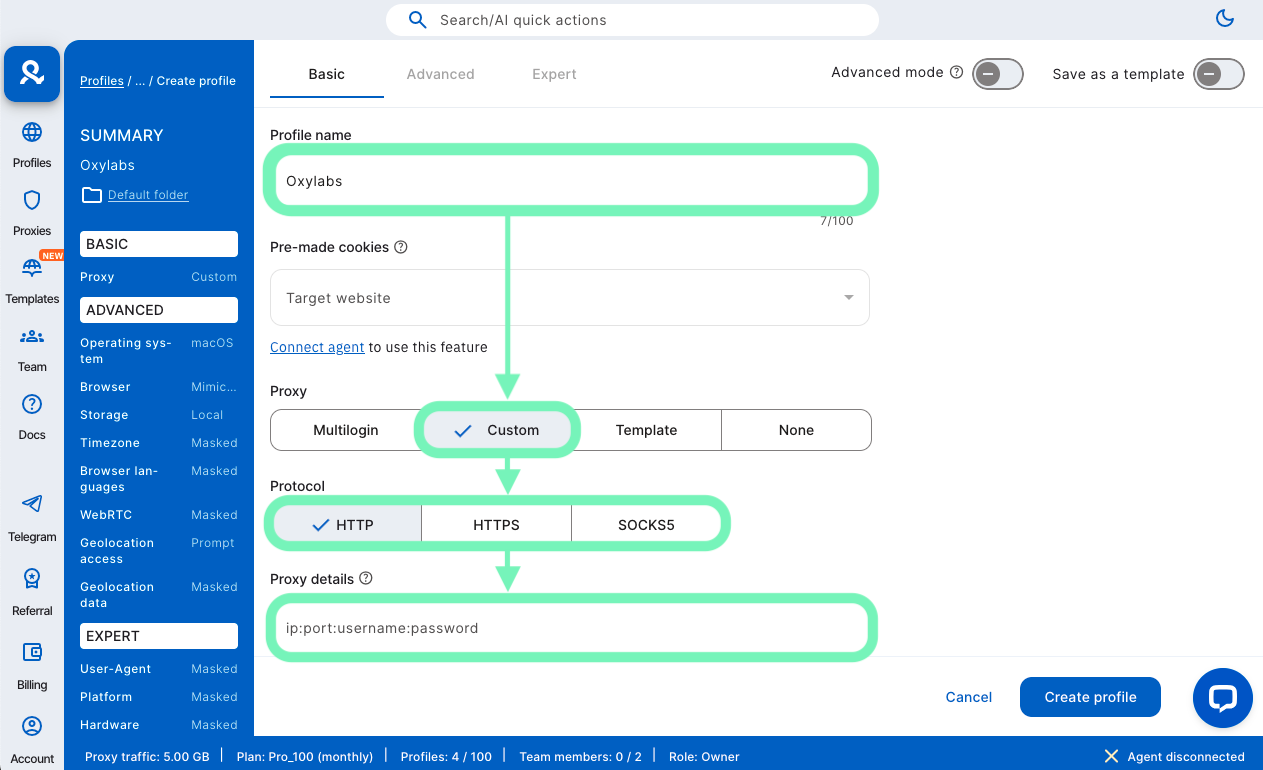
Enter the profile name, select Custom proxy, and choose a proxy protocol (HTTP, HTTPS, or SOCKS5)

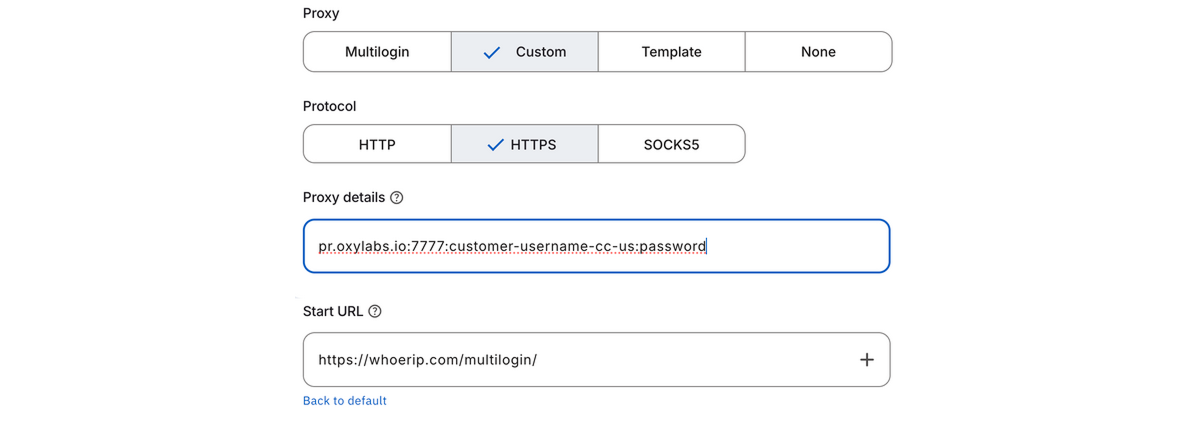
Then enter your proxy details and Oxylabs proxy user’s credentials (created in the Oxylabs dashboard) for your chosen proxy type:

Residential & Mobile Proxies

Host: pr.oxylabs.io

Port: 7777

Username: customer-username

Password: password

You may also use additional parameters with residential and mobile proxies to set the geo-location (country, state, city, and etc.) and control sessions. Check out the Residential Proxies documentation to learn more. The table below provides an overview of available parameters and their example values.

Proxy parameter
Example

Country entry node

Host: us-pr.oxylabs.io

Port: 10000

Country

User: customer-username-cc-US

State

User: customer-username-st-US_texas

City

User: customer-username-city-paris

Continent

User: customer-username-cn-NA

ZIP/Postal code

User: customer-username-cc-US-postalcode-90210

ASN Targeting

User: customer-username-ASN-21928

Session

User: customer-username-sessid-qwerty123-sesstime-30

Session time

Host: us-pr.oxylabs.io

Port: 10001

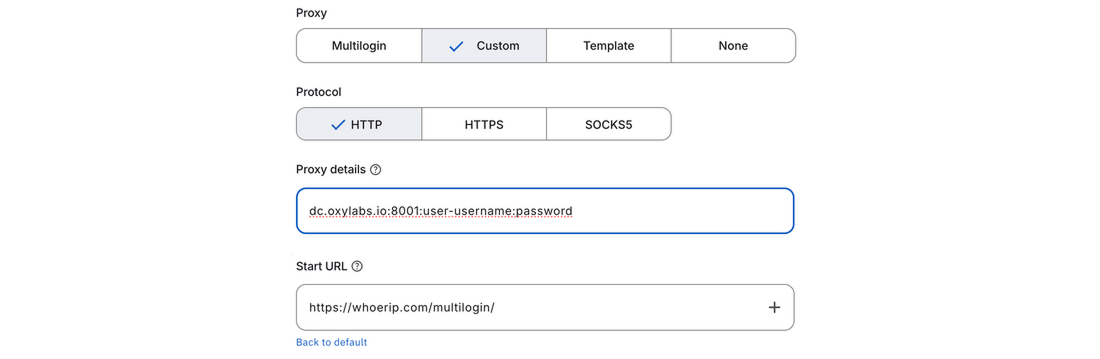
Datacenter Proxies

Host: dc.oxylabs.io

Port: 8001

Username: user-userername

Password: password

The port is the sequential number assigned to an IP address from the proxy list. Thus, port 8001 uses the first IP address from your list. You may also enable proxy IP rotation by setting the port to 8000.

Furthermore, you can specify the geo-location, for example, the US, by setting the Proxy username to user-USERNAME-country-US.

The port 8001 picks a random IP address but stays consistent during a session. Alternatively, you can rotate proxy IPs with each request by using port 8000.

If you want to use a specific geo-location, for example, the US, set the Proxy username to user-USERNAME-country-US.

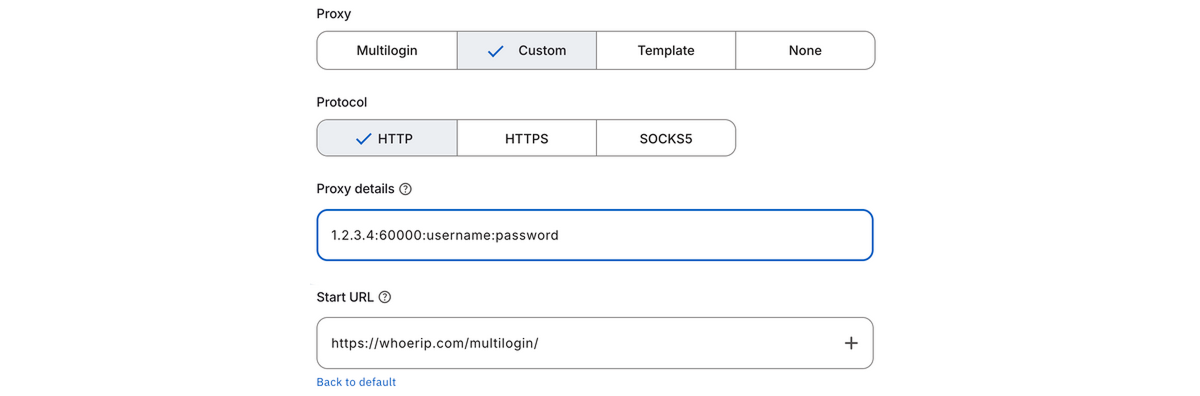
Dedicated Datacenter Proxies (Enterprise)

Host: 1.2.3.4 (IP address from your proxy list)

Port: 60000 (HTTP) or 1180 (SOCKS5)

Username: username

Password: password

For Enterprise Dedicated Datacenter Proxies, you’ll have to choose an IP address from the acquired proxy list.

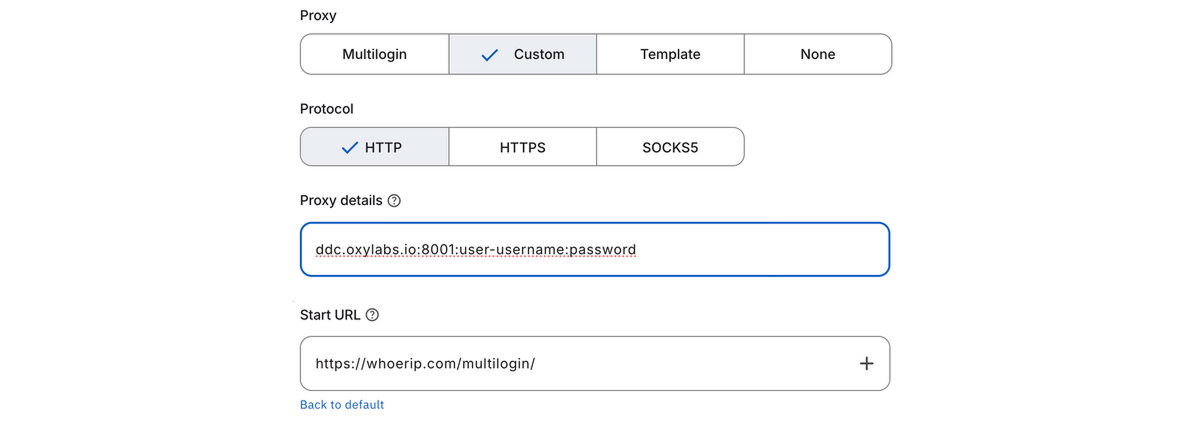
Dedicated Datacenter Proxies (Self-service)

Host: ddc.oxylabs.io

Port: 8001

Username: user-userername

Password: password

For Self-Service Dedicated Datacenter Proxies, the port indicates the sequential number of an IP address from the acquired proxy list.

If you want to get a different IP with each request, change the Port to 8000 to enable proxy rotation.

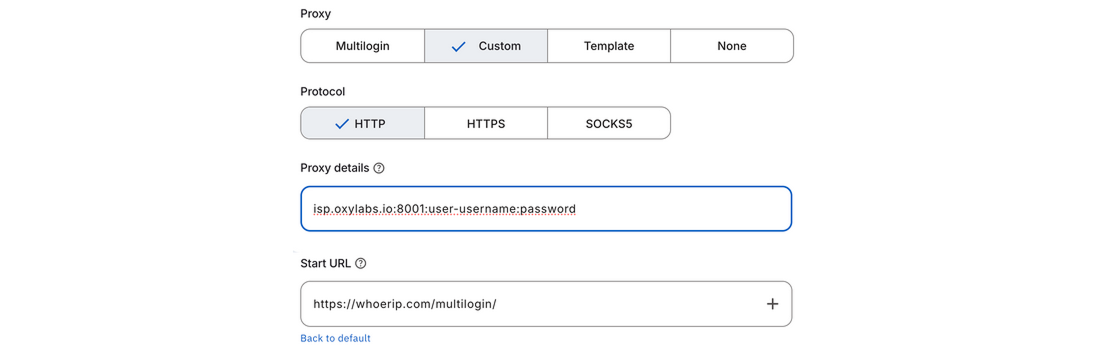
ISP Proxies

Host: isp.oxylabs.io

Port: 8001

Username: user-username

Password: password

With ISP Proxies, the port is assigned to a specific IP address and its location. Hence, port 8001 will always pick the first IP from your proxy list.

If you want to get a different IP with each request, change the Port to 8000 to enable proxy rotation.

Dedicated ISP Proxies

Host: disp.oxylabs.io

Port: 8001

Username: user-USERNAME

Password: PASSWORD

You will need to choose the port assigned to an IP address from the purchased proxy list, which you can find on the Oxylabs dashboard. The 8001 port will pick the first IP address from your list for all requests.

Use port 8000 for automatic proxy IP rotation.

3

Finish the profile

If you need to use specific browser fingerprint options, such as user agent, cookies, and device settings, toggle Advanced mode at the top of the screen. Otherwise, you can finalize your new profile by clicking Create profile at the bottom of the screen.

4

Run new profile

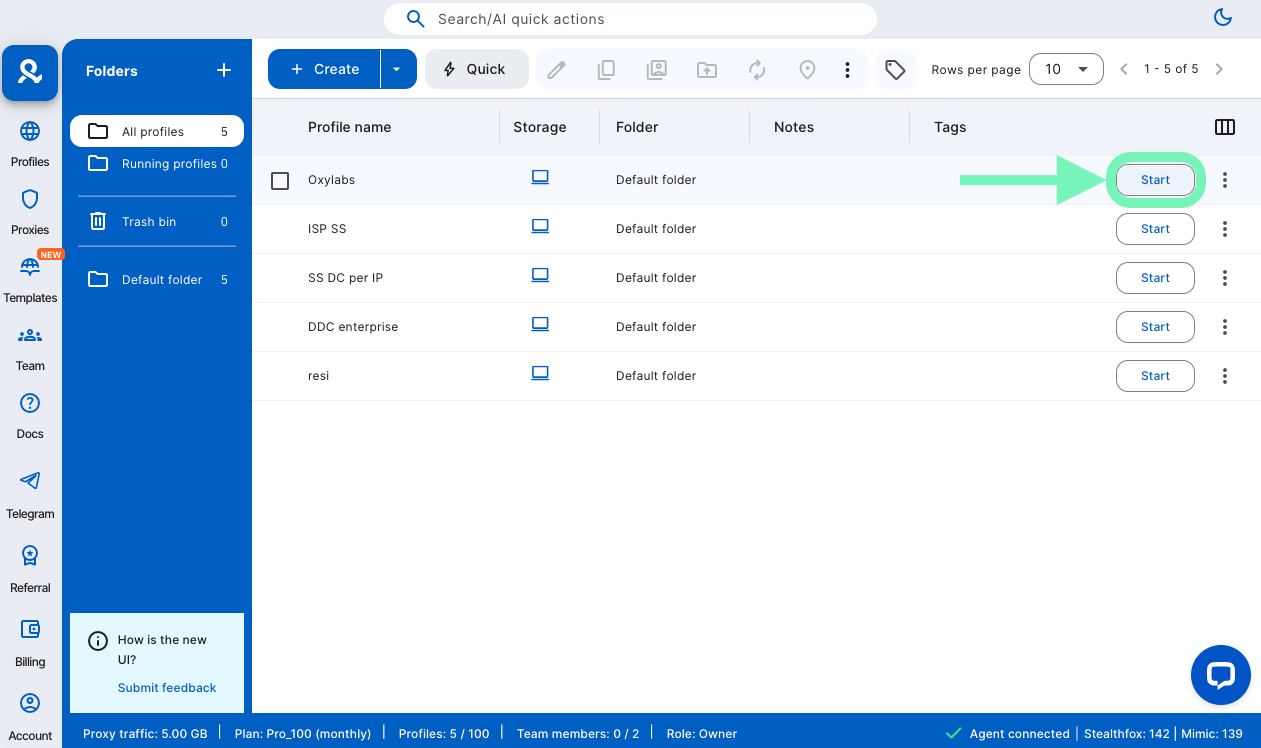
Press Start on your profile in the main screen to launch a newly created profile and carry on with your tasks in a private browser.

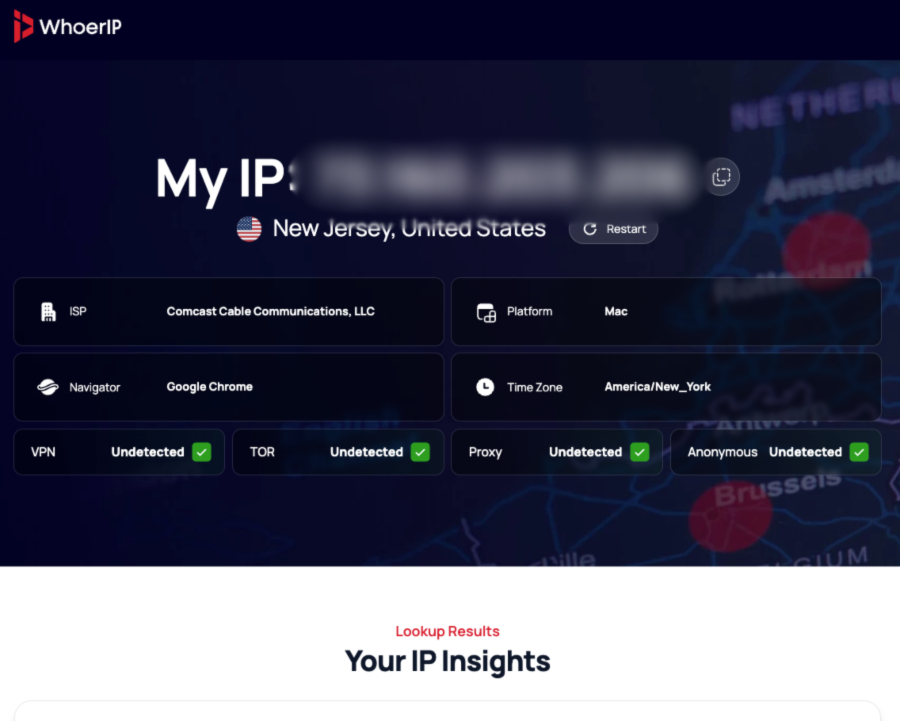
If everything is done correctly, https://whoerip.com/multilogin/ will open to show your new IP and all custom fingerprint information below.

And that’s it. You’ve successfully integrated your Oxylabs proxies with Multilogin. You can find the original Multilogin integration blog post here.

Also, take a look at the detailed Multilogin vs. Incognition, AdsPower vs. Multilogin, or GoLogin vs. Multilogin articles to compare the most popular anti-detect browsers.

Last updated

Was this helpful?