> For the complete documentation index, see [llms.txt](https://developers.oxylabs.io/llms.txt). Markdown versions of documentation pages are available by appending `.md` to page URLs; this page is available as [Markdown](https://developers.oxylabs.io/integrations/proxy-integrations/dedicated-datacenter-proxies-guides/enterprise/sphere.md).
# Sphere
[**Sphere**](https://sphere.tenebris.cc/) is a browser designed to enhance security and anonymity as well as to help manage multi-account tasks.
To integrate Oxylabs [**Dedicated Datacenter Proxies**](https://oxylabs.io/products/datacenter-proxies/dedicated-datacenter-proxies) with the Sphere on Windows (the process on Mac OS and Linux is the same), follow the steps below:
**Step 1.** [**Download**](https://sphere.tenebris.cc/) the Sphere browser. Extract the downloaded files to a preferred location and click `Sphere.exe` to run the program.
**Step 2.** Set up your account with a password-only login.
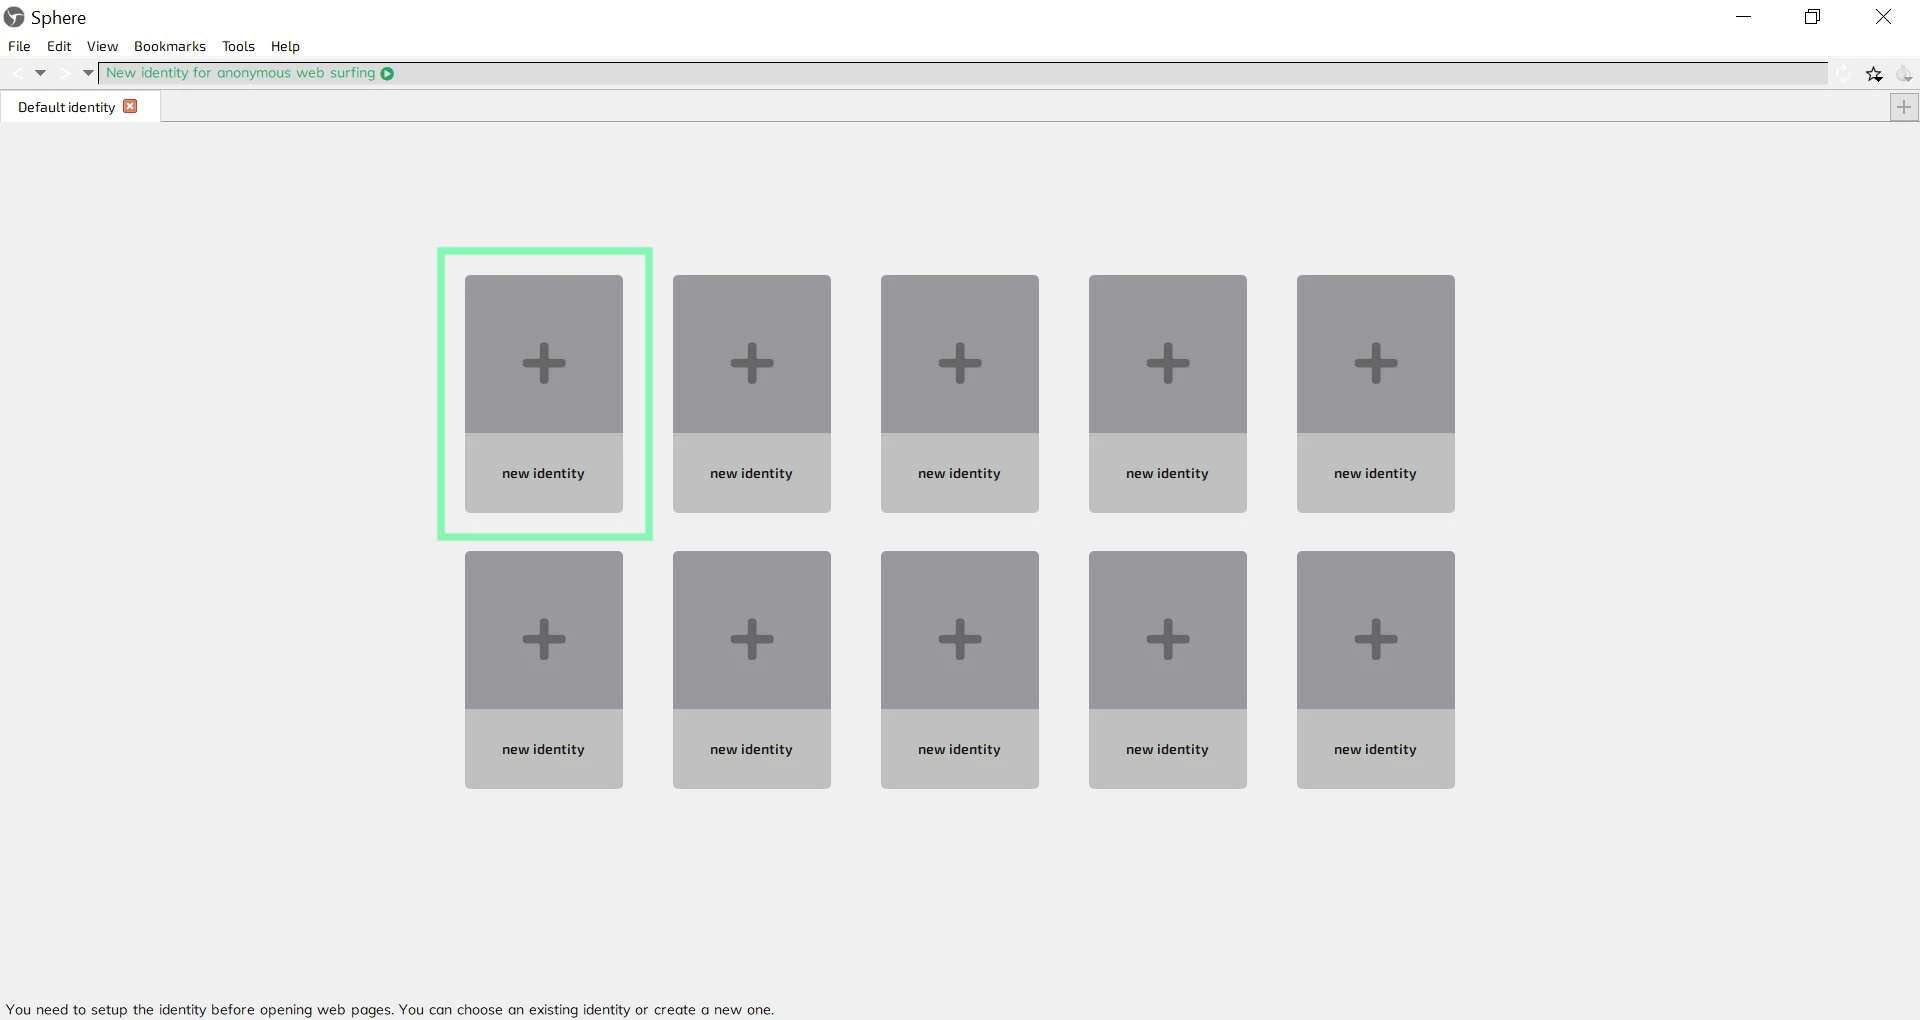
**Step 3.** On the home screen, click on a **new identity**.
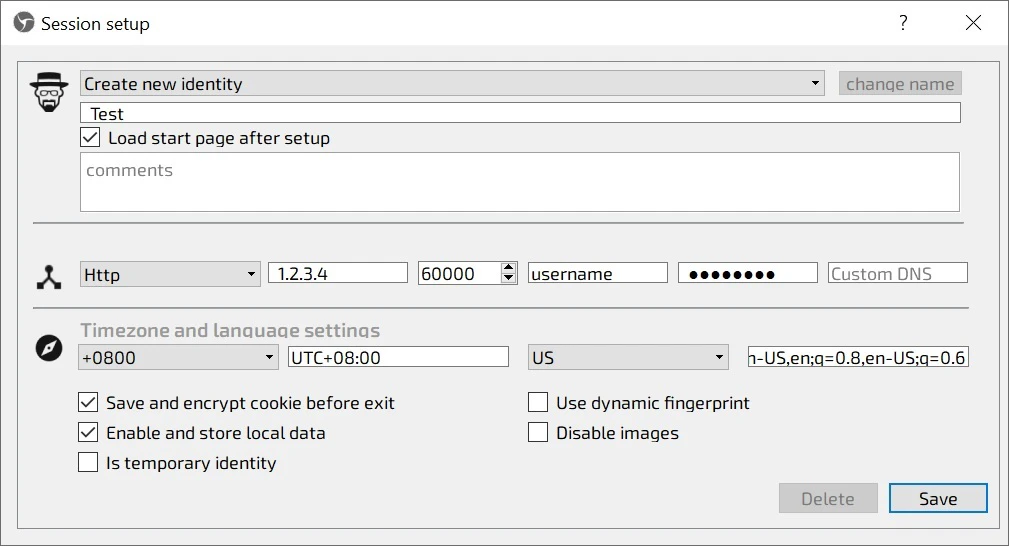
**Step 4.** In the **Session setup** window, fill in the identity name and choose your connection type according to your proxy purchase:
**Proxy type:** `HTTP` or `SOCKS5`
**Connection IP**: a specific IP address (`1.2.3.4` - example)
{% hint style="info" %}
In the case of Dedicated Datacenter Proxies, you will need to choose an IP address from the purchased list. Please refer to our [**`documentation`**](broken://pages/gReH6YgcRO0a2E34h5i4) for more details.
{% endhint %}
**Proxy port**: `60000`
**Username:** `username`
**Password:** `password`
{% hint style="info" %}
You can create and manage your proxy users in our [**dashboard**](https://dashboard.oxylabs.io/en/)**.**
{% endhint %}
**Step 5.** Detail the Timezone and language settings and click **Save**.
The new identity is configured.
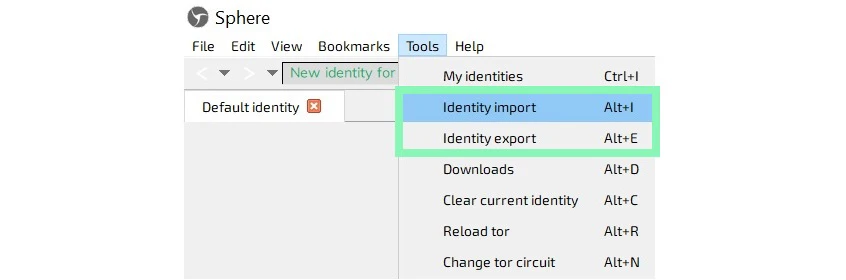
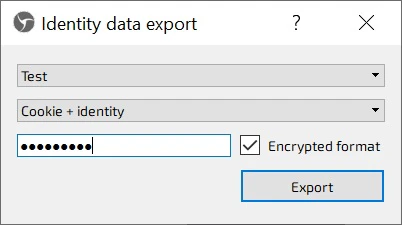
You can import and export your identities by clicking **Identity import** or **Identity export** under **Tools**.
That's it! Your setup is done.
Find the original Sphere integration blog post [here](https://oxylabs.io/resources/integrations/sphere).
---
# Agent Instructions
This documentation is published with GitBook. GitBook is the documentation platform designed so that both humans and AI agents can read, navigate, and reason over technical content effectively. Learn more at gitbook.com.
## Querying This Documentation
If you need additional information that is not directly available in this page, you can query the documentation dynamically by asking a question.
Perform an HTTP GET request on the current page URL with the `ask` query parameter, and the optional `goal` query parameter:
```
GET https://developers.oxylabs.io/integrations/proxy-integrations/dedicated-datacenter-proxies-guides/enterprise/sphere.md?ask=&goal=
```
`ask` is the immediate question: it should be specific, self-contained, and written in natural language.
`goal` is optional and describes the broader end goal you are ultimately trying to accomplish on behalf of the user. GitBook uses it to tailor the answer towards what is most useful for that goal.
The response will contain a direct answer to the question and relevant excerpts and sources from the documentation.
Use this mechanism when the answer is not explicitly present in the current page, you need clarification or additional context, or you want to retrieve related documentation sections.