> For the complete documentation index, see [llms.txt](https://developers.oxylabs.io/llms.txt). Markdown versions of documentation pages are available by appending `.md` to page URLs; this page is available as [Markdown](https://developers.oxylabs.io/integrations/cn/proxy-integrations/dedicated-datacenter-proxies-guides/enterprise/ubuntu-gui.md).
# Ubuntu
[**Ubuntu**](https://ubuntu.com/) 是一个基于 Linux 的开源软件操作系统,适用于企业服务器、桌面、云和物联网。
在 Ubuntu 中设置代理服务器有多种方法。本指南将介绍两种常见方法: [使用系统(GNOME)设置](#method-1-system-settings) 并 [使用终端](#method-2-terminal-sessions).
### 方法 1:系统设置
要设置全局网络代理,请按照以下步骤操作:
**步骤 1。** [**下载**](https://ubuntu.com/download/desktop) 并安装 Ubuntu Desktop。
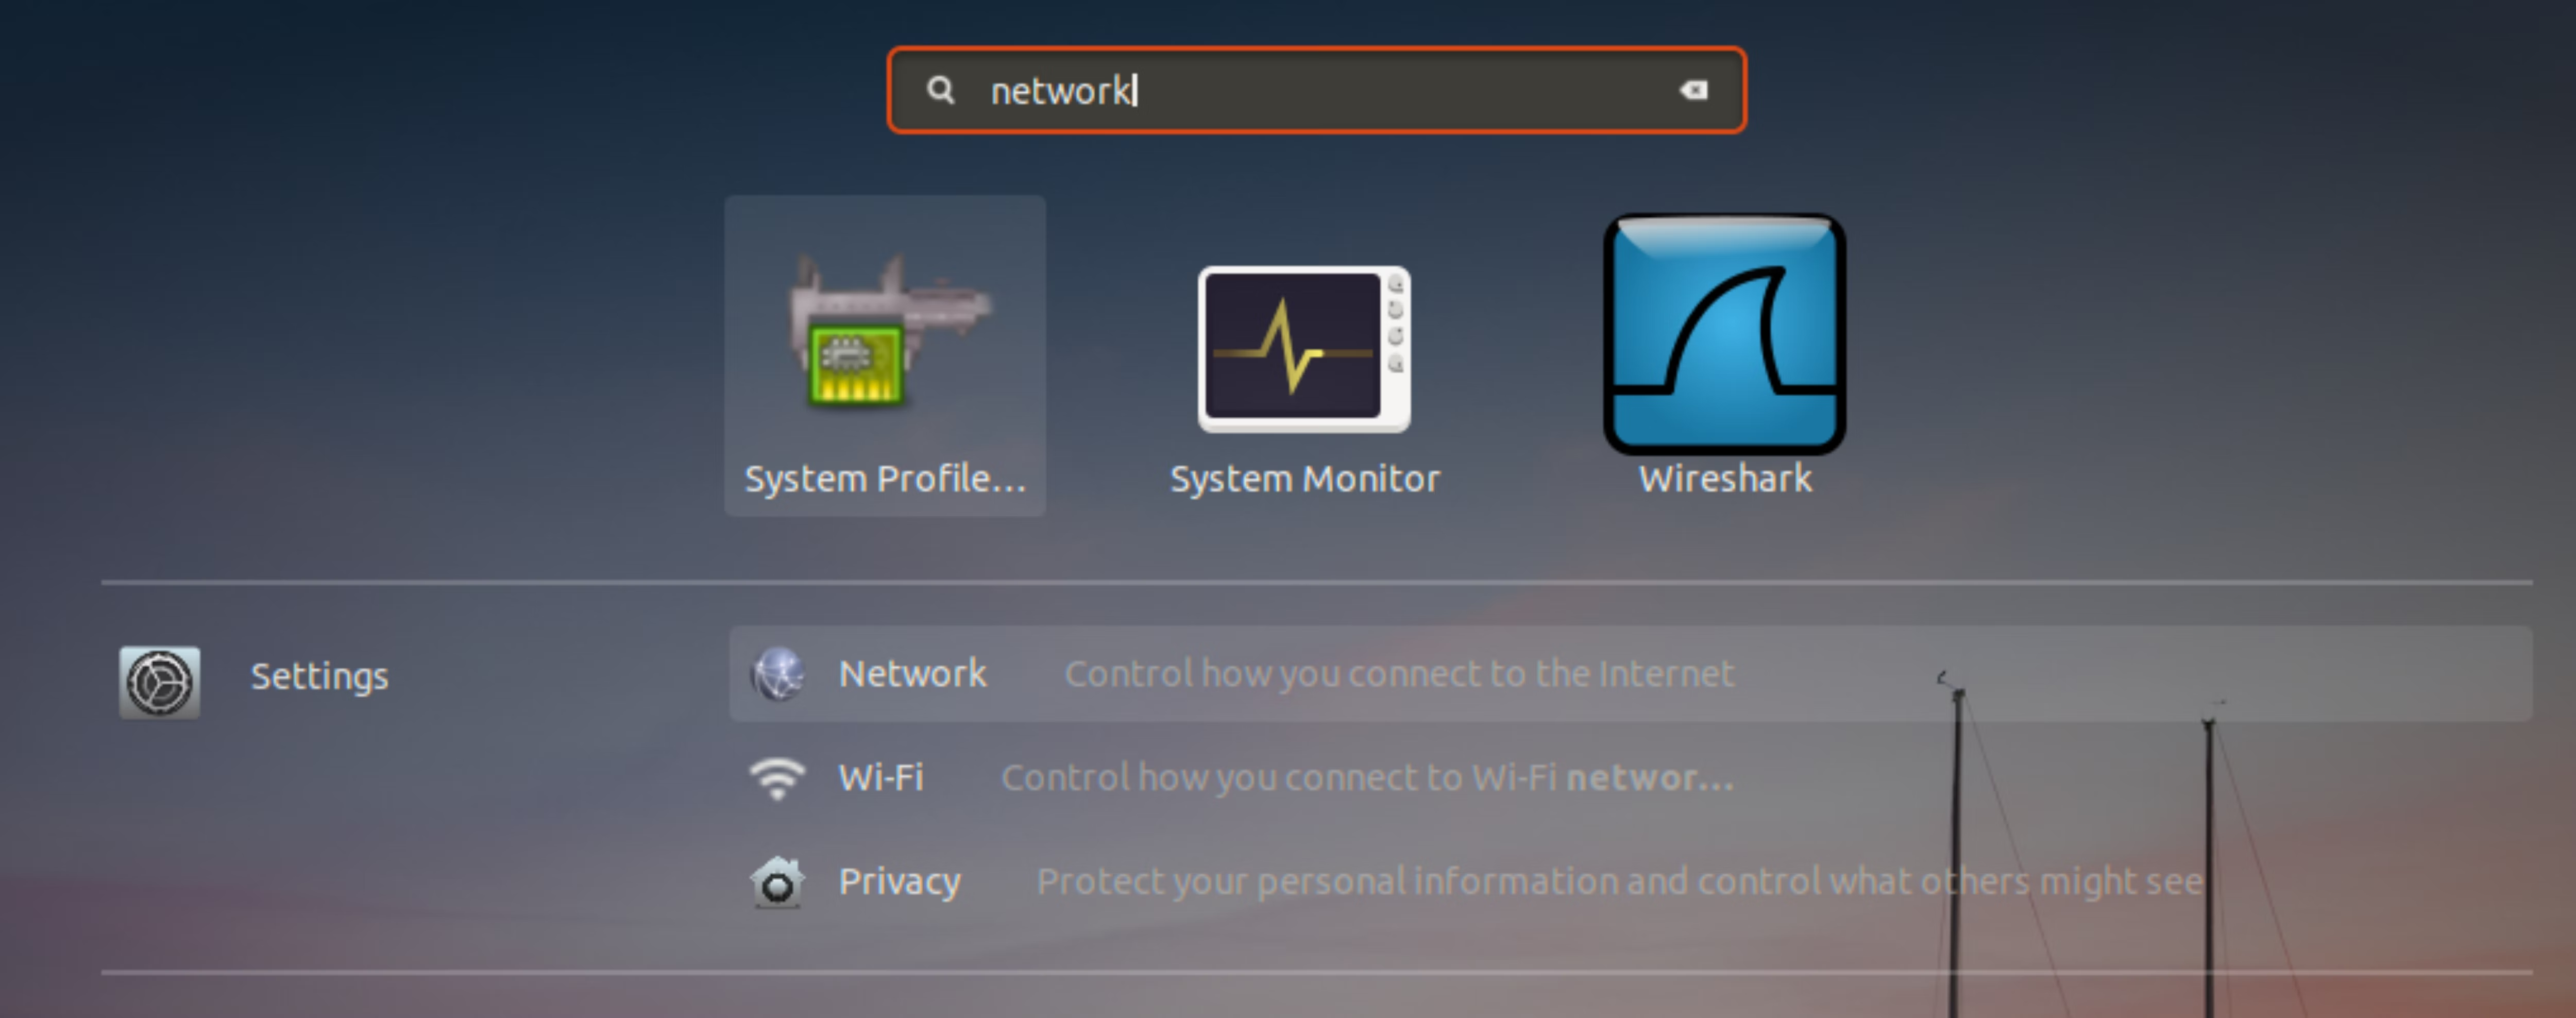
**步骤 2。** 找到 **Settings** 从 Ubuntu 启动器中,并转到 **Network** 选项卡。
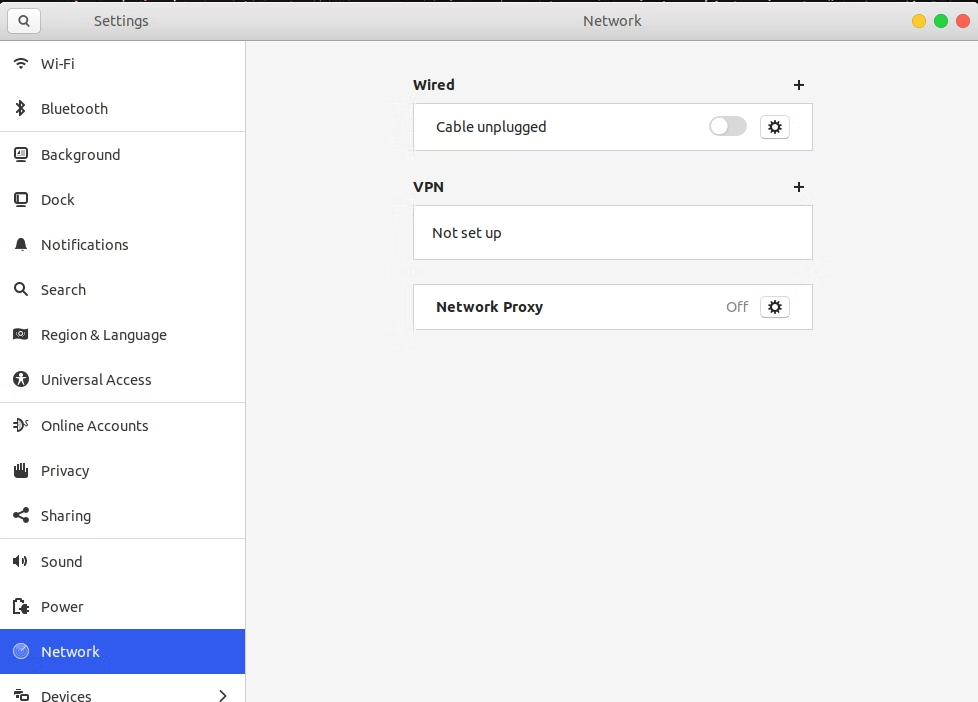
**步骤 3。** 点击 **Network**后,会打开一个新对话框。在三个选项中,选择 **Network Proxy。**
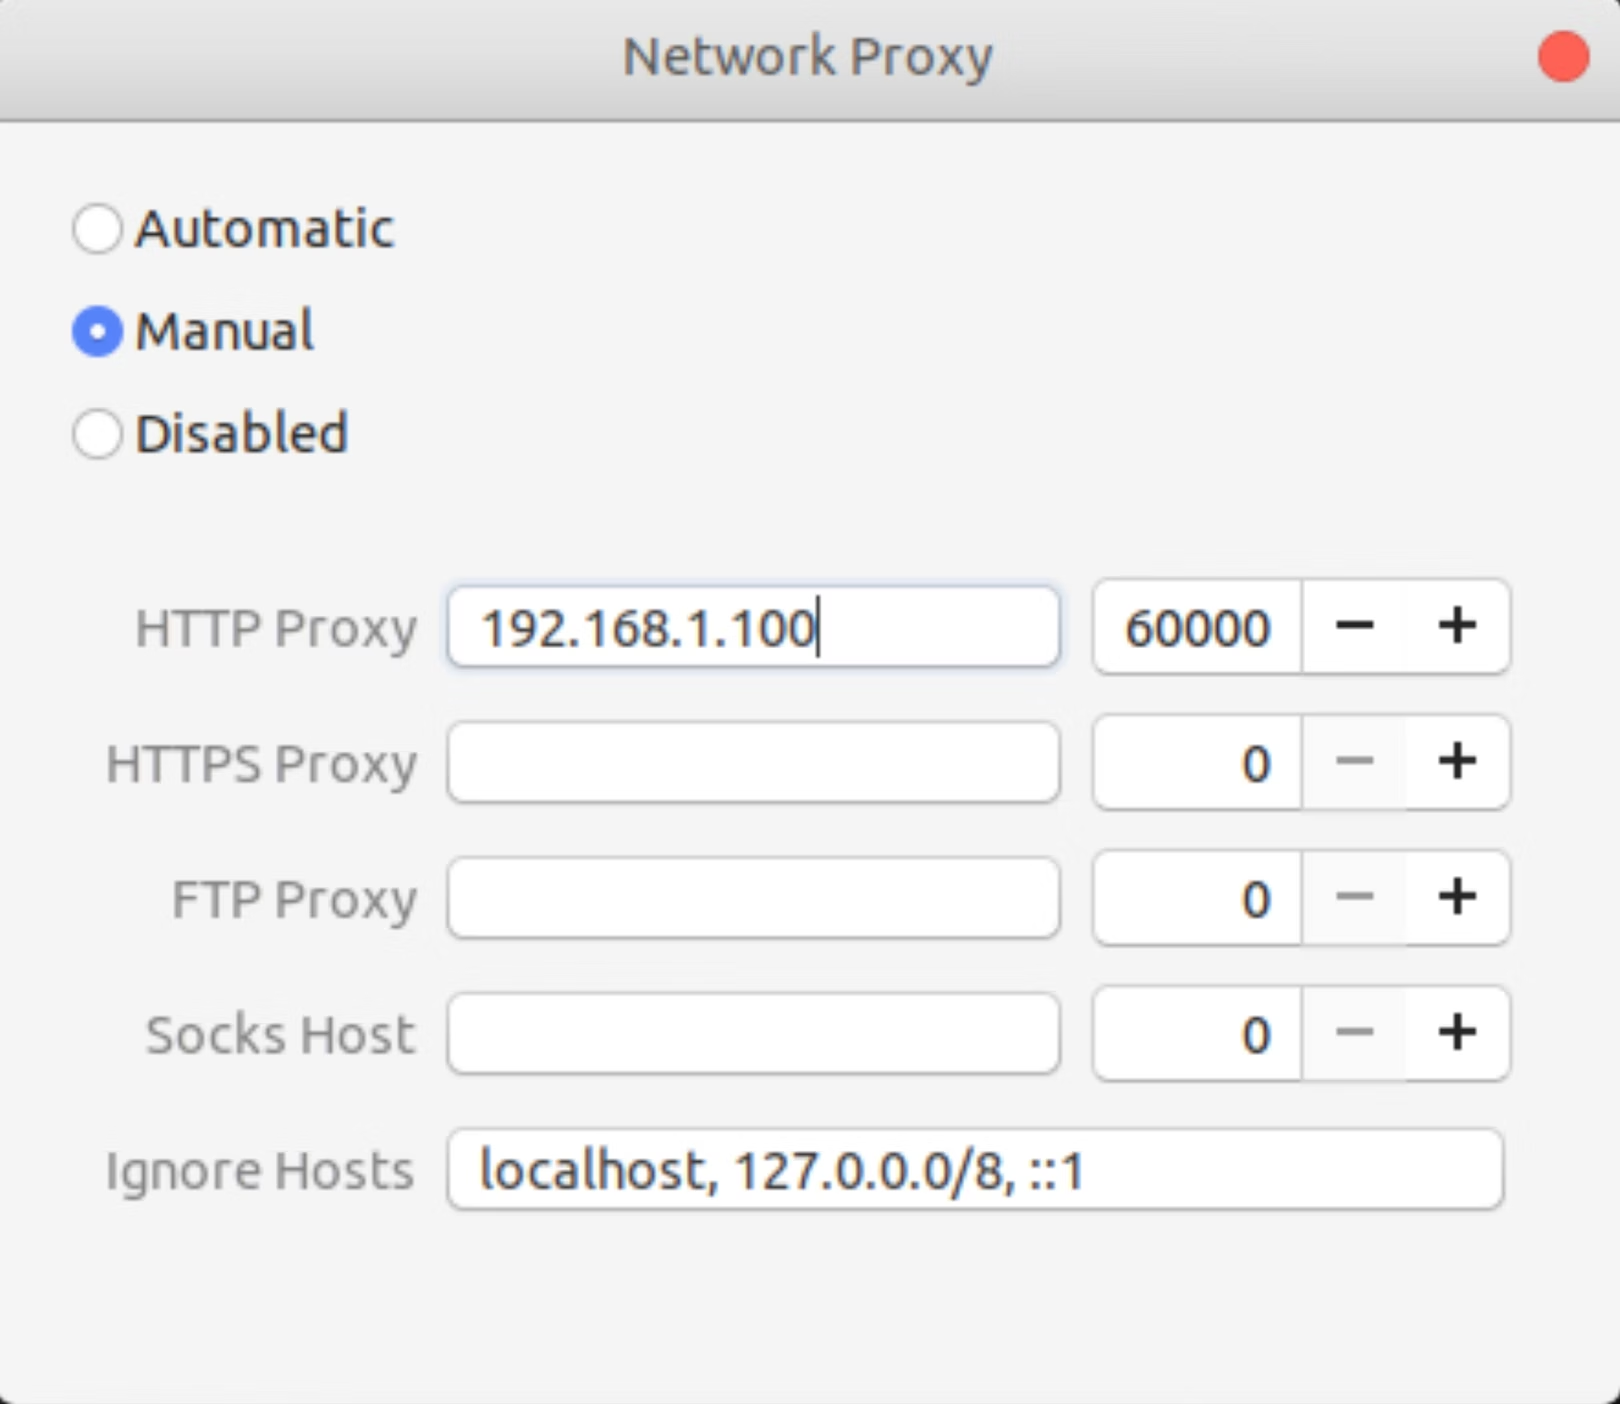
**步骤 4。** 选择 **Manual** 来配置代理设置。接下来会弹出几个文本框,您可以在其中设置 `HTTP` 或 `SOCKS` 代理。填写以下信息:
**HTTP Proxy:** 一个特定的 IP 地址(`192.168.1.100` - 示例)
{% hint style="info" %}
对于独享数据中心代理,您需要从已购买的列表中选择一个 IP 地址。请参阅我们的 [**`文档`**](broken://pages/d5bbd36d0bb27800c335757921a3776e5c9d1459) 。
{% endhint %}
**端口:** `60000`
**步骤 5。** 关闭 Network Proxy 窗口。更改将自动保存,全局代理将被激活。
每次通过浏览器或其他应用发出网页请求时, **弹出窗口都会提示您输入该会话的凭据** ,即您的 Oxylabs 代理用户凭据。
***
### 方法 2:终端会话
要为所有终端会话设置网络代理,请按照以下步骤操作:
**步骤 1。** [**下载**](https://ubuntu.com/download/desktop) 并安装 Ubuntu Desktop。
**步骤 2。** 打开 **shell** 使用编辑器进行配置。
对于 ZSH 终端,shell 配置文件默认位于主目录中。我们可以使用 `vim` 并通过以下命令编辑此文件:
```sh
vim ~/.zshrc
```
而不是 `vim`,您也可以使用 `gedit`, `nano`,或您喜欢的其他文本编辑器。另外,如果您使用的是 Bash 而不是 ZSH,则需要编辑 bash shell 配置文件,即 `~/.bashrc` 而不是 `~/.zshrc`.
**步骤 3。** 创建两个新的环境变量
在此配置文件底部,您需要定义 `http_proxy` 或 `ALL_PROXY` (用于 SOCKS5)变量。你需要从代理列表中使用一个特定的 IP 地址。为了演示,我们使用 `192.168.1.100:60000`:
```sh
export http_proxy="USERNAME:PASSWORD@192.168.1.100:60000"
export ALL_PROXY="socks5://USERNAME:PASSWORD@192.168.1.100:60000"
```
您需要填写以下详细信息:
**代理地址:** 一个特定的 IP 地址(`192.168.1.100` - 示例)
**端口:** `60000`
**用户名:** `username`
**密码:** `密码`
**步骤 4。** 重新加载配置
现在,您可以通过打开新的终端,或者在当前终端中运行以下命令来重新加载配置文件:
```sh
source ~/.zshrc
```
代理将始终对当前用户处于激活状态。每次打开新终端时,shell 配置文件都会被加载。因此,即使您重启计算机,环境变量也会始终可用。
如果您希望为所有用户启用它,则需要将上面的两行追加到 `/etc/environment`.
就是这样!您已成功集成 Oxylabs 代理。
您可以找到完整教程 [这里](https://oxylabs.io/resources/integrations/ubuntu).
---
# Agent Instructions
This documentation is published with GitBook. GitBook is the documentation platform designed so that both humans and AI agents can read, navigate, and reason over technical content effectively. Learn more at gitbook.com.
## Querying This Documentation
If you need additional information that is not directly available in this page, you can query the documentation dynamically by asking a question.
Perform an HTTP GET request on the current page URL with the `ask` query parameter:
```
GET https://developers.oxylabs.io/integrations/cn/proxy-integrations/dedicated-datacenter-proxies-guides/enterprise/ubuntu-gui.md?ask=
```
The question should be specific, self-contained, and written in natural language.
The response will contain a direct answer to the question and relevant excerpts and sources from the documentation.
Use this mechanism when the answer is not explicitly present in the current page, you need clarification or additional context, or you want to retrieve related documentation sections.