> For the complete documentation index, see [llms.txt](https://developers.oxylabs.io/llms.txt). Markdown versions of documentation pages are available by appending `.md` to page URLs; this page is available as [Markdown](https://developers.oxylabs.io/integrations/cn/proxy-integrations/datacenter-proxies-guides/switchyomega.md).
# SwitchyOmega
SwitchyOmega 是一款功能强大且可靠的代理管理器,适用于许多流行浏览器。
{% hint style="warning" %}
**免责声明:** 自 Manifest V3 发布起,Switchy Omega 已不再支持 Google Chrome 和基于 Chromium 的浏览器。以下指南仅适用于 Mozilla Firefox 的浏览器扩展。
{% endhint %}
按照以下步骤集成 Oxylabs [**数据中心代理**](https://oxylabs.io/products/datacenter-proxies):
**步骤 1。** 获取插件并安装。对于 Firefox 附加组件,点击 [**这里**](https://addons.mozilla.org/en-US/firefox/addon/switchyomega/).
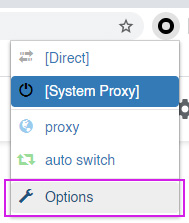
**步骤 2。** 打开 SwitchyOmega **选项**.
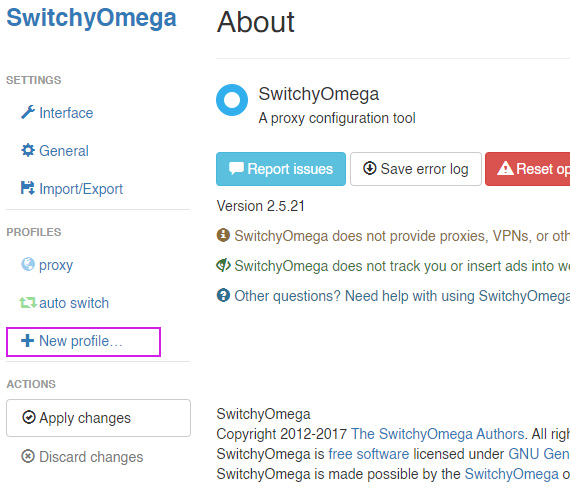
**步骤 3。** 点击 **+新建配置。**
**步骤 4。** 为这个新配置命名,选择 **代理配置** 类型,然后点击 **创建**.
**步骤 5。** 填写详细信息:
**连接类型:** `HTTP`, `HTTPS`,或 `SOCKS5`
**服务器:** `dc.oxylabs.io`
**端口:** `8001`
{% hint style="warning" %}
对于 **按 IP 付费** 订阅,端口是从给定列表中分配给某个 IP 地址的顺序编号。因此,端口 `8001` 使用您列表中的第一个 IP 地址。
对于 **按流量付费** 订阅,端口 `8001` 会选择一个随机 IP 地址,但在会话期间保持一致。
{% endhint %}
{% hint style="info" %}
你也可以在用户认证字符串中指定地理位置,例如美国: `user-USERNAME-country-US:PASSWORD`。请查看我们的 [文档](https://developers.oxylabs.io/proxies/datacenter-proxies/select-country) 。
{% endhint %}
**步骤 6。** 点击 **锁** 右侧图标。填写 **代理认证**:
**代理用户** **用户名:** `user-username`
**代理用户密码:** `密码`
{% hint style="info" %}
请确保你已经添加了 `user-` 部分在你的用户名前面。
{% endhint %}
点击 **保存更改。**
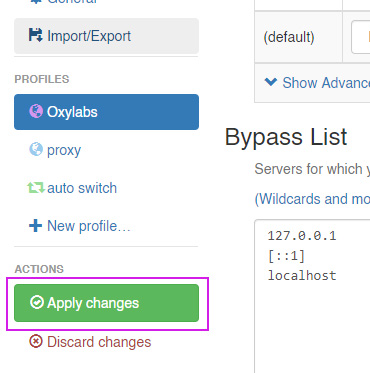
**步骤 7。** 点击 **应用更改。**
**步骤 8**. 点击 SwitchyOmega 图标并选择您新配置的代理。
就是这样!你现在已经可以将 SwitchyOmega 与数据中心代理一起使用了。
查找原始的 SwitchyOmega 集成博客文章 [这里](https://oxylabs.io/resources/integrations/proxy-switchyomega).
---
# Agent Instructions
This documentation is published with GitBook. GitBook is the documentation platform designed so that both humans and AI agents can read, navigate, and reason over technical content effectively. Learn more at gitbook.com.
## Querying This Documentation
If you need additional information that is not directly available in this page, you can query the documentation dynamically by asking a question.
Perform an HTTP GET request on the current page URL with the `ask` query parameter:
```
GET https://developers.oxylabs.io/integrations/cn/proxy-integrations/datacenter-proxies-guides/switchyomega.md?ask=
```
The question should be specific, self-contained, and written in natural language.
The response will contain a direct answer to the question and relevant excerpts and sources from the documentation.
Use this mechanism when the answer is not explicitly present in the current page, you need clarification or additional context, or you want to retrieve related documentation sections.