# Super Proxy
Super Proxy 是一款可在 [iPhone](https://apps.apple.com/us/app/super-proxy-tunnel-your-apps/id6478274781) 和 [Android](https://play.google.com/store/apps/details?id=com.scheler.superproxy\&hl=en) 上使用的免费应用,它会通过 HTTP 或 SOCKS5 代理服务器将您的所有应用流量进行隧道转发。
本指南将向您展示如何快速将 Super Proxy 与 Oxylabs **独享ISP代理** 结合使用,您可通过仪表板获取这些代理。
### 在 iOS 上
1\. 从 App Store 下载 Super Proxy 应用。
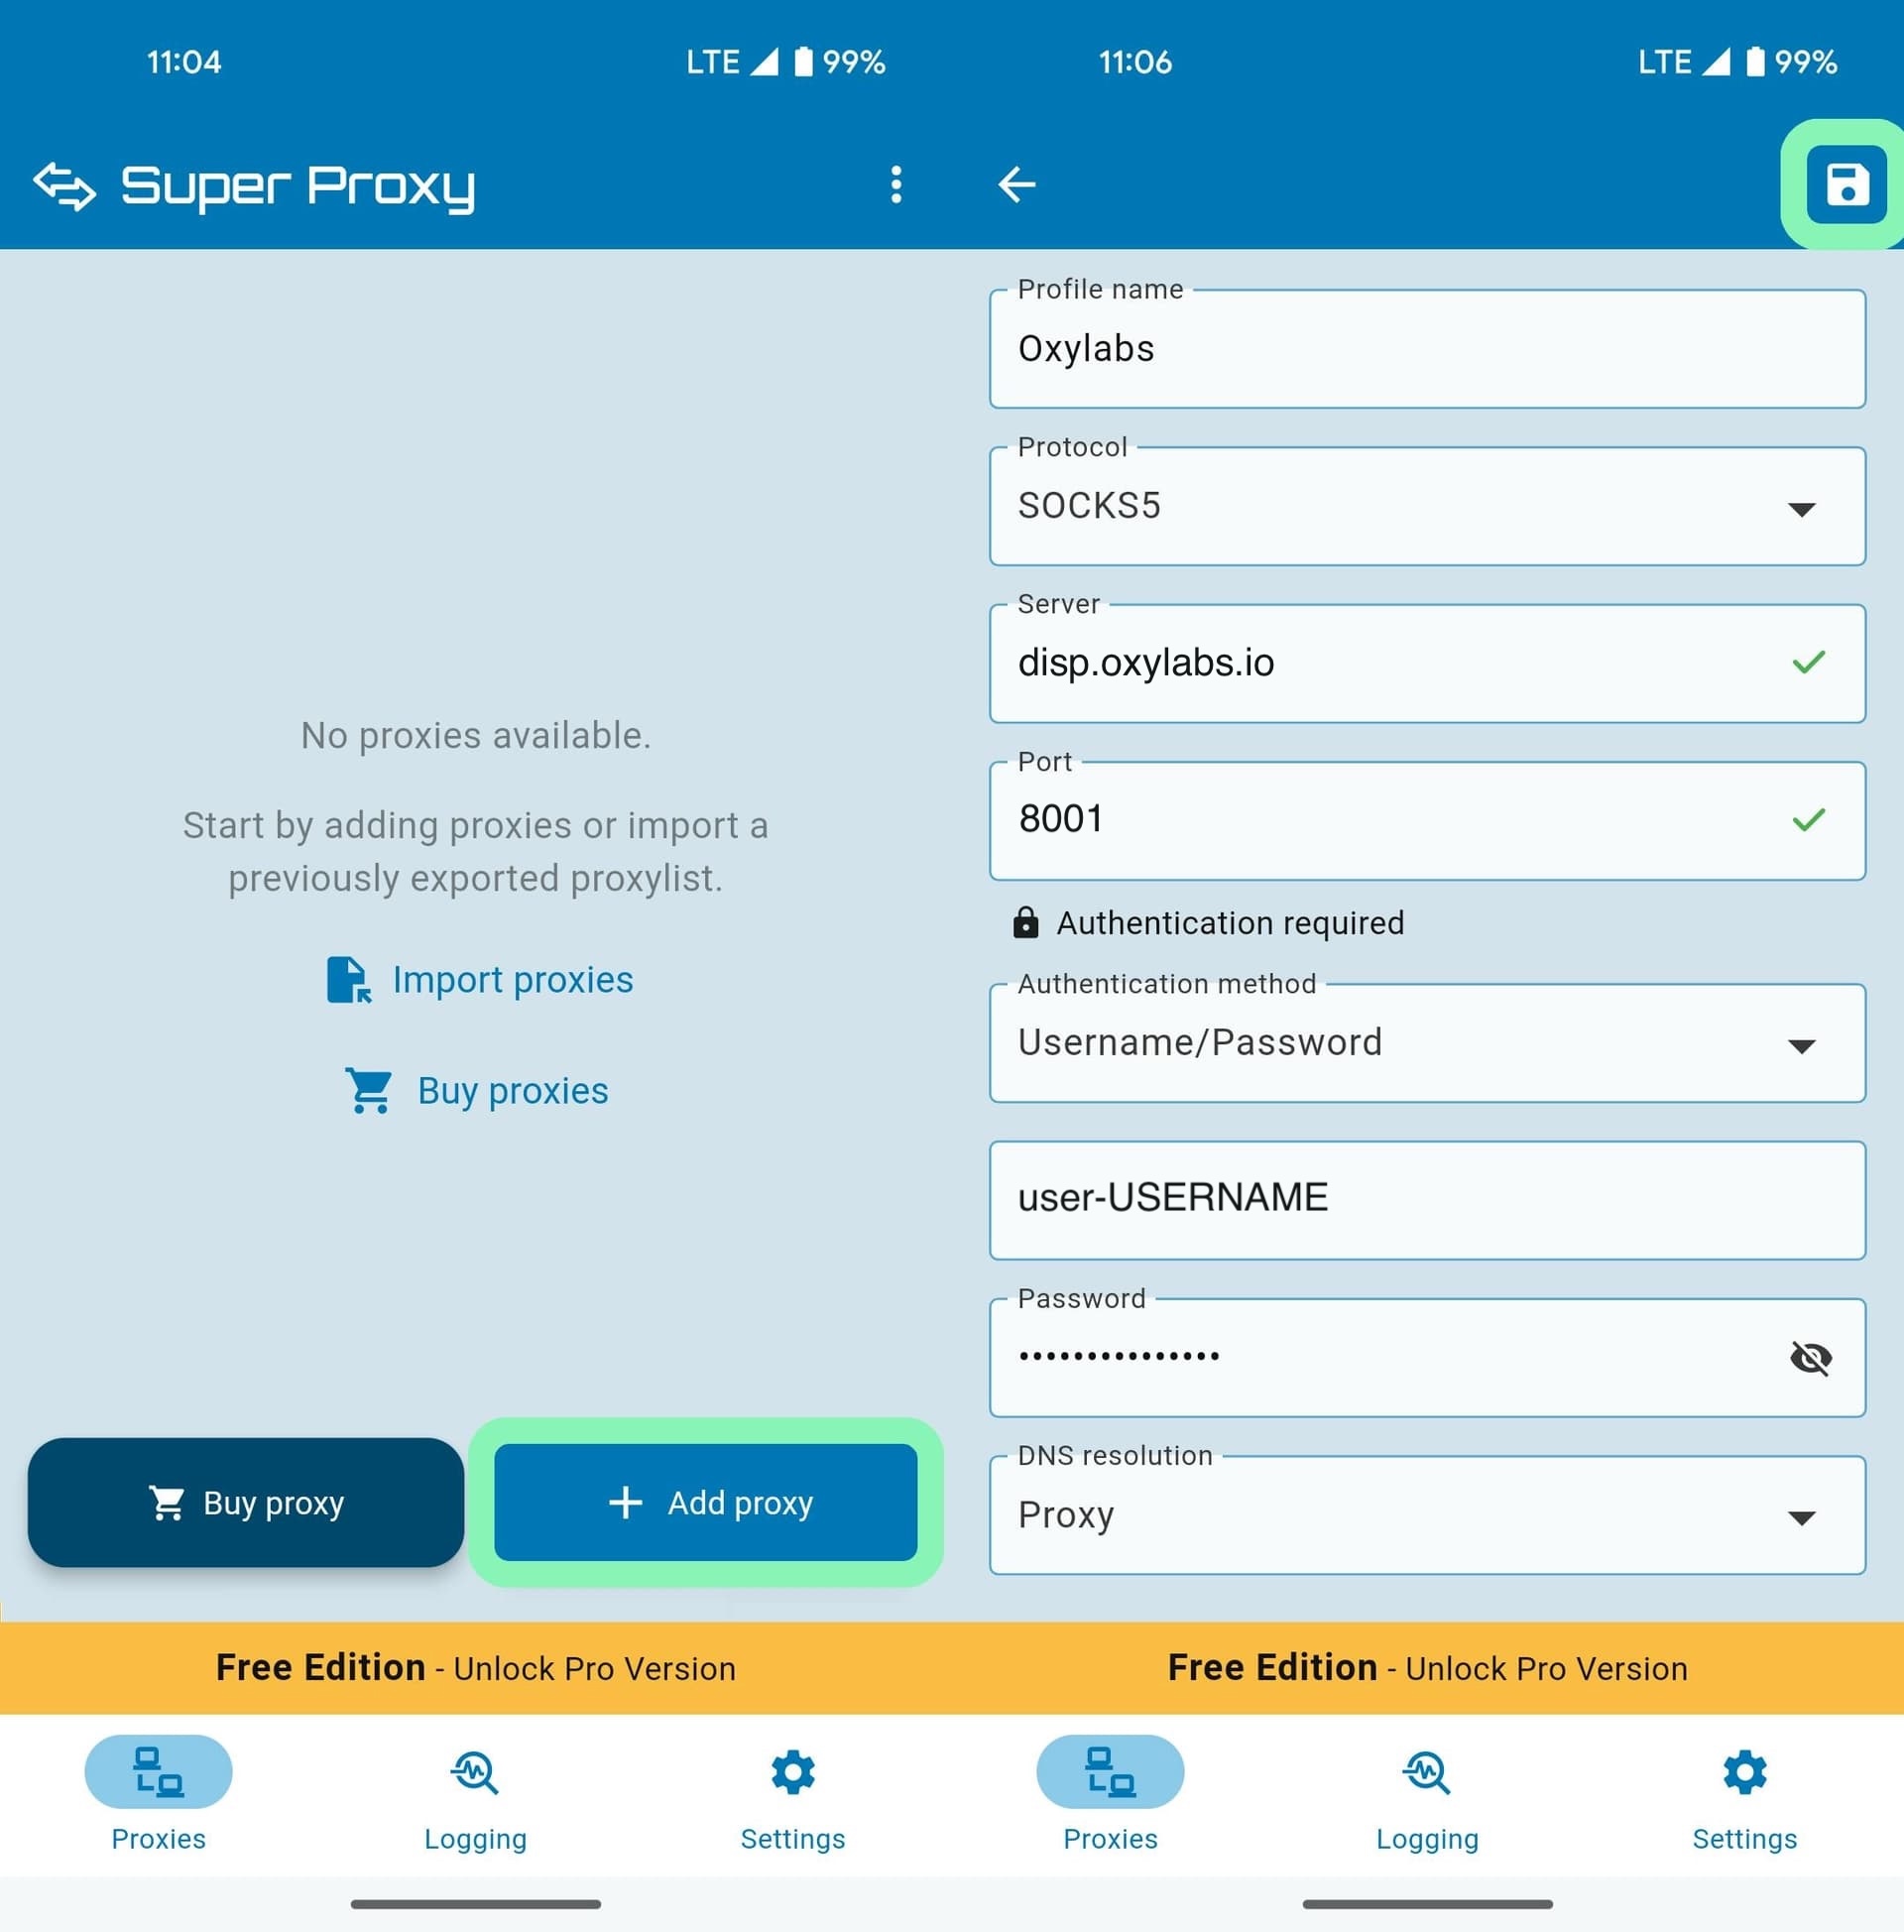
2\. 安装完成后,打开应用并点击 **+ 添加代理** 以创建新配置文件。
3\. 按如下方式填写必填字段:
* **配置文件名称** – 选择一个便于识别此代理的名称(例如,“工作代理”)。
4\. 为 Oxylabs 独享ISP代理指定以下详细信息。
**类型:** `HTTP` 或 `SOCKS5`
**服务器:** `IP:`
**端口:** `8001`
{% hint style="success" %}
您需要选择分配给所购买 IP 地址的端口 [**代理列表**](https://developers.oxylabs.io/documentation/cn/dai-li/dedicated-isp-proxies/self-service/proxy-list)**,** ,可在 Oxylabs 仪表板中找到。 `8001` 该端口会为所有请求从您的列表中选择第一个 IP 地址。
使用端口 `8000` 可实现自动 [代理 IP 轮换](https://developers.oxylabs.io/documentation/cn/dai-li/dedicated-isp-proxies/self-service/proxy-rotation).
{% endhint %}
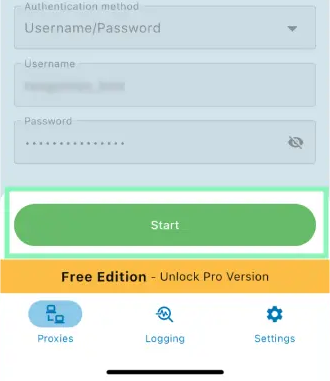
5\. 填写您的认证信息:
* **身份验证** – 选择 **用户名/密码** 作为您的身份验证方式。
* **用户名** – 输入您的代理用户名。
* **密码** – 输入您的代理密码。
{% hint style="warning" %}
别忘了添加 `user-` 前缀。
{% endhint %}
填写完详细信息后,点击 **保存**.
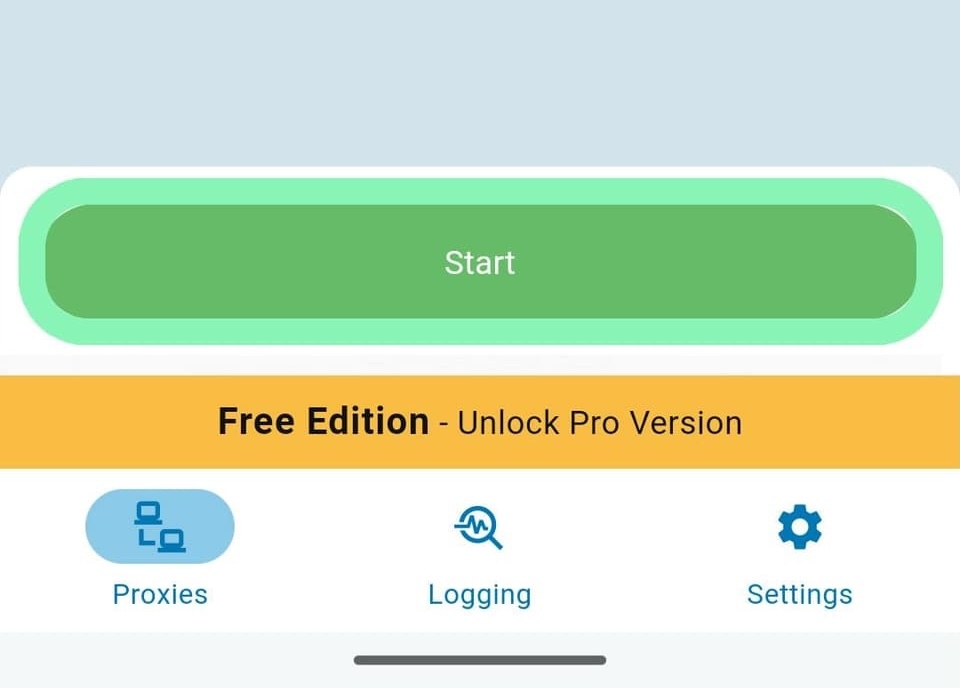
6\. 点击 **开始** 以启用您的代理。
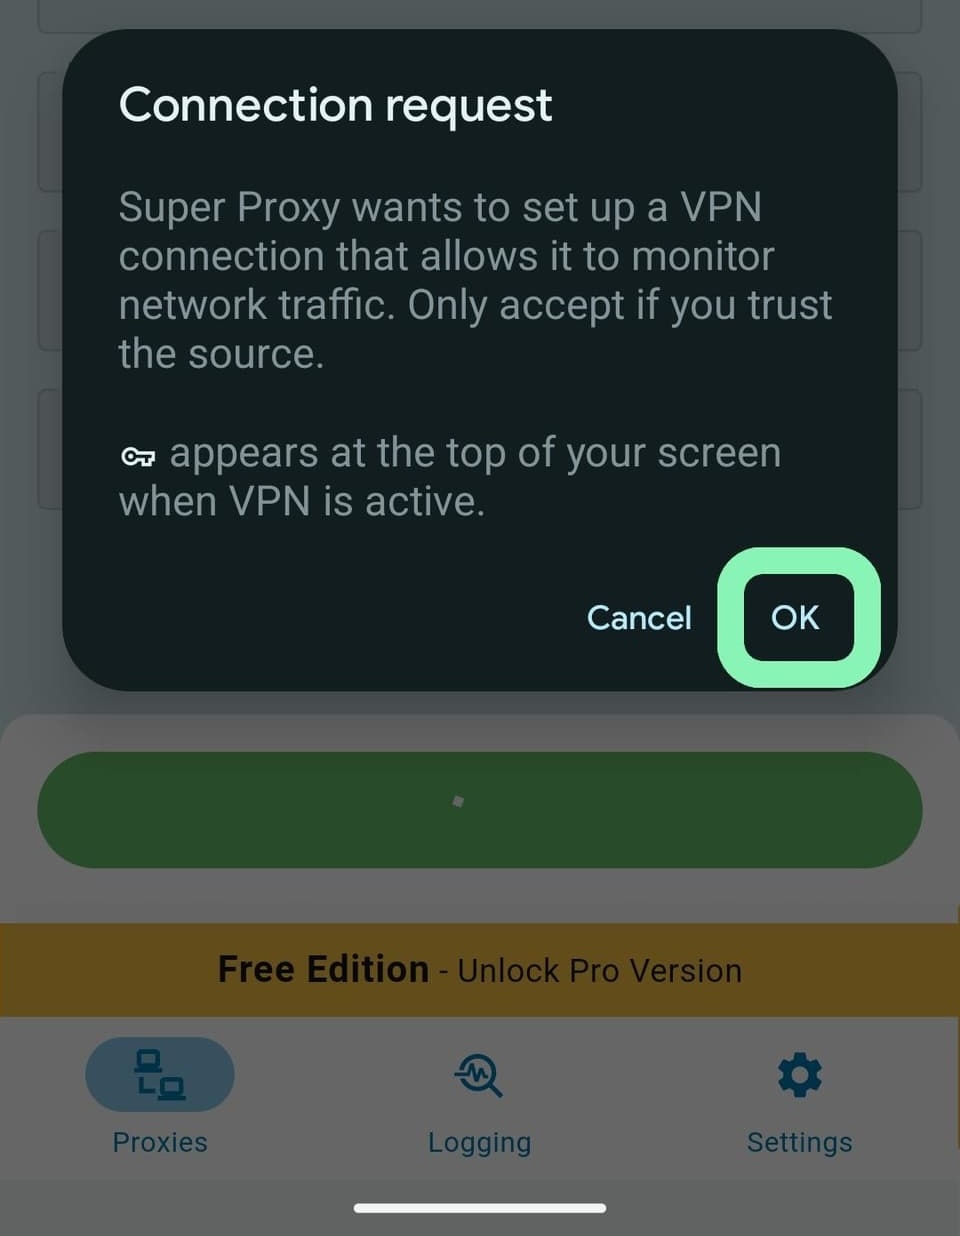
7\. 系统会弹出一个窗口,要求您接受 VPN 连接。点击 **允许** 以授予应用 VPN 配置访问权限。
就完成了。要确认代理是否正常工作,请访问 并检查您的 IP 是否已更改。
### 在 Android 上
Android 的步骤也相同——流程如下:
1\. 首先,在您的设备上打开 Play 商店并下载 Super Proxy 应用。
2\. 打开应用,然后点击 **+ 添加代理** 以创建新配置文件。
3\. 接下来,填写代理详细信息:
**类型:** `HTTP` 或 `SOCKS5`
**服务器:** `IP:`
**端口:** `8001`
{% hint style="success" %}
您需要选择分配给所购买 IP 地址的端口 [**代理列表**](https://developers.oxylabs.io/documentation/cn/dai-li/dedicated-isp-proxies/self-service/proxy-list)**,** ,可在 Oxylabs 仪表板中找到。 `8001` 该端口会为所有请求从您的列表中选择第一个 IP 地址。
使用端口 `8000` 可实现自动 [代理 IP 轮换](https://developers.oxylabs.io/documentation/cn/dai-li/dedicated-isp-proxies/self-service/proxy-rotation).
{% endhint %}
4\. 填写您的认证信息:
* **身份验证** – 选择 **用户名/密码** 作为您的身份验证方式。
* **用户名** – 输入您的代理用户名。
* **密码** – 输入您的代理密码。
{% hint style="warning" %}
别忘了添加 `user-` 前缀。
{% endhint %}
填写完详细信息后,点击 **保存**.
5\. 然后,点击 **开始** 以启用代理连接。
6\. 将出现一个弹窗,要求获取 VPN 访问权限——按 **OK** 以允许。
就完成了——要验证您的代理是否正常工作,请访问 并检查您的 IP 是否已更改。
***
本指南也适用于 [住宅代理](https://developers.oxylabs.io/documentation/cn/dai-li/integration-guides/3rd-party-integrations/super-proxy), [ISP代理](https://developers.oxylabs.io/documentation/cn/dai-li/integration-guides/isp-proxies-integrations/super-proxy), [企业独享数据中心代理](https://developers.oxylabs.io/documentation/cn/dai-li/integration-guides/3rd-party-integrations-1-1/enterprise/super-proxy), [自助式独享数据中心代理](https://developers.oxylabs.io/documentation/cn/dai-li/integration-guides/3rd-party-integrations-1-1/self-service/super-proxy),以及 [数据中心代理](https://developers.oxylabs.io/documentation/cn/dai-li/integration-guides/shared-datacenter-proxies-guides/super-proxy).
---
# Agent Instructions: Querying This Documentation
If you need additional information that is not directly available in this page, you can query the documentation dynamically by asking a question.
Perform an HTTP GET request on the current page URL with the `ask` query parameter:
```
GET https://developers.oxylabs.io/documentation/cn/dai-li/integration-guides/dedicated-isp-proxies-integrations/super-proxy.md?ask=
```
The question should be specific, self-contained, and written in natural language.
The response will contain a direct answer to the question and relevant excerpts and sources from the documentation.
Use this mechanism when the answer is not explicitly present in the current page, you need clarification or additional context, or you want to retrieve related documentation sections.