# Sphere
[**Sphere**](https://sphere.tenebris.cc/) 是一款旨在提升安全性和匿名性,并帮助管理多账户任务的浏览器。
要在 [**独享数据中心代理**](https://oxylabs.io/products/datacenter-proxies/dedicated-datacenter-proxies) Windows 上将 Oxylabs 与 Sphere 集成(在 Mac OS 和 Linux 上的流程相同),请按照以下步骤操作:
**第 1 步。** [**下载**](https://sphere.tenebris.cc/) Sphere 浏览器。将下载的文件解压到首选位置,然后点击 `Sphere.exe` 以运行程序。
**第 2 步。** 使用仅密码登录来设置您的账户。
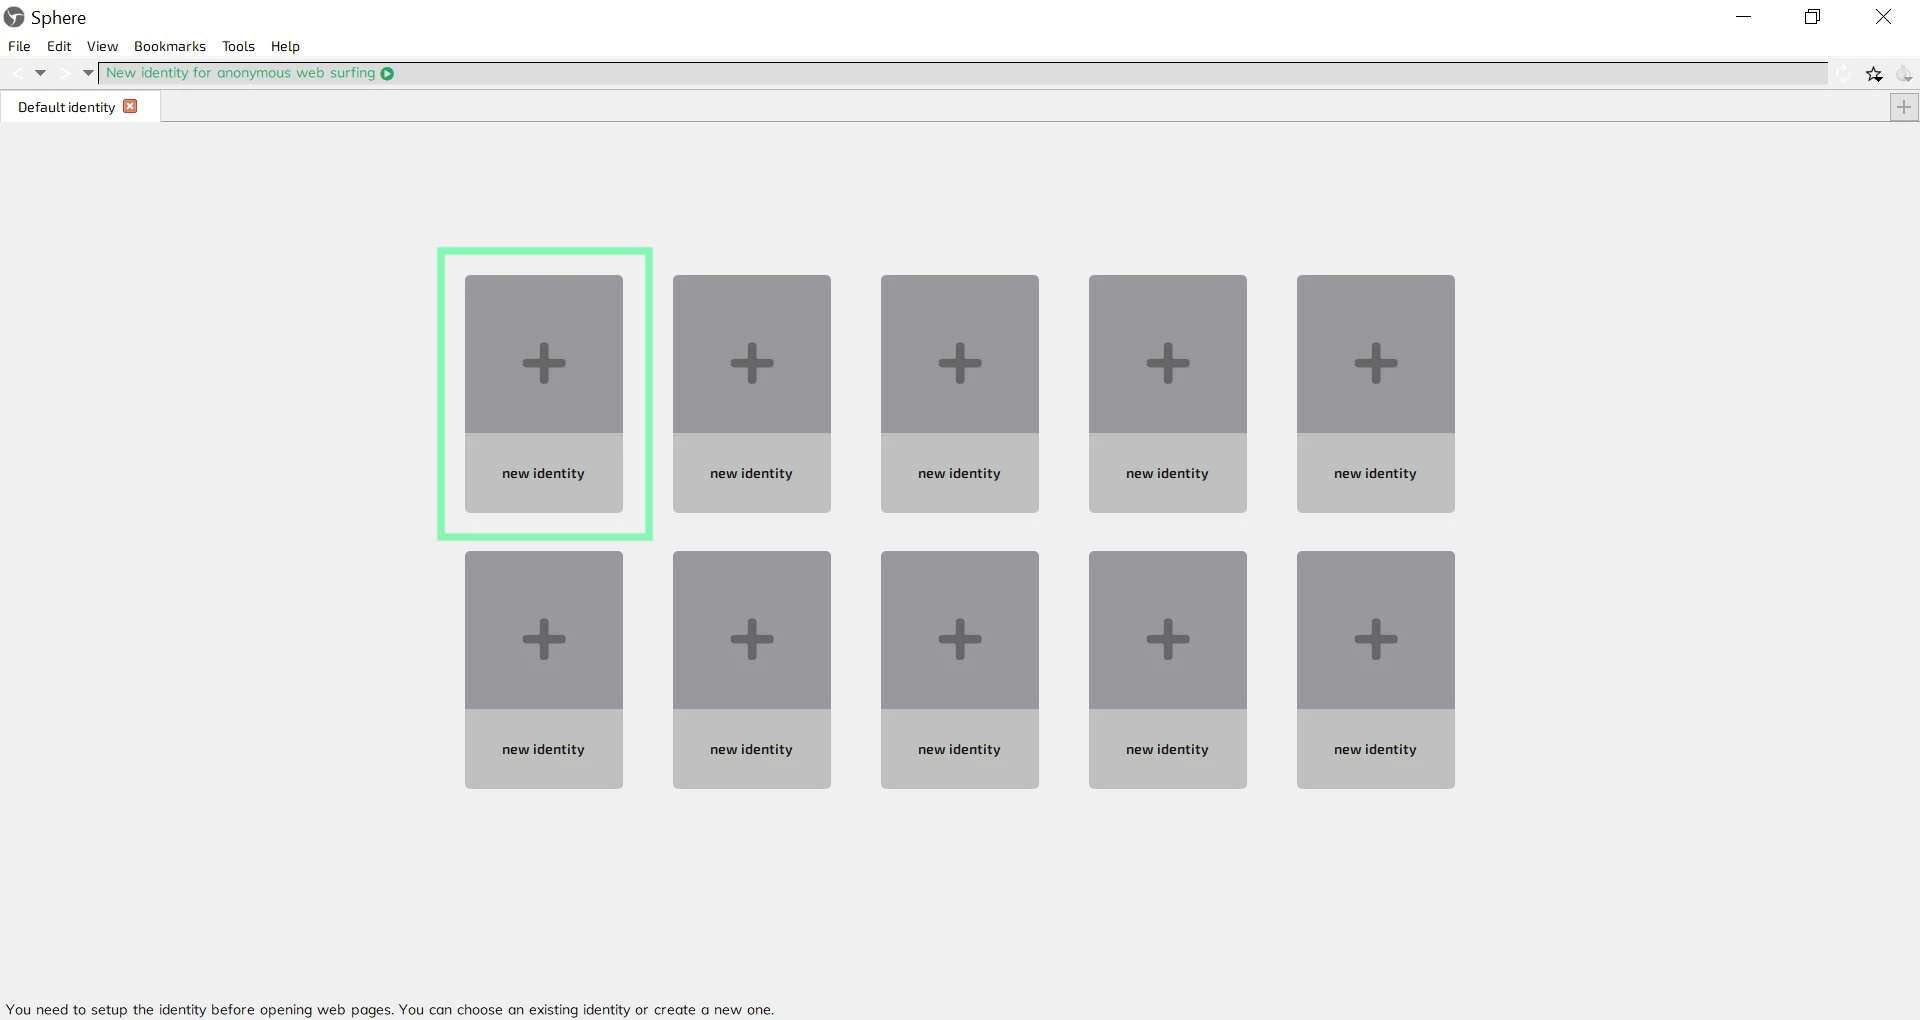
**第 3 步。** 在主页上,点击 **新身份**.
 **第 4 步。** 在 **会话设置** 窗口,填写身份名称,并根据您购买的代理类型选择连接类型:
**代理类型:** `HTTP`, `HTTPS`,或 `SOCKS5`
**连接 IP**: `ddc.oxylabs.io`
**代理端口**: `8001`
{% hint style="info" %}
你需要选择一个分配给已购买 [**代理列表**](https://developers.oxylabs.io/documentation/cn/dai-li/dedicated-datacenter-proxies/self-service/proxy-list)**,** 中某个 IP 地址的端口,你可以在 Oxylabs 的控制面板中找到它。
{% endhint %}
**作为身份验证方式。** `user-username`
**用户名:** `password`
{% hint style="warning" %}
请务必添加 `user-` 部分。
{% endhint %}
**第 5 步。** 详细设置时区和语言设置,然后点击 **保存**.
**第 4 步。** 在 **会话设置** 窗口,填写身份名称,并根据您购买的代理类型选择连接类型:
**代理类型:** `HTTP`, `HTTPS`,或 `SOCKS5`
**连接 IP**: `ddc.oxylabs.io`
**代理端口**: `8001`
{% hint style="info" %}
你需要选择一个分配给已购买 [**代理列表**](https://developers.oxylabs.io/documentation/cn/dai-li/dedicated-datacenter-proxies/self-service/proxy-list)**,** 中某个 IP 地址的端口,你可以在 Oxylabs 的控制面板中找到它。
{% endhint %}
**作为身份验证方式。** `user-username`
**用户名:** `password`
{% hint style="warning" %}
请务必添加 `user-` 部分。
{% endhint %}
**第 5 步。** 详细设置时区和语言设置,然后点击 **保存**.
 新身份已配置完成。
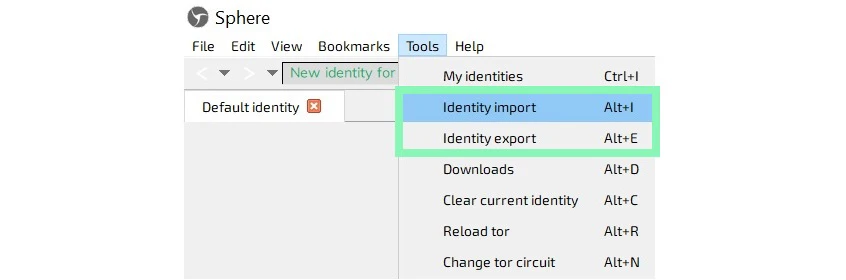
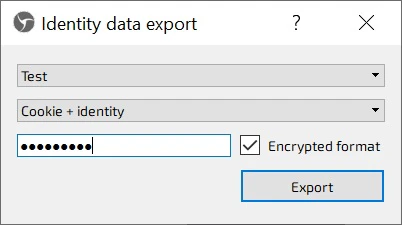
您可以通过点击来导入和导出您的身份 **身份导入** 或 **身份导出** 在 **工具**.
新身份已配置完成。
您可以通过点击来导入和导出您的身份 **身份导入** 或 **身份导出** 在 **工具**.
 就这样!您的设置已完成。